
Wet room installation offers a sleek, accessible bathing solution with significant advantages, but understanding the pros and cons is essential for a successful, watertight project. Weighing factors like cost, complexity, and potential water damage against benefits like space-saving design and modern aesthetics will help you decide if a wet room is right for your home.
Dreaming of a bathroom that feels like a spa, open and airy, with water just a step away? A wet room might be your next dream project! These modern bathrooms ditch the traditional shower enclosure for a fully waterproofed space. It sounds simple, but getting it right is key to avoiding leaks and water damage. If you’re wondering if a wet room is the ultimate bathroom upgrade or a potential headache, you’ve come to the right place. We’ll break down everything you need to know about wet room installation, exploring the good and the not-so-good. By the end, you’ll feel confident in making the best decision for your home.
What Exactly Is a Wet Room?

A wet room is essentially a bathroom designed to get wet. Unlike a standard bathroom with a separate shower cubicle, a wet room features a fully waterproofed space where the shower area isn’t enclosed. This means the shower, toilet, and sink can all be in the same open area. The key to a functional wet room is a properly sloped floor that directs water towards a drain, and comprehensive waterproofing of all walls and the floor to protect your home from moisture damage.
Think of it as a shower that takes up the entire room, but with smart design to keep water exactly where it should be. They are particularly popular for smaller bathrooms because they can make the space feel larger and more open. They also offer excellent accessibility, making them a fantastic option for homes needing barrier-free showering solutions.
Pros of Wet Room Installation

Wet rooms offer a unique blend of style, functionality, and space-saving benefits. Let’s dive into why they’ve become so popular among homeowners looking for a modern bathroom upgrade.
Space-Saving and Open Design
One of the biggest draws of a wet room is its ability to make any bathroom, especially a small one, feel significantly larger and more open. By removing the need for a bulky shower tray or enclosure, you create a seamless, continuous space. This open-plan design can make the room feel more airy and less cluttered, which is particularly beneficial for smaller homes or en suites.
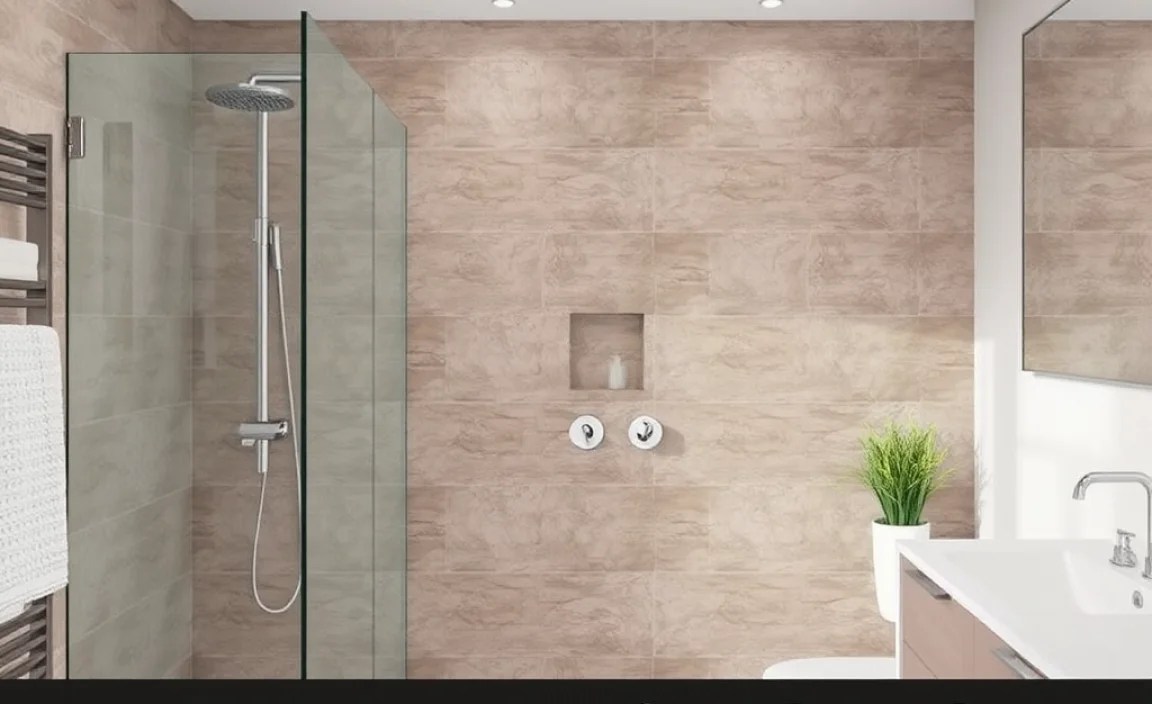
Modern Aesthetics and Luxury Feel
Wet rooms exude a contemporary, luxurious feel. The streamlined design, often featuring minimalist shower screens or even no screen at all, contributes to a sophisticated aesthetic. They can instantly elevate the look of your bathroom, giving it a spa-like ambiance that many homeowners desire. The integration of stylish tiles and modern fixtures further enhances this high-end appeal.
Enhanced Accessibility
For individuals with mobility issues, wet rooms are a game-changer. The absence of steps or raised shower trays makes them incredibly accessible. Anyone using a wheelchair or walking aids can easily enter and exit the showering area without assistance. This makes wet rooms a practical and dignified solution for aging in place or for households with family members who require enhanced accessibility.
Easy to Clean
With fewer nooks and crannies, and no shower doors to scrub, a wet room can be surprisingly easy to clean. The smooth, continuous surfaces and lack of obstructive structures mean you can often wipe down the entire space quickly. Regular cleaning also helps to prevent mold and mildew buildup, keeping your wet room looking fresh and hygienic.
Increased Property Value
A well-installed, stylish wet room can be a significant selling point for your home. Modern bathrooms are highly sought after by potential buyers, and a uniquely functional and aesthetically pleasing wet room can set your property apart. It signals a thoughtful, modern renovation that appeals to a wide range of buyers.
Flexibility in Design
Wet rooms offer remarkable design flexibility. You can choose from a vast array of tiles, from natural stone to sleek porcelain, and incorporate features like underfloor heating, rainfall showerheads, and custom lighting. The open nature of the space allows for creative layout solutions that might not be possible in a traditional bathroom, enabling you to truly personalize your sanctuary.
Cons of Wet Room Installation

While the benefits of a wet room are compelling, it’s crucial to be aware of the potential downsides. Proper installation and maintenance are paramount to avoid costly issues.
Higher Installation Costs
A professionally installed wet room can be more expensive than a standard bathroom renovation. This is primarily due to the specialized materials and labor required for effective waterproofing. The process involves meticulous attention to detail to ensure every surface is sealed, which adds to the overall cost. For DIY enthusiasts, the learning curve and risk of error can also lead to unexpected expenses.
Risk of Water Damage if Not Installed Correctly
This is arguably the biggest concern. Inferior or incomplete waterproofing is a recipe for disaster. Leaks can seep into walls, floors, and subfloors, leading to structural damage, mold growth, and costly repairs. This is why hiring experienced professionals or dedicating extensive research and time to a DIY project is non-negotiable. It’s vital to use high-quality tanking membranes and ensure all seals and joints are perfectly executed. Reputable resources like New Zealand’s Ministry of Building, Innovation and Employment provide guidance on external moisture management, which is highly relevant to wet room construction.
Potential for Mold and Mildew Growth
While generally easy to clean, any bathroom with increased moisture levels is susceptible to mold and mildew if ventilation is inadequate. If water isn’t draining properly or if humidity levels aren’t managed, these microscopic organisms can thrive. Good ventilation, either through an extractor fan or a window, is absolutely essential for a healthy wet room environment.
Slipping Hazards
The continuous, wet floor surface can pose a slipping risk, especially for the elderly or very young. While a slight slope towards the drain is necessary, it’s not usually enough to be a hazard. However, choosing the right non-slip tiles is crucial. Many tile options are designed with textured surfaces to provide excellent grip even when wet. Adding grab bars can also significantly improve safety.
Water Spray Throughout the Room
Without a dedicated enclosure, shower spray can spread further than in a traditional shower. While some prefer the open feel, others might find that toiletries on shelves or countertops can get wet. Strategically placed shower screens, even short ones, or thoughtful bathroom layout can help to mitigate this, directing the water spray more effectively towards the drain.
Can Feel Cold
An open, tiled space can feel colder, especially in winter. Without the enclosed warmth of a shower cubicle, you might feel a draft. Implementing underfloor heating, using heated towel rails, and ensuring good insulation can help to combat this and create a more comfortable bathing experience.
Wet Room Installation: Key Considerations & Steps

Successfully installing a wet room requires careful planning and execution. Here’s a breakdown of the essential steps and considerations to ensure a waterproof and functional space.
1. Planning and Design
Before any tools come out, map out your wet room. Consider the size, layout, and where the shower drain will be located. Planning is crucial for effective water drainage. The floor needs a gentle slope, typically around 1:80 or 1:100 gradient, towards the drain. Think about ventilation, lighting, and the placement of your toilet, sink, and any storage.
2. Waterproofing (Tanking)
This is the most critical step. You need to create a seamless, waterproof barrier over all surfaces that will be exposed to water – the entire floor and at least the lower 1-1.5 meters of the walls. This is often done using specialized liquid membranes or sheet membranes.
- Prepare the Surface: Ensure the subfloor and walls are clean, dry, and structurally sound.
- Apply Primer: Use a primer recommended by the membrane manufacturer.
- Apply Waterproofing Membrane: Apply multiple coats of liquid membrane, feathering it into corners and around any pipes or outlets. Pay special attention to corners and the areas around the drain, often using reinforcing tape.
- Check for Gaps: After drying, inspect thoroughly for any pinholes or missed spots.
For more detailed guidance on tanking, resources like Cornell University’s Engineering Library on waterproofing principles can offer broader insights into moisture barrier best practices.
3. Installing the Drain
A high-quality shower drain is essential. It should be installed flush with the sloped floor. Consider the type of drain: linear drains can be placed against a wall, offering a sleek look and efficient drainage, while point drains are typically placed centrally. Ensure the drain is properly sealed to the waterproofing membrane.
4. Tiling and Grouting
Choose appropriate tiles for wet room use. Non-slip tiles are a must for the floor. Use a high-quality, waterproof grout and ensure all grout lines are completely filled. After grouting, consider applying a grout sealant for an extra layer of protection.
5. Fitting Fixtures and Accessories
Install your shower, toilet, and sink. Ensure all connections are secure. Consider adding safety features like grab bars, especially if accessibility is a concern. Proper sealing around fixtures where they meet the walls and floor is crucial.
6. Ventilation
A powerful extractor fan is non-negotiable. It should be installed to vent moisture directly outside. Consider a timer function so it continues to run after you’ve finished showering.
DIY vs. Professional Installation
Deciding whether to tackle wet room installation yourself or hire a professional is a significant choice with major implications for cost, time, and the success of the project. Here’s a breakdown to help you decide.
DIY Installation
Pros:
- Significant cost savings on labor.
- Sense of accomplishment and skill development.
- Complete control over the process and materials.
Cons:
- Requires extensive research, planning, and patience.
- High risk of costly water damage if mistakes are made.
- Can be time-consuming, potentially disrupting your household for longer.
- May require specialized tools that need to be purchased or rented.
If you are a seasoned DIYer with experience in plumbing and tiling, and you are prepared to invest significant time in learning about waterproofing techniques, a DIY approach might be feasible. However, the stakes are very high with waterproofing.
Professional Installation
Pros:
- Expertise in waterproofing and drainage ensures a watertight result.
- Saves you time and reduces stress.
- Often comes with guarantees or warranties on workmanship.
- Access to professional-grade materials and techniques.
Cons:
- Higher upfront cost due to labor charges.
- Less control over the day-to-day process.
- Finding a reliable and experienced wet room installer can take time.
For most homeowners, especially beginners or those concerned about potential water damage, hiring a professional is the safer and more reliable option. Look for tradespeople with specific experience in wet room installations. Ask for references and look at examples of their previous work. A professional will also be familiar with local building codes and regulations that might apply.
Essential Tools and Materials for Wet Room Installation
Whether you’re going the DIY route or overseeing a professional, understanding the materials and tools involved is key. This will help you communicate effectively with tradespeople or ensure you have everything needed for a successful DIY project.
Key Materials:
- Waterproofing Membrane (Tanking System): Liquid or sheet membranes specifically designed for wet areas.
- Reinforcing Tape/Mesh: Used in corners and around joints to strengthen the membrane.
- Primer: Recommended by the membrane manufacturer for optimal adhesion.
- Shower Drain: A high-quality, appropriate drain for your chosen system.
- Tiles: Non-slip, water-resistant tiles for the floor, and suitable wall tiles.
- Waterproof Grout: Specifically designed for wet areas.
- Silicone Sealant: For sealing around fixtures.
- Pipe Collars: To seal around pipes where they emerge.
Essential Tools:
- Spirit Level
- Measuring Tape
- Trowels (notched and smooth)
- Buckets
- Utility Knife/Cutter
- Squeegees
- Rollers and Brushes (for liquid membranes)
- Tile Cutter/Wet Saw
- Grout Float
- Caulking Gun
- Drill and Mixer (for grout)
- Safety Gear: Gloves, safety glasses, dust mask
Comparing Shower Options: Wet Room vs. Traditional Shower
To truly appreciate the wet room concept, let’s see how it stacks up against a more conventional shower setup. Understanding these differences will help solidify your decision.
| Feature | Wet Room | Traditional Shower (Cubicle/Tray) |
|---|---|---|
| Space Efficiency | Maximizes perceived space, excellent for small bathrooms. | Defined space, can make smaller bathrooms feel more cramped. |
| Accessibility | Excellent – barrier-free, ideal for mobility issues. | Requires steps or high trays, less accessible. |
| Installation Complexity | High – requires meticulous waterproofing. | Moderate to High – depends on the complexity of the enclosure. |
| Cost (Installation) | Potentially higher due to specialized waterproofing. | Can vary widely; enclosed showers might be similar or less. |
| Aesthetics | Modern, sleek, minimalist, spa-like. | Can range from basic to luxurious, but often more conventional. |
| Cleaning | Easier due to fewer edges and no doors to scrub. | Requires regular cleaning of enclosure, trays, and tracks. |
| Risk of Water Damage | Higher if not installed perfectly. | Lower, as the enclosure contains most water. |
| Water Spray Management | Can spray further; may require strategic shielding. | Well-contained within the enclosure. |
Maintaining Your Wet Room
Once your beautiful wet room is installed, keeping it in top condition is straightforward but requires consistency. The keys are ventilation, regular cleaning, and checking seals.
- Ventilation is King: Always use your extractor fan during and after showering. If you have a window, open it when possible. This is your first line of defense against mold and mildew.
- Daily Wipe-Down: A quick squeegee of the shower walls and floor after use will remove excess water and prevent soap scum buildup.
- Regular Cleaning: Use mild, non-abrasive cleaners designed for bathrooms. Pay attention to grout lines and around the drain.
- Check Seals: Periodically inspect the silicone seals around fixtures and any shower screens. Re-apply sealant if you notice any cracking or deterioration.
- Drain Maintenance: Ensure the drain is free of hair and debris to maintain proper water flow.
Frequently Asked Questions About Wet Room Installation
Q1: Is a wet room suitable for any bathroom size?
Yes, wet rooms are particularly beneficial for small bathrooms as they create a sense of openness. However, ensure there is adequate space for confident movement and that the room is properly waterproofed and ventilated.
Q2: How long does a wet room installation take?
The timeframe can vary significantly depending on the complexity, whether it’s a DIY project or professional, and the extent of renovations. Generally, a professional installation can take anywhere from several days to a couple of weeks.
Q3: Can I put a bath in a wet room?
While the concept is “wet,” adding a traditional freestanding bath can complicate waterproofing. It’s more common and practical to focus on a shower-only wet room. If a bath is desired, it needs to be installed with extreme care to ensure water doesn’t pool around its base, and the floor must still be sloped towards a drain.
Q4: Will a wet room make my insurance premiums go up?
It’s unlikely that having a wet room itself will increase your premiums. However, if you are undertaking significant renovations, it’s always a good idea to inform your insurance provider. Proper installation with documented waterproofing is key, as it reduces the risk of claims.
