
Install exhaust fan tips to ensure proper ventilation, improve air quality, and prevent moisture damage. This guide breaks down the process, from choosing the right fan to ensuring a safe and effective installation. Follow these expert tips for a confident DIY approach to exhaust fan installation.
Dealing with moisture and stale air in your home can be a real headache. That musty smell in the bathroom after a shower or the lingering cooking odors in the kitchen are signs that your home needs better ventilation. An exhaust fan might seem like a small appliance, but it plays a huge role in keeping your home fresh and healthy. Installing one yourself can save money and boost your DIY confidence.
This guide will walk you through all the essential tips for installing an exhaust fan, making a task that might seem daunting feel straightforward and manageable. We’ll cover everything you need to know, from picking the right fan to the final screw, ensuring you get a safe and effective installation every step of the way.
Why Install an Exhaust Fan? The Fresh Air Advantage

Before we dive into the ‘how-to,’ let’s quickly touch on why this is such an important project. Exhaust fans are champions of air quality. They work by pulling unwanted air out of a room and venting it outside. This is critical for two main reasons:
- Moisture Control: Bathrooms and kitchens are naturally humid environments. Without an exhaust fan, this moisture can build up, leading to mold, mildew, peeling paint, and even structural damage over time. Think of it as your home’s dry-out buddy!
- Odor and Pollutant Removal: From steamy showers to sizzling bacon, or even cleaning products, your home can accumulate airborne particles and smells. An exhaust fan whisks these away, leaving your indoor air cleaner and fresher.
A properly installed and used exhaust fan is a simple yet powerful tool for maintaining a comfortable and healthy living space. It’s a proactive step in preventing bigger, more costly issues down the line.
Choosing Your Exhaust Fan: The Right Fit for the Job

Not all exhaust fans are created equal, and picking the right one is your first crucial step. Here’s what to consider:
1. Size Matters: Airflow (CFM)
This is the most important spec. CFM stands for Cubic Feet per Minute, and it tells you how much air the fan can move. For bathrooms, a good rule of thumb is 1 CFM per square foot of room area. So, a 5×7 bathroom (35 sq ft) would need at least a 35 CFM fan. Taller ceilings or more humid conditions might require a bit more power. Check out the U.S. Department of Energy’s guidance on energy-efficient ventilation for more details on CFM requirements.
2. Noise Level (Sones)
Fans are rated in “sones,” which measure how loud they are. A lower sone rating means a quieter fan. For bathrooms, especially at night, you’ll want something around 1.0 to 2.0 sones. If you want near-silent operation, look for fans rated at 0.5 sones or less.
3. Features to Consider
- Lights: Many fans come with integrated lighting. This can be a great way to combine ventilation and lighting in one fixture, especially in smaller bathrooms.
- Heaters: Some high-end models include a small heater, perfect for warming up a chilly bathroom.
- Humidistats: These are smart sensors that automatically turn the fan on when the humidity reaches a certain level and off when it drops.
- Timers: You can set these fans to run for a specific amount of time after you leave the room.
- Motion Sensors: Some fans turn on when they detect movement, ensuring ventilation when needed.
4. Energy Efficiency
Look for the ENERGY STAR® label. These fans use less energy, saving you money on your electricity bills and benefiting the environment.
Tools and Materials You’ll Need

Gathering your tools before you start will make the installation process smoother and safer. Here’s a typical list:
Essential Tools
- Safety Glasses
- Work Gloves
- Drill and Drill Bits
- Screwdriver Set (Phillips and flathead)
- Adjustable Wrench
- Utility Knife
- Tape Measure
- Pencil
- Stud Finder
- Drywall Saw or Reciprocating Saw
- Wire Strippers/Cutter
- Voltage Tester (Non-Contact is easiest for beginners)
- Ladder
- Caulking Gun and Exterior Caulk (if venting through the roof or wall)
- Duct Tape (foil-backed recommended)
Materials (Usually Included with Fan Kit, but good to check)
- Exhaust Fan Unit
- Ducting (flexible or rigid, appropriate diameter for fan)
- Mounting Brackets
- Vent Hood/Cap (for exterior termination)
- Screws and Fasteners
- Electrical Wire (if new circuit is needed, consult an electrician)
- Wire Connectors (wire nuts)
Step-by-Step: Installing Your Exhaust Fan Like a Pro

Let’s break down the installation into manageable steps. Remember, safety is paramount. If you’re ever unsure about electrical work, please consult a qualified electrician.
Step 1: Plan Your Fan Location and Vent Path
Decide exactly where the fan will go. Ideally, position it in the center of the room or, in a bathroom, directly over the shower or tub area where moisture is highest. Then, map out the path for the ductwork. It needs to go from the fan housing to an exterior wall or the roof. Avoid short, straight runs if possible; gentle curves are better for airflow. Try to minimize the length of the duct run.
Tip: Use your stud finder to locate joists and studs. You’ll need to cut a hole for the fan housing and potentially for the vent adapter. Planning the path around these obstructions is key.
Step 2: Turn Off Power! (Crucial Safety Step!)
This cannot be stressed enough. Locate the circuit breaker panel for your home. Find the breaker that controls the power to the area where you’ll be working and switch it OFF. If you’re unsure which breaker it is, turn off the main breaker. Always verify that the power is off using your voltage tester at the junction box where you’ll connect the fan’s wiring. Double-check!
Step 3: Prepare the Opening for the Fan Housing
If you’re replacing an old fan, remove it first. For a new installation, you’ll need to cut a hole in the ceiling drywall. You can often use the fan’s mounting bracket or housing as a template. Carefully trace the outline. Then, use a drywall saw to carefully cut out the opening. Make sure the opening is sized correctly for the fan’s housing.
Tip: Consider adding bracing between ceiling joists if the fan is heavy or if the existing structure feels weak. A professional contractor can advise on proper bracing techniques.
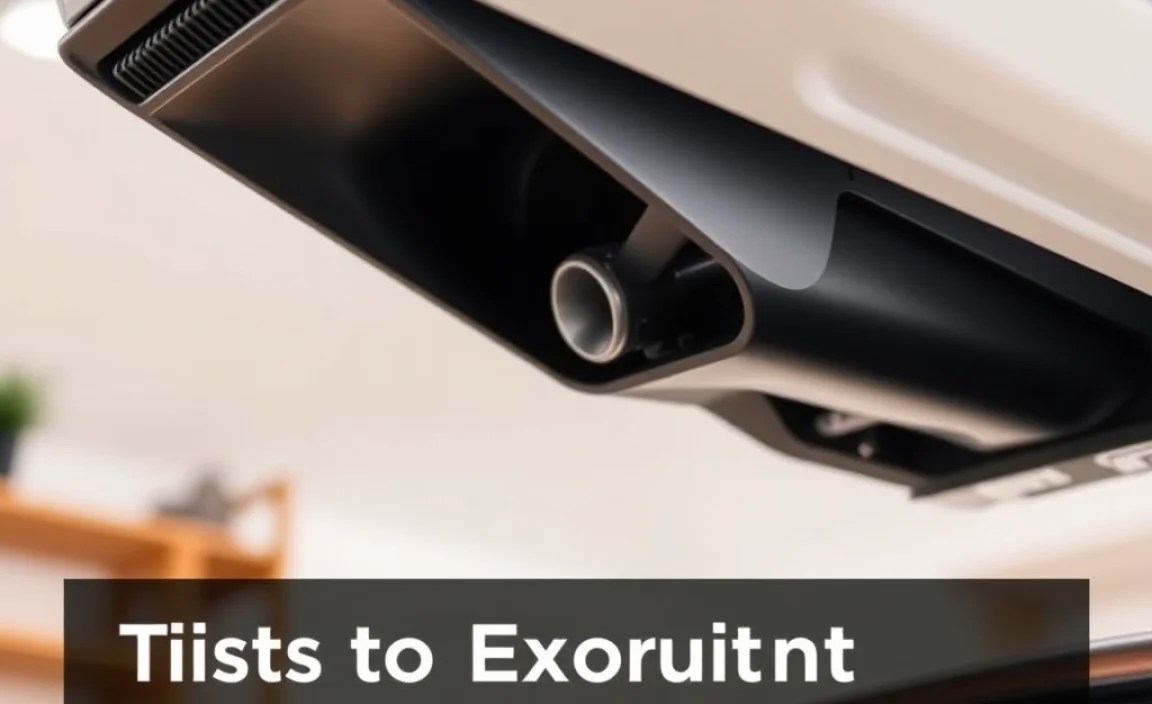
Step 4: Install the Fan Housing
Insert the fan housing into the opening you just cut. Most housings have adjustable mounting brackets or “ears” that you can extend to secure the fan to the ceiling joists or any added bracing. Fasten these brackets securely.
Step 5: Run the Ductwork
Connect the appropriate diameter ducting to the fan housing. Use metal foil-backed tape to seal the connection securely. Then, run the ductwork towards your exterior vent location. If you’re venting through a wall, you’ll need to cut a hole in the exterior wall for the vent hood. If you’re venting through the roof, you’ll need a roof vent cap. Ensure the ductwork has a slight downward slope towards the exterior to prevent condensation buildup.
Tip: Use rigid ducting whenever possible, as it offers better airflow and is less prone to collapsing than flexible options. If using flexible ducting, try to keep it as straight and taut as possible.
Step 6: Install the Exterior Vent Hood/Cap
This is the part that goes on the outside of your house. Whether it’s a wall vent or a roof vent, install it according to the manufacturer’s instructions. Always use exterior caulk to seal around the edges of the vent hood where it meets the house to prevent water leaks. Make sure any dampers in the vent hood open freely.
Tip: For roof vents, be extra careful with your footing and consider roof safety practices. If you’re not comfortable working on a roof, this part might be best left to a professional.
Step 7: Wire the Fan
This is where turning off the power is absolutely critical. You’ll typically run a cable from the fan’s junction box to the nearest light fixture’s electrical box, or to a dedicated switch. Your fan will have wires (usually black for hot, white for neutral, and green or bare for ground). Connect these to the corresponding wires in your home’s electrical system using wire connectors (wire nuts). Ensure all connections are tight and secure.
Understanding basic house wiring can be helpful here, but remember that exhaust fan wiring can vary slightly based on features like lights or humidistats.
Wiring Table Example: Common Connections
| Fan Wire Color | House Wire Color (Typical) | Connection |
|---|---|---|
| Black (for fan motor) | Black (hot) | Connect using a wire nut |
| White (for fan motor) | White (neutral) | Connect using a wire nut |
| Green or Bare Copper (ground) | Green or Bare Copper (ground) | Connect using a wire nut or to grounding screw |
| Blue (if fan has a light) | (Connected to light fixture’s hot wire or separate switch) | Connect using a wire nut |
Important: Always check your fan’s specific wiring diagram. If your fan has multiple functions (like a light or heater), the wiring might be more complex, potentially requiring a multi-wire branch circuit or a separate switch. Consult an electrician if you are unsure.
Step 8: Install the Fan Grille/Cover
Most exhaust fans have a decorative grille or cover that snaps or screws into place. Attach this to the fan housing. This is usually the final step in the visible parts of the installation.
Step 9: Restore Power and Test
Go back to your breaker panel and turn the power back ON. Test the exhaust fan by turning on the switch. Ensure the fan runs and that air is being drawn out. If your fan has a light or other features, test those as well.
Troubleshooting Tip: If the fan doesn’t work, immediately turn off the power and recheck your wiring connections. Make sure the breaker is fully seated and that no wires have slipped out of the connectors.
Tips for Optimal Exhaust Fan Performance
Installing the fan is only half the battle. Using it correctly ensures it performs at its best:
- Run it Often: For bathrooms, run the fan during and for 15-20 minutes after every shower or bath. In the kitchen, use it whenever you’re cooking, especially with high-heat or greasy foods.
- Regular Cleaning: Dust and debris can clog the fan blades and grille, reducing efficiency and potentially leading to motor strain. Clean the grille regularly with a vacuum attachment or by removing it and washing it gently.
- Check the Ductwork: Occasionally inspect the ductwork visually (if accessible) for any kinks, blockages, or signs of wear. Ensure the exterior vent flap isn’t stuck shut by ice or debris.
- Proper Insulation: If the fan housing is in an unheated attic space, consider adding insulation around it to prevent condensation from forming on the housing itself, which can then drip back into your room.
- Professional Maintenance: If your fan seems unusually loud, vibrate excessively, or isn’t venting effectively after a few years, it might be time for a professional inspection.
Common Exhaust Fan Installation Pitfalls to Avoid
Even with the best intentions, some mistakes are common. Being aware of them can help you sidestep trouble:
- Incorrectly Sized Fan: A fan that’s too small won’t ventilate effectively. A fan that’s too powerful for the space might be overly noisy and could potentially create unwanted drafts or pull conditioned air from other parts of the house.
- Improper Ducting: Using ducting that’s too narrow, kinking it, or having excessively long runs significantly reduces airflow. Ensure the duct size matches the fan outlet and that the path is as direct and smooth as possible.
- Poor Sealing: Leaks in the ductwork or around the exterior vent can reduce efficiency and allow moisture or pests into your home. Use foil-backed tape diligently on all connections.
- Ignoring Electrical Safety: This is the biggest one. Always, always, always turn off the power and verify it’s off. If you’re not comfortable with electrical wiring, hire an electrician. The <a href=”https://www.osha.gov/safety-topics/electrical-safety” target=”_blank” rel=”noopener noreferrer”>Occupational Safety and Health Administration (OSHA) provides extensive resources on electrical safety for professionals, highlighting the importance of these precautions for everyone.
- Venting into the Attic: Never vent moist air into an attic, crawl space, or wall cavity. This is a recipe for mold growth and serious structural damage. All exhaust must go directly outside.
Ventilation Codes and Best Practices
Building codes exist to ensure safety and efficiency. While specific requirements can vary by location, understanding general best practices is crucial for a compliant and effective installation.
The International Residential Code (IRC) (and similar codes depending on your region) often specifies requirements for bathroom and kitchen ventilation, including minimum airflow rates and proper termination points for exhaust. For instance:
- Minimum CFM: Codes typically mandate a certain CFM per square foot or require intermittent operation (e.g., 15 minutes per hour) if continuous ventilation isn’t met.
- Duct Termination: Exhaust must terminate outdoors, not into a soffit, attic, crawl space, or similar concealed area. Screens or louvers are often required at the termination point, but they should be sized to prevent obstruction of airflow.
- Duct Material and Size: Codes may specify acceptable duct materials (e.g., smooth metal, approved flexible ducts) and minimum diameters t
