
Have you ever stepped into the shower only to find water spraying everywhere? It’s frustrating, right? A leaking shower diverter can turn a simple shower into a mini water park. You may wonder, “What’s causing this mess?” Well, don’t worry! Fixing a leaking shower diverter is easier than you think.
Imagine this: you plan for a relaxing shower, but instead, water drips down your walls and creates puddles on the floor. This common problem affects many homes. In fact, a surprising number of people deal with a leaky shower diverter every year! But here’s the good news. With a few simple tools and a little effort, you can become your own plumbing hero.
In this article, we’ll reveal effective ways to fix that pesky leak. You’ll discover tips that will save you time and money. Ready to take on the challenge? Let’s dive into the world of shower diverters and get your bathroom back in shape!

Leaking Shower Diverter Fix: Simple Steps To Repair
Dealing with a leaking shower diverter can be frustrating. This problem often leads to wasted water and higher bills. Fortunately, fixing it is easier than it seems. Start by identifying the type of diverter you have. Then, replace worn-out parts or check for mineral buildup. Did you know that some quick fixes can work wonders? A few simple tools from your toolbox can help you stop the leak quickly!
Understanding the Diverter System
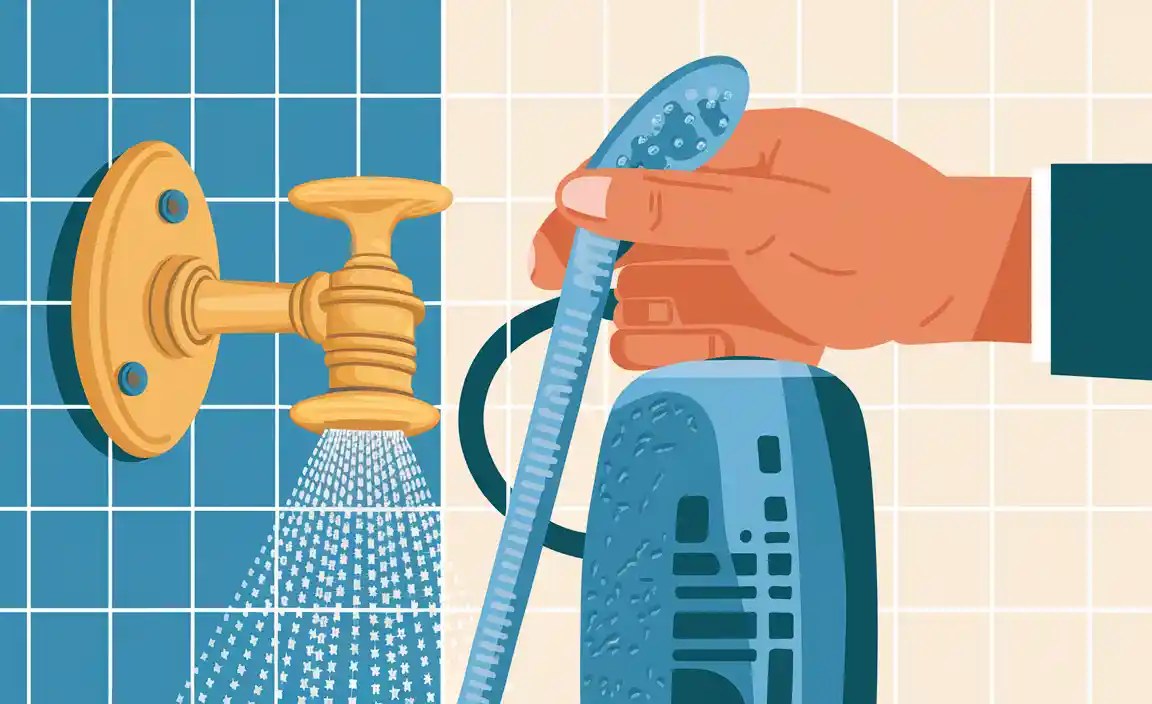
Explanation of how a shower diverter works. Common types of diverters in use. A shower diverter is like a traffic cop for water. It decides if water flows to the showerhead or the tub spout. When you pull up on the diverter, it redirects the water up for your shower. It’s usually found on the tub spout or as a knob on the wall. There are mainly three types: tub spout diverters, 3-valve diverters, and single-handle diverters. Each type has its quirks, but they all help keep your bath time drama-free!
| Type | Description |
|---|---|
| Tub Spout Diverter | Pull-up mechanism on the tub spout. |
| 3-Valve Diverter | Separate knobs for hot, cold, and diverter. |
| Single-Handle Diverter | One handle for both temperature and diverter. |
Symptoms of a Leaking Shower Diverter
Identifying visible signs of leakage. Understanding potential water damage indicators. Noticeable signs can help you understand if your shower diverter is leaking. Look for water spots on the walls or floors. These hints say your diverter may be broken. You might also see peeling paint or mold growth. This damage can make things worse if not fixed.

- Water stains on surfaces
- Wet or damp walls
- Peeling paint or wallpaper
- Unusual odors suggesting mold
Taking action early can save you money and effort. Don’t ignore these signs!
What are the signs of a leaking shower diverter?
Look out for frequent dripping sounds. This can mean your diverter is leaking. Also, check for puddles or moisture outside the shower.
Common Causes of Diverter Leaks
Wear and tear on diverter components. Improper installation and maintenance issues. Leaks in a shower diverter can drive anyone crazy. Sometimes, it’s simply worn-out parts that cause the trouble. If your diverter has seen better days, it might need a friendly retirement. Poor installation is another sneaky culprit. If the diverter isn’t set up right, it might as well be wearing a sign that says, “Hello, leaks!” Regular plumbing check-ups can help avoid these gremlins. Remember, a little maintenance goes a long way!
| Cause | Explanation |
|---|---|
| Wear and Tear | Old parts can become less effective and start to leak. |
| Improper Installation | A diverter set up wrongly can lead to annoying drips. |
Tools and Materials Needed for Repair
Essential tools for the repair process. Recommended materials to use for a lasting fix. Got a leaky shower? Let’s gather some tools and materials to fix it! You’ll need a wrench and a screwdriver—these little heroes can save the day. Don’t forget plumber’s tape; it’s like a superhero cape for your pipes, helping to keep everything tight and leak-free. Grab a replacement diverter too; it’s cheaper than therapy for your water woes!
| Tool/Material | Purpose |
|---|---|
| Wrench | For loosening and tightening nuts |
| Screwdriver | For removing screws |
| Plumber’s Tape | Seals joints to prevent leaks |
| Replacement Diverter | Replaces old, faulty parts |
With these items in hand, you’re ready to tackle that pesky leak like a pro. Remember, fixing leaks doesn’t have to feel like a wet blanket—turn it into a fun DIY adventure!
Step-by-Step Guide to Fixing a Leaking Shower Diverter
Detailed instructions from diagnosis to repair. Safety tips to consider during the process. First, check if your diverter is truly leaking. Look for water pooling or dripping. Turn off the water supply before you start playing handyman. Always wear safety goggles; nobody wants a shower surprise in their eye!
Next, take apart the diverter using a wrench. Keep everything organized; you might not want to go hunting for screws under the bathroom sink later. Replace any worn-out parts. Tighten everything back up, and voilà! Your shower should now be leak-free and happy. Here’s a quick safety checklist:

| Tip | Description |
|---|---|
| Turn Off Water | Prevents any splashy surprises. |
| Goggles On! | Protect your eyes from flying debris. |
| Use the Right Tools | Reduce the chance of stripping screws. |
When to Seek Professional Help
Signs that the problem may be beyond DIY fixes. How to choose a reliable plumber. Noticing water gushing like a mini waterfall from your shower? It might be time to call in a pro. If you see persistent leaks or hear strange gurgling sounds, those signs suggest a bigger problem. Is your diverter acting like a drama queen, refusing to work? That’s a clear sign you need expert help. Choose a plumber wisely! Look for qualifications, customer reviews, and fair pricing. A friendly chat can help too, just make sure they don’t try to sell you a gold-plated showerhead!
| Sign of Trouble | Action |
|---|---|
| Constant leaks | Call a plumber |
| Strange noises | Inspect further |
| Diverter issues | Get professional advice |
Preventive Maintenance Tips
Regular checks to avoid future leaks. Best practices for maintaining your shower diverter. Keeping your shower diverter in good shape can stop leaks before they start. Regular checks are key. Look for any signs of wear. Clean the diverter often to remove soap scum. Here are some tips:
- Check the diverter every month.
- Clean it with vinegar to remove buildup.
- Ensure all seals are tight.
- Replace worn parts quickly.
These steps can help you avoid the hassle of a leaking shower diverter fix!
How often should I check my shower diverter?

You should check your shower diverter at least once a month. Regular checks catch small issues before they become big problems.
Conclusion
In summary, fixing a leaking shower diverter is important to save water and prevent bigger problems. You can often solve the issue with simple tools and basic steps. Start by checking for clogs or worn parts. If problems continue, consider asking a professional for help. For more tips, check out home repair guides to learn more.
FAQs
What Are The Common Causes Of A Leaking Shower Diverter?
A leaking shower diverter can happen for a few reasons. First, old or worn-out rubber parts inside can cause leaks. Second, dirt and grime can build up and block the water flow. Third, sometimes the screws that hold it in place can become loose. Lastly, the diverter might be broken and need to be replaced.
How Can I Identify If My Shower Diverter Is The Source Of The Leak?
To check if your shower diverter is leaking, first turn off the water. Next, look for water dripping around the diverter when you use the shower. If you see water coming out or notice a puddle, that could mean it’s leaking. You can also listen for any strange sounds, like dripping or running water. If you’re still not sure, ask an adult to help.
What Tools And Materials Are Needed To Repair A Leaking Shower Diverter?
To fix a leaking shower diverter, you need a few tools and materials. Get a wrench to loosen and tighten parts. You will also need a screwdriver to take off the cover. Buy some plumber’s tape and a new rubber washer to help prevent leaks. Make sure to have a bucket handy to catch any water that drips.
Can I Fix A Leaking Shower Diverter Myself, Or Should I Hire A Professional Plumber?
Yes, you can fix a leaking shower diverter yourself if you feel comfortable. First, turn off the water. Next, take the diverter apart and check for worn-out parts. You may need to replace them with new ones. If it’s too hard, calling a plumber is a good idea.
What Steps Should I Follow To Replace A Faulty Shower Diverter To Prevent Future Leaks?
To replace a faulty shower diverter and stop leaks, first, turn off the water supply. Next, remove the handle and pull off the old diverter piece. Then, clean the area and put in a new diverter. Finally, put the handle back on and turn the water back on to check for leaks.
Resource:
-
Signs of Mold Growth in Bathrooms: https://www.epa.gov/mold/mold-cleanup-your-home
-
How to Use Plumber’s Tape Effectively: https://www.familyhandyman.com/project/how-to-use-teflon-tape/
-
Best Ways to Clean Bathroom Fixtures: https://www.goodhousekeeping.com/home/cleaning/a20706574/how-to-clean-bathroom/
-
When to Call a Plumber for Help: https://www.thisoldhouse.com/plumbing/21015081/when-should-you-call-a-plumber
