
The naming of faucets in construction refers to the specific terms used for different parts of a faucet, helping professionals and DIYers communicate clearly about repairs and installations. Understanding these terms ensures you can accurately identify and discuss faucet components, leading to successful projects and effective communication with plumbers and suppliers.
Ever stared at a faucet, wondering what to call that little piece that controls the water? You’re not alone! Sometimes, the simplest home tasks can feel complicated because of unfamiliar words. In construction and home improvement, knowing the correct names for faucet parts is super important. It stops confusion, saves you trips to the hardware store, and makes sure you get the right fix or replacement.
Don’t worry, we’re going to walk through it all. Think of this as your friendly guide to faucet terminology. We’ll break down the different names and what they mean in plain English.
By the end of this article, you’ll confidently know your spout from your stem, and your aerator from your escutcheon! Let’s get started on demystifying the world of faucet parts.
What Are Faucet Parts, and Why Do They Matter?

Faucets, those everyday fixtures that bring us clean water, are actually made up of several distinct components. Each part has a specific job, and together, they create the smooth operation we expect. Understanding these parts is key for a few reasons:
- Accurate Communication: When you need a repair or are buying a new faucet, using the correct terms helps plumbers, hardware store staff, or even online suppliers understand exactly what you need. This avoids misunderstandings and ensures you get the right part the first time.
- Effective Troubleshooting: If your faucet is leaking or not working properly, knowing the names of the parts helps you pinpoint the problem. Is it the cartridge, the O-ring, or something else?
- Informed Purchasing Decisions: When shopping for a new faucet or replacement parts, understanding the terminology allows you to compare features, understand specifications, and make a choice that’s right for your needs and budget.
- DIY Confidence: For those who love a good DIY project, knowing the names of parts is the first step to successfully performing minor repairs or upgrades yourself, boosting your confidence and saving money.
Think of it like learning the names of tools. Knowing a screwdriver from a wrench is fundamental. Similarly, knowing a spout from a handle is crucial for any faucet-related task.
Dissecting the Faucet: Common Terminology

Let’s break down the most common parts of a faucet. We’ll explore what each component is called and what it does. Understanding these terms will make your next trip to the hardware store or your next plumbing project much smoother.
The Body
The faucet body is the main structure that houses all the internal components and connects to the water supply lines. It’s the central piece that everything else attaches to. It’s typically made of brass, stainless steel, or other durable metals. Sometimes, it’s referred to as the faucet “frame” or “housing.”
The Handle
This is what you interact with to turn the water on and off, and often to adjust the temperature. Handles come in many styles:
- Lever Handle: A single lever that moves up and down, and side to side for hot and cold.
- Knob Handle: The traditional round knob, usually separate for hot and cold water.
- Cross Handle: Two separate handles, often shaped like a cross, for hot and cold water control.
The handle is connected to the internal valve mechanism that controls water flow.
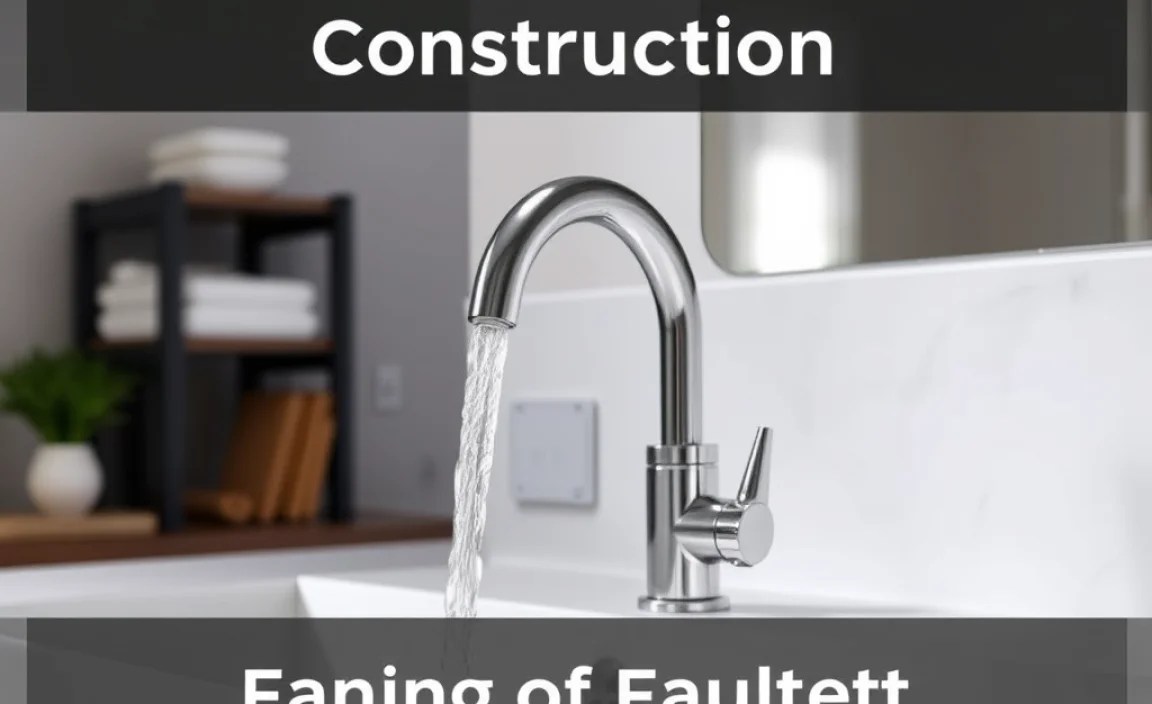
The Spout
This is the ‘nose’ of the faucet where the water actually comes out. Spouts can vary widely in shape and length:
- Curved Spout: The most common, with a gentle arc.
- Pull-down/Pull-out Spout: A flexible spray head that can be extended from the main spout for easier rinsing.
- Tub Spout: Specifically designed for bathtubs, often featuring a simple opening or a diverter to send water to the showerhead.
The spout is crucial for directing the water where you want it.
The Aerator
Often overlooked, the aerator is a small but mighty part located at the very tip of the spout. Its job is to mix air into the water stream. This results in a smooth, splash-free flow and can also reduce water consumption. You can often unscrew it to clean out debris that might be clogging the faucet.
The Valve Cartridge (or Stem)
This is the heart of the faucet’s operation. It’s the component inside the faucet body that controls the flow and temperature of the water. When you move the handle, you’re moving this cartridge.
- Cartridge: A self-contained unit, common in single-handle faucets. Replacing a cartridge is a frequent DIY repair.
- Stem (or Stem Assembly): Found in two-handle faucets, it’s a movable rod that opens and closes the water valve.
Different faucet types use different valve mechanisms, such as ceramic disc, compression, or ball valves. Understanding your faucet type helps in identifying the correct replacement part.
The Escutcheon (or Flange)
This is the decorative plate or trim piece that covers the hole in the sink or countertop where the faucet is mounted. It provides a clean, finished look and often hides the mounting hardware and any gaps between the faucet and the surface. It’s also sometimes called a flange or trim plate.
The Bonnet Nut
This nut typically sits at the base of the faucet body, underneath where the handle is attached. It helps to secure the valve stem or cartridge in place and creates a watertight seal. When disassembling a faucet, removing the bonnet nut is often a key step.
The Shank
The shank refers to the threaded portion of the faucet that extends through the sink or countertop. This is where the faucet is attached and secured from underneath using nuts and washers.
O-rings and Gaskets
These are small rubber or silicone rings that create watertight seals between different faucet parts. They are critical for preventing leaks. O-rings are typically round, while gaskets can be a variety of shapes. Over time, these can wear out, leading to drips.
The Rubber Washer (or Seat Washer)
Commonly found in compression faucets (older style with two handles), these rubber washers press up against a valve seat to stop the water flow. When they wear out, they are a common cause of drips. The combination of the washer and seat is known as a “seat and spring” assembly in some designs.
The Drip Lip
This is the edge or rim at the end of the spout. Its design helps to prevent water from continuing to drip down the spout and onto the sink. A well-designed drip lip contributes to a cleaner faucet and sink area.
The Water Inlet Connections
These are the threaded fittings where the water supply lines (hot and cold) connect to the faucet body. Ensuring these connections are secure and correctly sized is vital for preventing leaks.
Types of Faucets and Their Nomenclature

The “naming of faucet in construction” can also refer to the classification of the faucet itself. Different types of faucets have distinct characteristics and may use slightly different terminology for their core components. Here’s a look at some common types:
Single-Handle Faucets
These faucets use one handle to control both water flow and temperature. They typically employ a cartridge mechanism. The key parts are usually the handle, spout, aerator, cartridge, and escutcheon.
Double-Handle Faucets
Featuring separate handles for hot and cold water, these often use either a cartridge system or older compression mechanisms. Naming conventions here include the two handles (often cross-shaped or knobs), the spout, aerator, and the individual valve stems or cartridges.
Wall-Mounted Faucets
Installed directly onto the wall behind a sink or tub, these faucets have their plumbing hidden within the wall. The nomenclature here focuses on the visible parts: spout, handles, and any associated trim plates or escutcheons that mount flush to the wall.
Deck-Mounted Faucets
These are the most common type, mounted directly onto the sink deck or countertop. All the parts we’ve discussed – body, handles, spout, escutcheon, shank, etc. – are relevant here.
Balcony or Tall Bar Faucets
Often used in kitchens for island sinks or bar areas, these are characterized by their extended height and reach. While the core components are similar, their “tall” or “balcony” designation is part of their naming.
Tub and Shower Faucets
These are a bit more complex as they integrate control for both bathtub spout and showerhead. Key terms include the tub spout, showerhead, valve body (often hidden behind a wall plate), handle, and diverter (which switches water flow from tub to shower).
A Visual Guide to Faucet Parts

To truly grasp the naming of faucet in construction, seeing the parts in action (or at least in a diagram) is incredibly helpful. Here’s a simplified breakdown of a common kitchen faucet:
| Part Name | Description | Visual Cue |
|---|---|---|
| Handle | Controls water flow and temperature. | Lever, knob, or cross that you move. |
| Spout | Where the water exits. | The curved or straight pipe. |
| Aerator | Tip of the spout, mixes air with water. | A small, often screw-on piece at the very end. |
| Escutcheon (Optional) | Decorative plate under the faucet base. | A flat plate covering the mounting hole. |
| Faucet Body | The main structure housing internal parts. | The central metal unit. |
| Valve Cartridge/Stem | Internal mechanism controlling water. | Hidden inside the faucet body. |
| Bonnet Nut | Secures the cartridge/stem. | A nut usually under the handle. |
| Shank | Threaded part that goes through the sink/countertop. | The pipe extending downwards with threads. |
Common Issues and Their Parts
When your faucet acts up, knowing the part names helps you get the right fix:
- Dripping from the spout: Often a worn-out washer, O-ring, or a faulty cartridge/stem.
- Leaking around the handle: Usually indicates a problem with O-rings or the bonnet nut not being tight enough.
- Low water pressure: Can be a clogged aerator or debris in the valve mechanism.
- Leaking from the base: Might be faulty seals within the faucet body or insecure mounting.
Faucet Installation and Terminology
When installing a new faucet, understanding the construction and naming of its parts is essential. Plumbers will often use specific terms, and knowing them will help you follow along or even ask informed questions.
Rough-in and Trim Stages
In construction, plumbing work is often divided into stages:
- Rough-in: This is when the pipes are installed within the walls or under the floor. For faucets, this includes installing the valve bodies and water supply lines, but not the visible faucet parts yet.
- Trim: This is the final stage where the visible parts of the faucet are installed – the handles, spout, escutcheon plate, and any decorative trim. This happens after drywall or finished surfaces are in place.
Parts You Might Buy Separately
Sometimes, you don’t replace the whole faucet; you replace a part. Here are some common individual purchases:
- Cartridge: The entire valve mechanism for single-handle faucets.
- Stem Assembly: The valve control for two-handle faucets.
- O-rings and Seals Kit: A collection of various rubber seals for common faucet brands.
- Handles: If you want to change the style or color.
- Spouts: Less common, but sometimes you can replace just the spout.
- Aerator: Easy to replace if it’s clogged or you want a different spray pattern.
- Escutcheon Plates/Trim Kits: For updating the look or covering old mounting holes.
Manufacturers like Moen, Delta, Kohler, and Price Pfister have their own specific part numbers and nomenclature, so it’s always best to know your faucet’s brand and model number before purchasing replacement parts.
Common Installation Terms
- Mounting Hardware: Nuts, washers, and brackets used to secure the faucet to the sink or countertop.
- Supply Lines: Flexible or rigid hoses that connect the faucet’s inlet connections to the shut-off valves in the wall or under the sink.
- Shut-off Valves (Angle Stops): The valves located under the sink that control the water flow to individual fixtures.
- Thread Tape (PTFE Tape): Used to create a watertight seal on threaded pipe connections. You can learn more about its proper use on resources like Popular Mechanics’ guide to using thread tape.
A Table of Faucet Components and Their Function
To help solidify your understanding, here’s a quick reference table summarizing the main faucet components and their roles. This is essential for anyone looking to understand the “naming of faucet in construction” for repair or replacement.
| Component | Function | Common Issues | Notes |
|---|---|---|---|
| Handle | Activates and controls water flow/temperature. | Loose, stiff, broken. | Attached to stem or cartridge. |
| Spout | Directs water into the sink/tub. | Cracked, clogged, drips (at the tip). | May have an aerator at the end. |
| Aerator | Mixes air with water for softer flow, prevents splashing. | Clogged, worn out, dislodged. | Screws onto the end of the spout. |
| Faucet Body | The main housing, connects to water supply. | Corroded, cracked (rare). | Includes internal waterways. |
| Valve Cartridge/Stem | Controls the opening and closing of water flow. | Leaking, stiff operation, water mixing issues. | The ‘brain’ of the faucet operation. |
| Escutcheon/Fl |
