
P-trap parts in plumbing are crucial for preventing sewer gases from entering your home. Understanding these components—the trap arm, trap seal, and body—helps you identify issues like clogs or leaks and perform basic maintenance confidently. This guide breaks down each piece and its function for DIY success.
Ever noticed a weird smell coming from your sink or bathroom? Chances are, a P-trap is doing its job, or maybe it needs a little help! These curved pipes under your sink are silent guardians, blocking nasty sewer gases from wafting into your living space. They’re a common plumbing fixture, but when they cause trouble, it can be a real head-scratcher. Don’t worry, though! We’re going to break down exactly what makes up a P-trap and what each part does. Knowing these simple components will give you the confidence to tackle minor issues and understand your home’s plumbing better than ever before. Let’s dive in and demystify the P-trap!
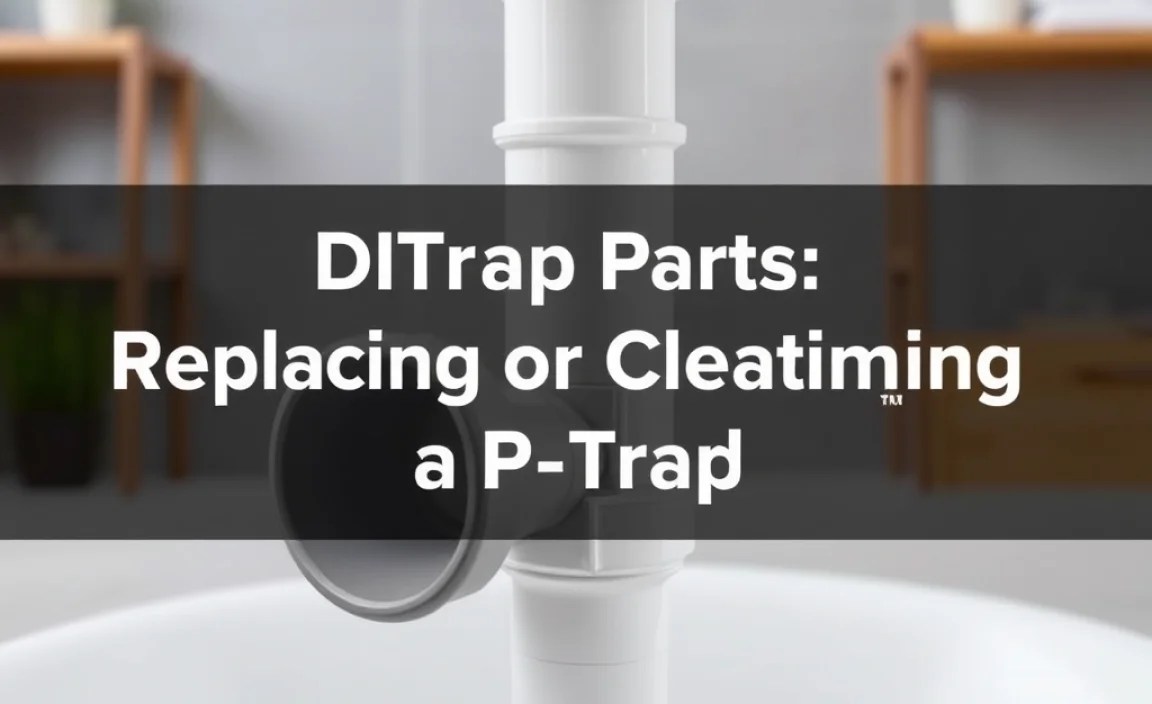
Understanding P-Trap Parts in Plumbing: Your Essential Guide

As Bryan Lee, your go-to for all things home and DIY, I know that plumbing can seem a bit intimidating. But when it comes to P-traps, it’s simpler than you think! These U-shaped pipes are a fundamental part of your home’s drainage system, and understanding their anatomy is the first step to tackling common plumbing woes like clogs and leaks. My goal is to make this knowledge accessible, so you can confidently maintain your home. We’ll explore each P-trap part, why it’s important, and how it all works together to keep your home fresh and safe.
What Exactly Is a P-Trap?
A P-trap is a U-shaped section of pipe located beneath sinks, tubs, and other plumbing fixtures. Its primary purpose is to hold a small amount of water, creating a seal that prevents unpleasant and potentially harmful sewer gases from entering your home through drain openings. Think of it as a water barrier against odors and gasses. This simple yet ingenious design is a cornerstone of sanitary plumbing systems worldwide. It’s a visible, often metallic or plastic, component that directly connects your fixture’s drain to the main waste line.
The Anatomy of a P-Trap: Key Components Explained
While the U-shape is the most recognizable feature of a P-trap, it’s made up of several distinct parts that work in harmony. Understanding these parts will help you diagnose problems, perform maintenance, and even replace a worn-out section yourself. Let’s break down the main components:
1. The Trap Body (The U-Bend)
This is the most obvious part of the P-trap – the curved section that gives the trap its name and distinctive shape. The U-bend is specifically designed to retain water after the fixture has been used. When water flows down the drain, most of it passes through the bend and continues to the main sewer line. However, a small amount of water remains trapped in the lowest point of the U. This trapped water is the crucial seal that prevents sewer gases from coming back up the drainpipe.
Why It’s Important: Without the water held in the trap body, your home would be constantly filled with foul-smelling sewer gases. These gases can contain methane and hydrogen sulfide, which are not only unpleasant but can also be harmful in high concentrations. Regular use of the fixture ensures the trap body stays filled with water, maintaining the seal. For fixtures that are used infrequently, a dry trap can lead to odors; this is why it’s good practice to run water in seldom-used drains periodically.
2. The Trap Arm (The Horizontal Outlet Pipe)
The trap arm is the horizontal pipe that extends from the side of the U-bend and connects to the waste line or drainpipe. It carries the wastewater from the trap body towards the larger drainage system of your house. The length and slope of the trap arm are critical for proper function. A trap arm that is too long can cause the water in the trap to siphon out, breaking the seal. Conversely, if it’s too short, it may not connect properly to the drainpipe.
Why It’s Important: This component ensures that wastewater flows away efficiently and also plays a role in maintaining the water seal. Proper venting of the system, often connected near the trap arm, is essential to prevent siphoning. If the trap arm is clogged, water will back up into the fixture you’re using. If it’s leaking, you’ll notice water dripping from the underside of the pipe.
3. The Trap Seal (The Water Retained)
While not a physical “part” you can touch or replace on its own, the trap seal is the most vital functional element. It’s the layer of water that sits at the bottom of the U-bend. This water barrier is what actually stops sewer gases from entering your home. The depth of this water seal is regulated by plumbing codes and is typically about 2 inches deep. This ensures an effective barrier against gases.
Why It’s Important: The integrity of the trap seal is paramount for maintaining a sanitary environment. If the seal is broken (e.g., through siphoning, evaporation, or excessive blockage), the P-trap fails at its primary job, and sewer gases can escape. This is why running water in infrequently used drains is a common recommendation – it replenishes the evaporated water in the trap seal.
Types of P-Traps and Their Parts
P-traps come in various materials and configurations, but the fundamental parts remain the same. The most common types you’ll encounter are:
Material Differences:
- Plastic P-Traps: These are typically made from PVC (polyvinyl chloride) or ABS (acrylonitrile butadiene styrene). They are lightweight, inexpensive, and easy to install. Plastic traps are resistant to corrosion but can become brittle over time, especially when exposed to extreme temperatures or harsh chemicals. The parts are usually connected with solvent cement or threaded fittings.
- Metal P-Traps: Commonly made from brass, chrome-plated brass, or stainless steel. Metal traps are more durable and aesthetically pleasing, often used in visible applications like kitchen sinks. They are more expensive than plastic but offer greater longevity and resistance to damage. Parts are typically connected using slip-joint nuts and washers.
Configuration Variations:
- Standard P-Trap: The most common type, consisting of the U-bend and a connected trap arm.
- Adjustable P-Trap: These traps often have a swivel joint or a telescoping trap arm, allowing for more flexibility in aligning with existing drainpipes, especially useful during renovations or when dealing with non-standard plumbing layouts.
- Bottle Trap (or Bottle P-Trap): Less common in residential settings but often found in commercial or aesthetic installations (like wall-mounted sinks). It achieves the water seal using a different, more compact design, often with a removable cleanout plug at the bottom. While the shape is different, the principle of holding water to create a seal remains.
Regardless of the material or specific configuration, the core parts—the body holding the water seal, and the arm directing water to the drain—are always present and perform the same essential functions.
How P-Trap Parts Work Together: A Flow of Function
Let’s visualize the journey of water and gases. Imagine you’ve just finished washing your hands.
- Water Enters: As the water drains from the sink, it flows down the tailpiece (the pipe directly below the sink drain) and into the P-trap.
- Filling the U-Bend: The water fills the U-shaped bend. Most of it continues to flow down the horizontal trap arm.
- The Seal Forms: A small amount of water remains at the lowest point of the U, creating the vital water seal—the trap seal. This water blocks any upward passage of sewer gases.
- Wastewater Flows Out: The remaining water, along with the wastewater, travels down the trap arm into the main drainpipe and eventually to the sewer or septic system.
- Gas Prevention: As the water seal is in place, any sewer gases present in the main drain system cannot travel back up through the trap arm and into your home.
- Ready for Next Use: When the fixture is used again, the process repeats, flushing out any accumulated debris and replenishing the water seal.
This constant replenishment is key. If a drain isn’t used for a long time, evaporation can deplete the trap seal, allowing gases to enter. That’s why running water in seldom-used bathrooms or sinks periodically is such good advice.
Common P-Trap Problems and Their Corresponding Parts

Most P-trap issues stem from clogs, leaks, or a compromised water seal. Here’s a breakdown of common problems and which P-trap parts are usually involved:
1. Clogs
Symptoms: Slow draining, standing water in the sink or tub, gurgling noises from the drain.
Usually Involved Part: Primarily the Trap Body (U-Bend), but can also occur in the Trap Arm.
Why it happens: Hair, soap scum, grease, food particles, and other debris accumulate over time, narrowing the pipe and eventually blocking the flow of water. The U-shape of the trap body is particularly prone to catching these materials.
DIY Fix: Many clogs can be cleared without harsh chemicals. First, try using a plunger. For tougher clogs, you might need to disassemble the P-trap. Place a bucket underneath to catch water and debris, loosen the slip nuts connecting the trap body and trap arm, remove the U-bend, and clean it out manually. Ensure the washers are intact when reassembling.
For more on clearing drain clogs, the U.S. Environmental Protection Agency (EPA) offers some helpful tips on wastewater management and drain maintenance: EPA’s WaterSense program.
2. Leaks
Symptoms: Water pooling under the sink or around the base of the fixture.
Usually Involved Part: The Couplings/Slip Nuts, Washers, or cracks in the Trap Body or Trap Arm.
Why it happens:
- Loose Connections: Slip nuts can loosen over time due to vibrations or temperature changes.
- Worn or Damaged Washers: The rubber or plastic washers inside the slip nuts can become brittle, cracked, or compressed, failing to create a tight seal.
- Cracked Pipe: The plastic or metal pipe of the trap body or trap arm can develop cracks due to age, impact, or freezing.
DIY Fix:
- Tighten Connections: First, try hand-tightening the slip nuts. If that doesn’t work, use channel-lock pliers, but be gentle to avoid overtightening and damaging the plastic.
- Replace Washers: If tightening doesn’t help, the washers are likely the culprit. Disassemble the trap, replace the old washers with new ones of the correct size, and reassemble.
- Replace Damaged Pipe: If the pipe itself is cracked, you’ll need to replace the faulty section. For plastic traps, this usually means replacing the entire U-bend or trap arm. For metal traps, individual components might be replaceable.
3. Siphoning or Dry Traps
Symptoms: Gurgling sounds from the drain, water disappearing from the sink or tub, and the re-emergence of sewer odors.
Usually Involved Part: The Trap Seal is compromised, often due to issues with the venting system or an improperly configured Trap Arm.
Why it happens:
- Improper Venting: Plumbing systems require vents to allow air in as water drains out. Without proper venting, a vacuum can form, siphoning water out of the trap seal.
- Incorrect Trap Arm Length/Slope: A trap arm that is too long or has too steep of a downward slope can allow water to be pulled out of the trap by the momentum of the draining water (self-siphonage).
- Evaporation: As mentioned, infrequent use leads to water evaporating from the trap seal.
DIY Fix:
- Run Water: For evaporation, simply running water for a minute or two will replenish the seal.
- Check Venting: Addressing venting issues is usually beyond basic DIY and may require a plumber. However, ensuring your roof vent isn’t blocked by debris can sometimes help.
- Inspect Trap Arm: Check the slope and length. Most codes require the trap arm to slope downwards at a rate of 1/4 inch per foot. If it seems too long or has an improper slope, it might need adjustment or replacement, which can be a more involved DIY task.
Troubleshooting Table: Common P-Trap Issues
Here’s a quick reference table for common P-trap problems:
| Problem | Symptoms | Likely P-Trap Part Involved | Common DIY Solution |
|---|---|---|---|
| Clog | Slow draining, standing water, gurgling | Trap Body (U-Bend), Trap Arm | Plunge, disassemble & clean, drain snake |
| Leak | Water under sink/fixture | Slip Nuts/Couplings, Washers, Cracked Pipe (Trap Body/Arm) | Tighten connections, replace washers, replace pipe section |
| Siphoning/Dry Trap | Gurgling, sewer odor, water gone from sink | Trap Seal (affected by venting, trap arm slope/length) | Run water regularly, check for vent obstructions (professional help for complex venting) |
| Loose Component | Waddling noise, slight instability of pipe | Slip Nuts, Threaded Connections | Hand-tighten or gently tighten with pliers |
DIY Steps: Replacing or Cleaning a P-Trap
Many P-trap issues, especially clogs and minor leaks, can be resolved with a bit of hands-on work. Here’s a step-by-step guide to cleaning or replacing a standard P-trap assembly.
Tools and Materials You Might Need:
- Bucket (to catch water and debris)
- Plumber’s tape (if dealing with threaded fittings)
- Slip-joint pliers or channel-lock pliers
- Pipe wrench (if dealing with metal traps or stubborn fittings)
- Soft cloths or rags
- New P-trap kit (if replacing)
- Replacement washers (if just replacing washers)
- Safety glasses
- Gloves
- Drain snake or auger (optional, for stubborn clogs)
Step-by-Step Guide to Cleaning a P-Trap:
- Preparation is Key: Put on your safety glasses and gloves. Place a bucket directly beneath the P-trap to catch any water and debris that will come out. Empty out any standing water from the sink bowl into the bucket if possible.
- Loosen the Slip Nuts: Most P-traps connect to the tailpiece (from the sink) and the trap arm (to the drain pipe) using large, plastic or metal nuts known as slip nuts. These are usually hand-tightened or require minimal effort to loosen. Turn the slip nut connecting the trap arm to the P-trap counter-clockwise. Then, loosen the slip nut connecting the P-trap to the tailpiece.
- Remove the P-Trap: Once the nuts are loose, carefully ease the P-trap downwards. It should come away easily. Be prepared for water and any accumulated gunk to spill into the bucket.
- Clean the Trap: Inspect the inside of the removed P-trap. Use a rag or a brush to scrub out any hair, soap scum, grease, or other debris. For particularly stubborn clogs, you might use a drain snake at this stage. You can also rinse it thoroughly with hot water.
- Inspect for Damage: Check the trap itself and the removed slip nuts and washers for any cracks, wear, or damage. If the trap is cracked or the washers are flattened or torn, you’ll need to replace the affected parts or the entire P-trap assembly.
- Reassemble: Position the clean P-trap back into place. Ensure the washers are correctly seated inside the slip nuts. Hand-tighten the slip nuts onto the tailpiece and trap arm. Make sure the trap is aligned properly.
- Tighten and Test: Once hand-tight, use your pliers to give each slip nut a quarter to half turn to ensure a snug fit. Do not overtighten, as this can crack plastic fittings. Run water into the sink and check thoroughly for any leaks around the slip nuts. If you see drips, try tightening the nut slightly more. If the leak persists, you may need to disassemble again and ensure the washer.
