
Quick Summary:
Removing a sink often seems daunting, but with the right tools and this simple guide, you can tackle the job with confidence. We’ll cover everything from essential tools to safe, step-by-step instructions for a smooth DIY removal, ensuring you’re set up for a successful replacement.
Remove Sink Tools: Your Essential & Effortless Guide
A leaky faucet, a chipped basin, or just a desire for an upgrade – there are many reasons you might need to remove your sink. For many homeowners, the thought of this task can bring a sigh of frustration, conjuring images of endless plumbing puzzles and potential water damage. But don’t worry! Removing a sink is a manageable DIY project that anyone can master with the right approach and a few key tools. We’re here to break it down into easy-to-follow steps, demystifying the process and empowering you to get the job done right. Let’s get your old sink out and prepare for your new one!
Why Removing a Sink Might Be Necessary
Before we dive into the how-to, let’s quickly touch on why you might find yourself needing to remove a sink. Understanding these common scenarios can help you recognize when it’s time for action:
- Leaks and Damage: A persistent leak from the drain or faucet can cause water damage to your cabinets and flooring. Sometimes, the damage is too extensive for a simple repair, requiring a full sink replacement.
- Outdated Fixtures: The style and functionality of your sink might no longer suit your needs or the aesthetic of your home. An old sink can also be less efficient, impacting water usage.
- Cracks or Chipped Surfaces: While cosmetic, significant cracks or chips in a porcelain or ceramic sink can harbor bacteria and simply look unappealing.
- Plumbing Issues: Sometimes, access to plumbing for repairs or upgrades requires sink removal.
- Renovations: As part of a larger bathroom or kitchen remodel, the sink is often one of the first fixtures to be removed.
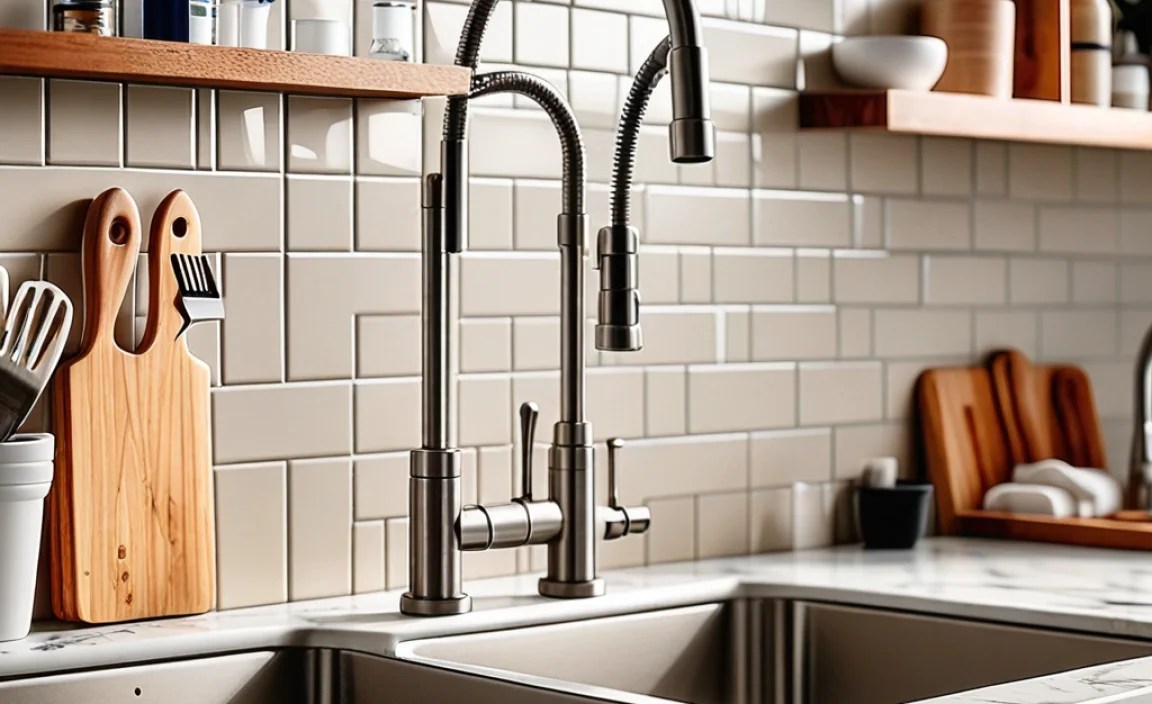
Essential Tools for Sink Removal

Gathering the right tools before you start is crucial for a smooth and efficient removal. Having everything at hand will save you time and prevent unnecessary frustration. Here’s a breakdown of the essential tools you’ll need:
| Tool | Purpose | Why It’s Essential |
|---|---|---|
| Adjustable Wrench (or Basin Wrench) | Loosening and tightening nuts on faucets and supply lines. A basin wrench is specially designed for tight spaces under a sink, making it highly recommended. | Provides leverage to turn stubborn nuts that standard wrenches might not reach or grip effectively. |
| Pipe Wrench | Gripping and turning pipes, especially if they are corroded or difficult to budge. | Offers a strong grip on pipes and fittings, useful for disconnecting trap arms or other stubborn plumbing components. |
| Bucket or Container | Catching residual water from pipes and the drain trap. | Prevents water from spilling onto your floor, protecting cabinets and flooring from damage. |
| Pliers (Slip-Joint or Channel Locks) | Gripping, bending, or holding small parts. | Versatile for a variety of tasks, such as holding a nut while you turn a bolt, or gripping small, stubborn pieces. |
| Screwdriver Set | Removing mounting screws for the faucet or sink clips. | Many sink components are held in place with screws, requiring various screwdriver head types (Phillips and flathead). |
| Putty Knife or Scraper | Breaking the seal between the sink and the countertop/wall. | Helps to cut through old caulk or putty that might be adhering the sink firmly in place. Use gently to avoid damaging surfaces. |
| Utility Knife | Cutting through thick caulk or sealant. | Provides a sharper edge than a putty knife for initial scoring of stubborn sealant. |
| Safety Glasses | Protecting your eyes from debris, dust, or falling particles. | Essential for any DIY task involving potential splashing or falling debris. Safety first! |
| Work Gloves | Protecting your hands from sharp edges, grime, and chemicals. | Keeps your hands clean and safe from potential cuts or irritations encountered under the sink. |
| Towel or Rags | Wiping up spills and cleaning surfaces. | Always handy for unexpected drips and for keeping your workspace tidy. |
| Flashlight or Headlamp | Providing light in dark under-sink areas. | Ensures you can see what you’re doing clearly, especially in confined or poorly lit spaces. |
Optional but Helpful Tools:
- Plumber’s Tape (PTFE Tape): While not strictly for removal, it’s essential for reinstallation.
- Penetrating Oil: For loosening very stubborn or corroded nuts and bolts.
- Hammer: For gently tapping stubborn parts (use sparingly and with caution).
- Caulk Remover Tool: Specifically designed to safely remove old caulk.
Step-by-Step Guide to Removing Your Sink

Now that you have your tools ready, let’s get down to business. This guide is designed for most standard sink types, but always refer to your sink’s manufacturer instructions if available. Safety is paramount, so double-check that all water is turned off before you begin.
Step 1: Turn Off the Water Supply
This is the most critical first step. You don’t want any surprises! Look for the shut-off valves located under the sink. Typically, there are two valves: one for hot water and one for cold water. Turn them clockwise until they are hand-tight. If you don’t have individual shut-off valves under the sink, you’ll need to turn off the main water supply to your house.
After turning off the valves, open the faucet to relieve any remaining pressure and drain any water left in the lines.
Step 2: Disconnect the Water Supply Lines
Now, use your adjustable wrench (or basin wrench) to disconnect the flexible water supply lines from the faucet tails. Position a bucket underneath the connections to catch any residual water. Turn the nuts on the supply lines counter-clockwise. If the connectors are difficult to loosen, a little penetrating oil might help. Once disconnected, gently move the lines out of the way.
Step 3: Disconnect the Drain Assembly
This is where things can get a bit messy if not prepared. Place your bucket directly under the P-trap (the U-shaped pipe beneath the sink drain). Loosen the large slip nuts connecting the P-trap to the vertical tailpiece of the sink drain and the horizontal pipe leading to the wall. You can usually do this by hand, but you might need pliers or a pipe wrench if they are stuck. Allow any trapped water to drain into the bucket.
Once the P-trap is removed, you’ll need to disconnect the rest of the drainpipe. The tailpiece (the pipe coming directly from the sink drain flange) will be connected to a trap arm that goes into the wall. Use your pipe wrench or pliers to loosen the slip nut here.
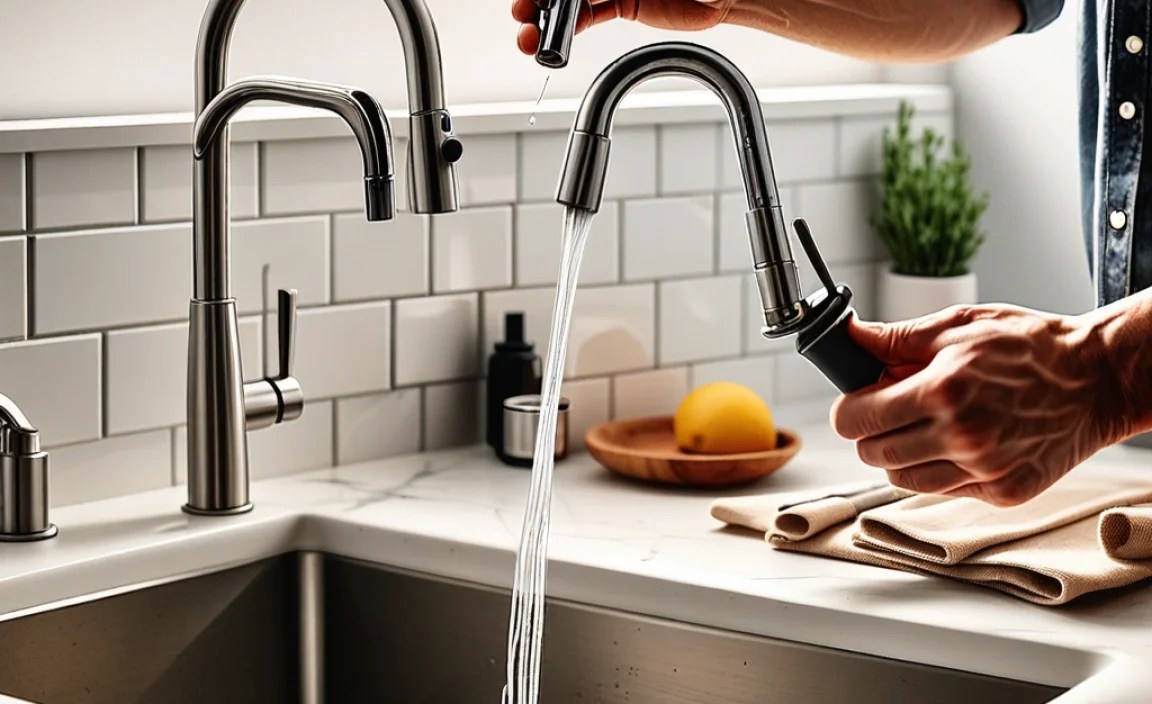
Step 4: Remove the Faucet
Before you can lift the sink, the faucet usually needs to be removed. Look under the sink where the faucet base meets the sink. You’ll see mounting nuts or screws holding it in place. Use your basin wrench or adjustable wrench to loosen and remove these. Once loose, you should be able to lift the faucet straight up and out from the top of the sink.
Step 5: Release the Sink from the Countertop/Vanity
Sinks are typically held in place by one of two methods: clips or sealant.
- Sink Clips: Many undermount and some drop-in sinks are secured with metal clips that attach to the underside of the sink rim and the countertop. Locate these clips (there are usually several, evenly spaced). Use a screwdriver or wrench to loosen and remove them.
- Sealant (Caulk/Putty): Most drop-in sinks have a bead of silicone caulk or plumber’s putty around the rim to create a watertight seal. If there are no clips, this is likely how your sink is attached. Use a utility knife or putty knife to carefully score and cut through the sealant all the way around the edge where the sink meets the countertop. Be patient and make sure you break the seal completely. For stubborn caulk, a caulk remover tool can be very helpful.
If your sink is mounted to a vanity, there might be additional screws or supports to release.
Step 6: Lift Out the Sink
With all connections and fasteners removed, the sink should now be free. Gently try to lift the sink. If it feels stuck, double-check for any missed clips or sealant. You might need to run your putty knife around the edge again. For heavier sinks (like cast iron), you might need a helper to lift it safely. Lift it straight up and away from the countertop.
Step 7: Clean Up the Area
Once the old sink is removed, take some time to clean up the countertop or vanity area. Scrape away any old caulk, putty, or debris. A clean surface is essential for installing your new sink to ensure a proper seal. Wipe down the area thoroughly.
Common Sink Types and Removal Nuances
While the general steps remain similar, different sink types can have slight variations in their removal process. Understanding these nuances can save you a headache.
Drop-In Sinks (Top-Mount Sinks)
These are the most common type. They rest in a hole in the countertop, with their rim sitting on top. The removal process largely follows the steps above, focusing on disconnecting plumbing, releasing faucet hardware, and cutting through the rim sealant. They are generally the easiest to remove.
Undermount Sinks
These sinks are installed beneath the countertop, offering a sleek look. Their removal involves disconnecting plumbing and faucet hardware, but instead of cutting sealant from above, you’ll be working from underneath to release mounting clips. These clips are often tightened from below and must be fully detached. Sometimes, a bead of caulk is also applied between the sink and countertop edge, which you’ll need to cut through.
Farmhouse/Apron Sinks
These large, distinctive sinks often require custom cabinetry and are integrated into the front of your counter. They can be quite heavy and may be secured with clips or adhesive from underneath. Removing them can be more involved, sometimes requiring partial cabinet disassembly. Due to their weight, having assistance is almost always necessary.
Vessel Sinks
These sit on top of the counter, with the drain passing through the countertop. Their removal is typically straightforward: disconnect the drain assembly from underneath, disconnect water supply lines, and faucet hardware if integral to the sink. The sink itself just lifts off. The main challenge is often accessing the drain plumbing.
Troubleshooting Common Sink Removal Problems
Even with the best preparation, you might encounter a few snags. Here’s how to handle common issues:
- Stubborn Nuts: If supply line or drain nuts are corroded and won’t budge, a generous application of penetrating oil (like WD-40 or a specialized rust penetrant) and some patience can work wonders. Let it sit for 15-30 minutes (or longer for severe corrosion) before trying again. A pipe wrench can also offer more grip.
- Leaking During Disconnection: Even with shut-off valves, some water may remain in the pipes. Always have your bucket and rags ready for any drips.
- Sink Won’t Budge: If the sink feels like it’s still attached after removing all visible clips and cutting sealant, check carefully for any missed mounting points or hidden clips, especially on undermount sinks. Sometimes, gently rocking the sink can help break a weak or missed seal.
- Damaged Countertop: Be cautious when cutting caulk. If you’re worried about scratching your countertop material (especially laminate or solid surface), use a plastic putty knife or a specialized caulk removal tool made for delicate surfaces.
Safety First: Important Considerations
DIY projects should always prioritize safety. Here are a few points to keep in mind:
- Water Shut-Off: Double-check that the water is off at the valves or the main supply.
- Electrical Hazards: Ensure no electrical outlets or appliances are directly under the sink area that could be affected by water spills. If you have a garbage disposal, make sure its power switch is OFF, and consider turning off the circuit breaker for extra safety.
- Heavy Lifting: Sinks, especially cast iron or stone, can be very heavy. Always get help when lifting to prevent back injuries.
- Sharp Edges: Old sinks or faucet parts can have sharp or broken edges. Wear gloves to protect your hands.
- Ventilation: If using caulk remover or other chemicals, ensure the area is well-ventilated.
For more detailed information on plumbing safety and best practices, the U.S. Consumer Product Safety Commission (CPSC) offers valuable resources on home maintenance safety. You can find general safety guidelines on their website: Consumer Product Safety Commission.
What Happens Next: Preparing for a New Sink
Once your old sink is out, you’re halfway to enjoying your updated space! Before installing a new sink, now is the perfect time to:
- Inspect Plumbing: Check the visible pipes and valves for any signs of corrosion or leaks. Address any issues now before they become bigger problems.
- Clean and Repair: Thoroughly clean the countertop opening and the vanity/cabinet underneath. Repair any minor damage to the cabinet or countertop if needed.
- Measure Carefully: Ensure your new sink will fit the existing opening or adjust cabinetry if necessary.
Having a clean, prepared workspace will make the installation of your new sink much smoother and ensure a professional finish.
Frequently Asked Questions (FAQ)
Q1: How long does it typically take to remove a sink?
For an experienced DIYer, removing a standard sink can take anywhere from 30 minutes to an hour and a half. For beginners, it might take a bit longer as you get familiar with the tools and steps. Rushing the process can lead to mistakes or damage, so take your time.
Q2: Do I need to turn off the main water supply to my house?
Only if you don’t have individual shut-off valves directly under the sink for both hot and cold water. Most modern homes will have these valves, making it unnecessary to shut off the water to your entire house.
Q3: My drain P-trap is really stuck. What can I do?
If the slip nuts on the P-trap are difficult to loosen, try applying a penetrating oil and letting it soak for about 30 minutes. Ensure you are using the correct size wrench or pliers for grip without stripping the plastic nuts. Gentle, steady pressure is key.
Q4: What if my sink is glued or heavily caulked?
A sharp utility knife and a putty knife or scraper are your best friends here. You’ll need to carefully score and cut through the sealant all the way around the sink’s edge where it meets the countertop. Be patient and work slowly to avoid damaging the countertop. For very old or stubborn caulk, you might find specialized caulk removal tools helpful.
Q5: Can I reuse my old faucet with a new sink?
Sometimes, but it’s not always recommended. Compatibility is key – ensure the faucet hole pattern on the new sink matches your existing faucet. Also, consider the age and condition of the faucet; if it’s old and prone to leaks, it might be a good idea to replace it at the same time.
Q6: What’s the difference between plumber’s putty and silicone caulk for sealing sinks?
Plumber’s putty is a malleable compound used to create a watertight seal, often under faucet bases or drain flanges. Silicone caulk is a flexible sealant that cures to form a rubber-like barrier, typically used around the rim of drop-in sinks to bond them to the countertop and prevent water seepage. Silicone is generally more durable and weather-resistant.
Conclusion
Removing a sink might seem like a job best left to the professionals, but as you’ve seen, with the right preparation, a few essential tools, and this step-by-step guide, it’s a perfectly achievable DIY project. You’ve learned how to safely shut off water, disconnect plumbing, release the sink, and prepare the area for a new installation. Remember to work methodically, prioritize safety, and don’t hesitate to ask for a helping hand if needed. Tackling tasks like sink removal builds confidence and skill, empowering you to take on more home maintenance projects in the future. With your old sink out.
