
Ready to ditch that old tile and give your space a new look? Removing tiles yourself might seem daunting, but with the right tools and a simple plan, it’s completely achievable! This guide breaks down the process step-by-step, making it easy for any beginner to tackle. We’ll show you how to prepare, safely remove tiles, and clean up afterward. Get ready to say goodbye to outdated styles and hello to your dream renovation!
Why Tackle Tile Removal Yourself?
Tiling adds beauty and durability to many homes, but styles change, and wear and tear happen. When it’s time for a refresh, you’ll likely face the task of removing old tiles. While hiring professionals is an option, doing it yourself can offer significant savings and a rewarding sense of accomplishment. It’s a fantastic way to learn more about your home and gain valuable DIY skills. Plus, a DIY approach means you control the pace and the budget.
The idea of smashing and prying might sound messy and difficult, but with a methodical approach, it’s a manageable project. We’ll cover everything you need to know to make this process as smooth and stress-free as possible, ensuring you’re prepared for what comes next.
Gathering Your Essential Tools for DIY Tile Removal

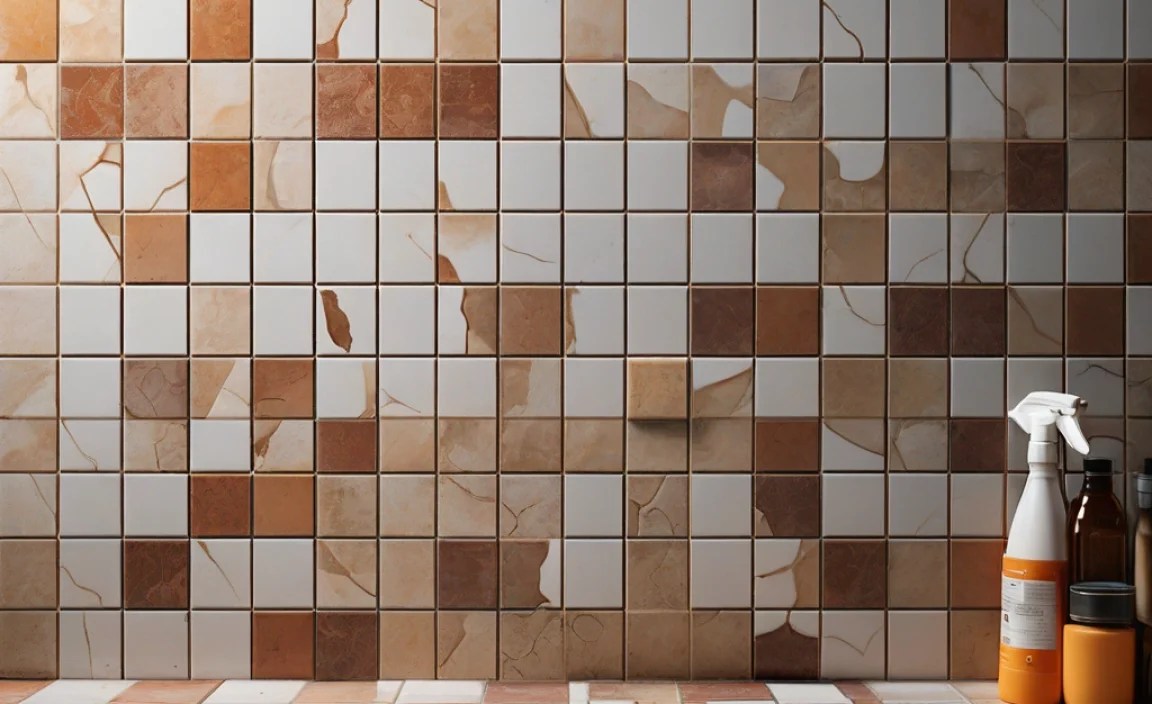
Having the right tools makes all the difference when you’re removing tiles. It’s not just about making the job easier; it’s also about working safely and efficiently. Investing in or renting the appropriate equipment will save you time and prevent unnecessary damage to your walls or floor.
Here’s a list of the must-have tools for your DIY tile removal project:
- Safety Gear: This is non-negotiable! You’ll need safety glasses or goggles to protect your eyes from flying debris, sturdy work gloves to prevent cuts and scrapes, and a dust mask to avoid inhaling dust particles. Consider knee pads for floor tile removal.
- Scraper/Putty Knife: A heavy-duty scraper or a wide putty knife is your first line of attack for loosening grout and lifting tiles.
- Hammer: A standard claw hammer or a small sledgehammer can be useful for breaking up stubborn tiles, especially those that are well-adhered.
- Pry Bar: Essential for getting leverage to pry tiles away from the surface. Longer pry bars offer more leverage.
- Chisel: A cold chisel, particularly with a flat edge, is excellent for chipping away at grout and breaking apart tiles.
- Utility Knife: Useful for cutting through caulk or grout sealing around the edges of the tile area.
- Scraper Blade (Optional but Recommended): A specialized scraper blade attachment for a multi-tool or oscillating tool can make quick work of grout.
- Bucket: For collecting debris and discarded tiles.
- Drop Clothes/Plastic Sheeting: To protect surrounding areas from dust and debris.
- Broom and Dustpan or Vacuum Cleaner: For initial mess cleanup. A shop vacuum is ideal for handling construction dust.
- Crowbar (for larger projects): If you’re removing a significant area of flooring, a larger crowbar can provide more prying power.
For a more comprehensive look at recommended tools, you can check out resources from experienced DIY communities or professional tradespeople. Many reputable hardware stores also offer guides on tool selection for demolition projects.
Step-by-Step Guide: How to Remove Tiles Like a Pro

Let’s break down the process of removing tiles into manageable steps. This guide is designed for beginners, focusing on clarity and safety. Remember to work at your own pace and focus on precision over speed.
Step 1: Prepare Your Workspace and Ensure Safety
Before you even pick up a tool, setting up your area correctly is crucial for a smooth process and minimizing mess. This involves protecting your surroundings and yourself.
- Clear the Area: Remove all furniture, rugs, and decor from the room or the immediate work area.
- Protect Surfaces: Cover floors and nearby furniture with drop cloths or plastic sheeting. Secure them with painter’s tape to prevent them from shifting. For wall tiles, protect adjacent walls, countertops, and cabinetry.
- Ventilate the Room: Open windows to ensure fresh air circulation, which helps dissipate dust and any potential fumes.
- Put on Safety Gear: Always wear your safety glasses, gloves, and dust mask before starting any demolition.
Step 2: Remove Grout or Caulk
The grout is the “glue” holding your tiles together. Loosening or removing it is often the first step to freeing the tiles. If there’s caulk along the edges, remove that first with a utility knife.
- For Grout Lines:
- Manual Method: Use a utility knife, a grout saw, or the edge of a chisel to carefully score and scrape out the grout from between the tiles. Work slowly to avoid damaging the tile edges or the underlying surface.
- Power Tool Method: An oscillating multi-tool with a grout removal blade can significantly speed up this process. Follow tool instructions carefully and maintain control. Power tool safety is paramount, so ensure you understand its operation.
- Focus on Edges: Pay special attention to the grout lines around the perimeter of your tile area, as well as between individual tiles.
Step 3: Start Removing the Tiles
Once the grout is sufficiently cleared, it’s time to pry the tiles loose. The method will depend on how the tiles were installed and how strongly they are adhered.
- Begin with a Corner or Edge Tile: It’s often easiest to start with a tile that has an exposed edge or is already slightly loose.
- Insert Your Tool: For wall tiles, slide the scraper or putty knife under the edge of a tile. For floor tiles, you might need to use a chisel to create a small starting point or angle.
- Apply Gentle Pressure: Gently tap the end of the scraper/putty knife with a hammer or use your pry bar to lever the tile away from the surface. Be patient. If a tile isn’t budging, don’t force it; you might need to remove more grout or try a different spot.
- Work Systematically: Remove one tile at a time. As you remove tiles, use your hammer and chisel to break up any stubborn pieces that won’t pry off easily.
- For Larger Tiles or Stubborn Adhesion: You might need to use a heavier hammer or even a small sledgehammer. Place the chisel against the tile and strike it firmly with the hammer. Be prepared for the tile to break into pieces. Always be mindful of where the pieces will fly.
Step 4: Dealing with Adhesive
After the tiles are off, you’ll likely be left with adhesive residue on the subfloor or wall. This needs to be addressed before installing new material.
- Scrape Away Excess: Use a heavy-duty scraper or floor scraper to remove as much of the old adhesive as possible.
- Consider an Adhesive Remover: For tough or dried-on adhesive, a commercial adhesive remover or a solution of hot water and detergent can help soften it. Always test in an inconspicuous area first.
- Sanding (for floors): For stubborn residue on a concrete subfloor, you might need to lightly sand it down. A floor scraper or even a floor sander attachment can be effective.
Step 5: Clean Up the Debris
This is where your drop cloths and quick cleanup tools come in handy.
- Collect Large Pieces: Gather the removed tiles and place them directly into your bucket or designated debris area.
- Sweep or Vacuum: Once the bulk of the tiles and debris are removed, sweep the area thoroughly. A shop vacuum is excellent for picking up fine dust and small fragments.
- Bag and Dispose: Place all debris into sturdy trash bags. Heavy tile fragments can make bags very heavy, so consider double-bagging or disposing of them directly into a larger container or bin if appropriate. Check local regulations for proper disposal of construction debris.
Proper disposal is an important part of any renovation project. Resources like your local municipality’s waste management website can provide specific guidelines.
Tile Backer Boards vs. Cement Board: What’s the Difference for Your Project?
When you’re preparing to retile, understanding the materials that go behind the tiles (the backer board) is important. While both serve to create a stable surface, they have different compositions and applications.
Here’s a quick comparison:
| Feature | Tile Backer Board (e.g., DensShield, HardieBacker) | Cement Board (e.g., Durock, HardieBacker) |
|---|---|---|
| Composition | Often a fiberglass-faced gypsum core, or a fiberglass mat on both sides of a core. Some are coated with a waterproofing membrane. | Made from Portland cement, aggregate, and often reinforcing mesh. It’s a rigid, dense material. |
| Water Resistance | Varies. Some have integrated waterproofing, which can save a step. Others still require a separate waterproofing membrane. | Naturally resistant to moisture and rot, but not inherently waterproofs. Separate liquid or sheet membranes are often used for wet areas. |
| Weight | Generally lighter than cement board, especially fiberglass-faced versions. | Heavier due to the cement composition. |
| Installation | Can be easier to cut and handle due to lighter weight. Screws are typically used. | Requires specific screws designed for cement board. Can be slightly more challenging to cut due to density but provides a very robust surface. |
| Best Use | Can be used in most areas, including wet areas if they have integrated waterproofing or a membrane is applied. Good for general wall and floor tiling. | Excellent for high-moisture areas like showers and tub surrounds due to its inherent water resistance and durability. Also great for floors. |
Choosing the right backer board ensures the longevity and success of your new tile installation. Always check manufacturer recommendations for the specific type of tile and installation area.
Tips for Removing Different Types of Tiles
Not all tiles are created equal, and some might present more challenges than others. Here’s how to approach common types:
- Ceramic Wall Tiles: These are generally easier to remove. Focus on carefully prying them off after scoring the grout. If they break, they usually shatter cleanly.
- Ceramic Floor Tiles: Often adhered more strongly than wall tiles. You may need more leverage with a pry bar or to use your hammer and chisel more directly.
- Porcelain Tiles: Porcelain is denser and harder than ceramic, making it more difficult to break. You might need to chip away more grout and use a stronger prying force. Expect breakage to be more controlled, less shattering.
- Natural Stone Tiles (e.g., Marble, Granite, Slate): These can be expensive and brittle. Be very careful when removing. Use a more delicate approach with chisels and pry bars, and focus on removing grout thoroughly first. If sections break, try to lift them out carefully.
- Vinyl or Linoleum Tiles: These are typically glued down with mastic. The adhesive can be stubborn. After removing the tile itself, you’ll focus heavily on scraping and softening the adhesive residue.
- Peel-and-Stick Tiles: While easy to install, the adhesive can become very strong over time. You may need to use a heat gun (on a low setting, carefully) to soften the adhesive before prying.
Always remember that the more strongly the adhesive is bonded, the more effort will be required. Patience and the right tools are key.
What to Do with Old Tiles? Disposal and Recycling
Once your tiles are removed, you’ll have a pile of debris. How you handle it depends on the material and your local options.
Disposal Methods:
- Household Trash: For small amounts of ceramic or porcelain tile, and especially if they’ve been broken into small pieces, you can often place them in your regular household trash. Be sure to bag them securely to prevent sharp edges from tearing the bags. Heavy amounts might exceed weight limits for regular trash pickup, so check with your local waste management.
- Construction & Demolition (C&D) Waste Services: For larger projects or larger quantities, you’ll likely need to arrange for a special pickup or rent a dumpster. Many waste management companies specialize in C&D debris.
- Local Landfills/Transfer Stations: You can often haul tile debris directly to a local landfill or transfer station yourself. There will likely be a tipping fee based on weight.
Recycling Options:
While not as common as other materials, some tile recycling options exist:
- Crushed Aggregate: Some recycling centers accept clean ceramic and porcelain tiles to be processed into crushed aggregate, which can be used in road construction or landscaping.
- Creative Reuse: Broken tile pieces (tesserae) are perfect for mosaics! If you’re feeling crafty, save beautifully colored or patterned fragments for future art projects.
- Contact Local Facilities: It’s always a good idea to check with your local recycling centers or waste management authority. Some may have specific programs for construction materials.
For more information on responsible waste disposal and recycling, you can consult resources from the Environmental Protection Agency (EPA) or local government environmental departments. Their websites often have detailed guidelines for construction debris.
Frequently Asked Questions (FAQ)
Q1: How long does it typically take to remove tiles myself?
A: The time it takes can vary greatly depending on the size of the area, the type of tile, how well it’s adhered, and your experience. A small bathroom might take a full day or two for a beginner, while a larger floor could take several days.
Q2: Can I remove tiles without damaging the subfloor?
A: It’s possible, but it requires care. Slow, controlled work, using the right tools, and avoiding excessive force will minimize subfloor damage. Some minor gouges or adhesive residue are common but can usually be cleaned or repaired before new flooring is installed.
Q3: Is it safe to remove tiles if there’s a chance of asbestos or lead paint?
A: Older homes, especially those built before the 1980s, might contain asbestos in flooring materials or lead paint. Asbestos is a serious health hazard. If you suspect their presence, do not attempt removal yourself. Hire a certified professional to test and abate these materials safely.
Q4: What if the tiles are glued directly to drywall?
A: Removing tiles glued directly to drywall can be tricky. You risk damaging the drywall paper or even tearing through the board. Work very carefully with a thin pry bar or scraper. If the drywall is significantly damaged, you may need to replace sections of it.
Q5: How do I know if I’m removing enough grout?
A: You need to remove enough grout so that you can get your scraper or chisel blade underneath the edge of the tile. If you can’t get a good angle or leverage, more grout needs to come out. Aim to clear at least half to two-thirds of the grout line’s depth.
Q6: What’s the best way to remove tile adhesive?
A: Start with a stiff scraper or floor scraper. For stubborn adhesive, you can try softening it with hot water and a scrub brush or use a chemical adhesive remover. Always follow the product’s safety instructions. For concrete floors, light sanding can also be effective.
Conclusion: Your New Space Awaits!
You’ve done it! By following these steps, you’ve successfully navigated the process of removing tiles yourself. It might have been dusty, loud, and physically demanding, but you’ve cleared the way for your exciting next project. Remember, every DIY success starts with preparation and a willingness to learn. Take a moment to appreciate the progress you’ve made. The transformation to your space is now within reach. From here, you’re ready to lay down new flooring, install a fresh tile design, or simply enjoy a clean, updated foundation. Happy renovating!
