
Tired of sagging cabinet doors or wobbly shelves? Don’t worry! This guide will show you how to easily repair common cabinet issues step by step. You’ll learn to assess problems, gather tools, and make fixes to restore your cabinets to their former glory. Get ready to impress yourself with your DIY skills!
Cabinets are essential in every home, serving as storage and a key part of your kitchen or bathroom’s look. Over time, they can show signs of wear and tear. A loose hinge, a chipped veneer, or a sticky drawer might seem like big problems, but they’re often simple fixes. You don’t need to be a master carpenter to tackle them. This guide will break down cabinet repair into easy steps. We’ll cover common issues and give you the confidence to make your cabinets look and function like new again. Let’s get started and bring new life to your cabinets!
Why Cabinets Need Repair

Cabinets, much like any hardworking part of your home, experience a lot of daily use. From holding heavy pots and pans to being opened and closed countless times a day, their components inevitably face stress. This can lead to common problems:
Wear and Tear: Frequent use causes hinges to loosen, drawer slides to bind, and finishes to scratch.
Moisture Damage: Kitchen and bathroom cabinets are exposed to humidity, steam, and occasional spills, which can warp wood or damage finishes.
Structural Strain: Overloading shelves can cause them to sag or even break, putting stress on the cabinet frame.
Accidental Damage: Bumps, scrapes, and dropped items can lead to chips, dents, and cracks in the cabinet material.
Addressing these issues promptly prevents minor problems from becoming costly replacements.
Common Cabinet Problems and Their Solutions
Let’s dive into some of the most frequent cabinet predicaments and how to resolve them with a hands-on approach.
1. Loose or Sagging Cabinet Doors
This is perhaps the most common cabinet issue. It’s usually caused by loose hinge screws or worn-out hinges.
Assessing the Problem:
Check the Screws: Open the door and look at where the hinges attach to the cabinet door and the cabinet frame. Are the screws loose?
Examine the Hinges: Are the hinges bent, rusted, or cracked? Do they appear worn out?
Door Alignment: Does the door hang crooked? Does it rub against the adjacent door or cabinet frame?
Tools and Materials You’ll Need:
Screwdriver (Phillips head is most common, but have a flathead handy too)
Wood filler (for stripped screw holes)
Wooden toothpicks or golf tees (for filling stripped holes)
Drill with a small drill bit (optional, for pilot holes)
New hinges (if current ones are damaged)
Level
Carpenter’s glue (optional)
Step-by-Step Repair for Loose Hinges:
1. Tighten Existing Screws: Start by simply trying to tighten all the screws holding the hinges to both the door and the cabinet. Often, this is all that’s needed.
2. Address Stripped Screw Holes: If a screw spins freely without tightening, the hole is stripped.
Method 1 (Toothpicks/Golf Tees): Remove the hinge from the stripped hole. Dip a few wooden toothpicks or a golf tee into wood glue or carpenter’s glue. Insert them into the stripped hole, breaking them off flush with the surface. Let the glue dry for about an hour. Then, drive the original screw back into the glued toothpicks, which will give the screw something to grip. You might want to pre-drill a small pilot hole for the screw.
Method 2 (Wood Filler): For a more permanent fix, especially on larger holes, use a wood filler. Follow the product’s instructions. Typically, you’ll clean out the hole, apply the filler, let it dry completely (this can take several hours), sand it smooth if needed, and then drill a new pilot hole before reinserting the screw.
3. Replace Damaged Hinges: If the hinges themselves are bent or broken, they need replacement.
Identify Hinge Type: Take a picture of your existing hinges and bring it to the hardware store. There are many types (e.g., overlay, inset, concealed). It’s best to find an exact match or a compatible replacement.
Remove Old Hinges: Unscrew the old hinges from both the door and the cabinet.
Install New Hinges: Position the new hinges and screw them into place. If you had to fill screw holes, make sure to pre-drill pilot holes for the new screws.
4. Adjusting for Sagging: Sometimes, even with tight screws, a small sag remains. Many modern hinges have adjustment screws.
Height Adjustment: This screw usually moves the door up or down.
Depth Adjustment: This screw moves the door in or out, helping it sit flush.
Left/Right Adjustment: This screw moves the door horizontally towards or away from the cabinet frame.
Experiment with these screws (usually one turn at a time) until the door hangs straight and closes properly. A level is your best friend here!
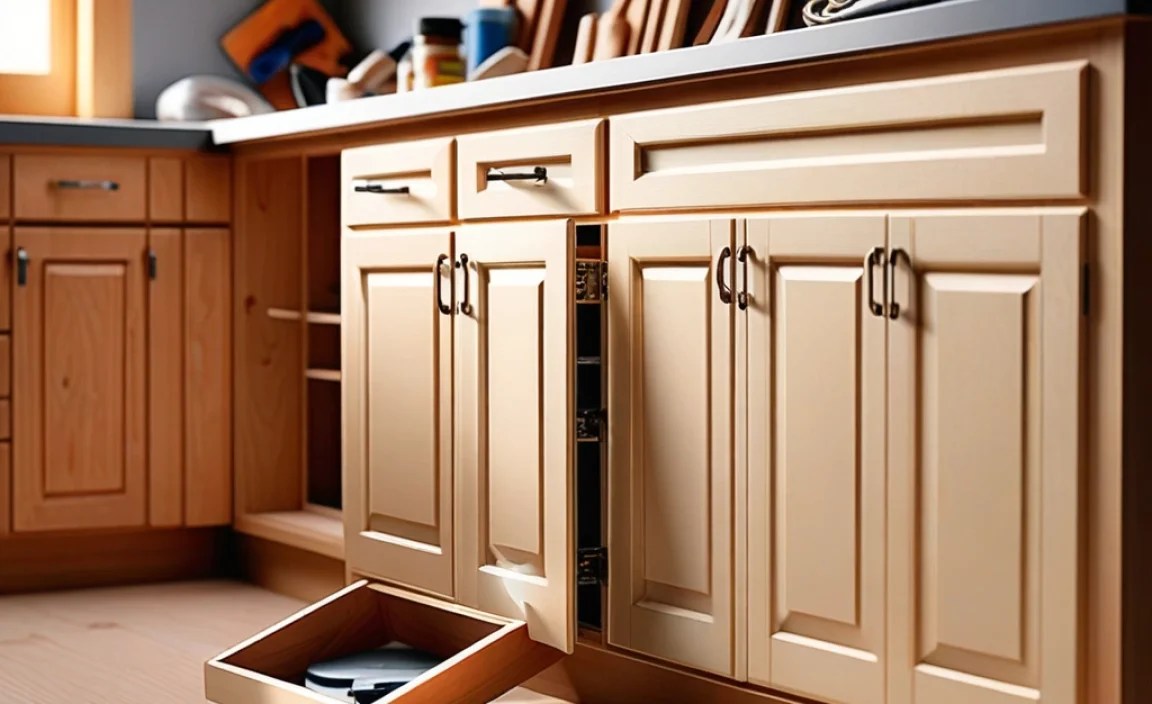
2. Sticky or Binding Cabinet Drawers
Drawers can become difficult to open or close due to a few common culprits: debris in the tracks, swollen wood, or misaligned drawer glides.
Assessing the Problem:
Check for Obstructions: Is there anything physically blocking the drawer’s path, like stray utensils or debris?
Inspect the Tracks/Glides: Look at the parts of the drawer and cabinet the drawer slides on. Are they dirty, bent, or worn out? Are the screws holding them in place loose?
Wood Swelling: In humid environments, wood can swell. Does the drawer feel tighter than usual, especially if it’s been humid?
Drawer Alignment: Is the drawer itself warped or misaligned?
Tools and Materials You’ll Need:
Vacuum cleaner with brush attachment
Screwdriver
Wax (paraffin, block wax, or even a candle) or silicone spray lubricant
Measuring tape
Wood shims or thin strips of wood (for adjustments)
Carpenter’s glue and clamps (for warped drawers)
New drawer glides (if current ones are damaged or worn)
Step-by-Step Repair for Sticky Drawers:
1. Clear Obstructions and Clean: Remove the drawer completely from its cabinet. Thoroughly vacuum out any dust, debris, or gunk from both the drawer glides/tracks and the cabinet interior.
2. Lubricate the Glides:
Wax Method: Rub a block of wax (like paraffin wax, or even the side of a candle) along the wooden glides of the drawer and inside the cabinet. Open and close the drawer to distribute the wax. This works wonderfully for wooden drawer slides.
Silicone Spray: For metal or plastic glides, a silicone spray lubricant can be very effective. Apply sparingly, making sure to get it into the moving parts of the glide.
3. Tighten Loose Glides: If the drawer glides (the metal or plastic runners) are loose, tighten the screws securing them to the drawer and the cabinet. If the screw holes are stripped, use the toothpick/wood filler method described for cabinet doors.
4. Address Swollen Wood: If the drawer is tight due to humidity, try opening and closing it repeatedly after lubrication. If it remains tight, you can try very carefully planing or sanding down the edges that are binding. Do this a little at a time, checking the fit frequently.
5. Correct Misalignment:
Shims: If the drawer is not sitting square, you might need to use thin wood shims. You can insert them behind the drawer glides in the cabinet or under the drawer itself to adjust its position. This requires patience and a good eye.
Warped Drawer: If the drawer box itself is warped, you might need to disassemble it, apply glue along the joints, clamp it square, and let it dry. This is a more involved repair and might be beyond a beginner’s scope.
6. Replace Worn-Out Glides: If the glides are bent, broken, or excessively worn, it’s best to replace them. Measure the old glides precisely and purchase new ones that match. Installation usually involves screwing the new glides into the pre-drilled holes.
3. Chipped or Damaged Cabinet Veneer/Laminate
Cabinet doors and drawer fronts are often covered with a thin layer of wood veneer or laminate. Scratches, chips, and peeling can make cabinets look old and uncared for.
Assessing the Problem:
Type of Material: Is it real wood veneer, or a synthetic laminate? This affects the repair method. Veneer is a thin layer of real wood; laminate is often a plastic-like or paper-based material simulating wood.
Extent of Damage: Is it a small scratch, a deep chip, or is a large piece peeling off?
Color Match: How important is a perfect color match?
Tools and Materials You’ll Need:
For minor scratches/chips:
Touch-up markers or pens (available in many wood tones)
Crayons or colored pencils that match the finish
Paste wax or furniture polish
For deeper chips or peeling veneer:
Wood glue or contact cement (depending on the material)
Putty knife or scraper
Sandpaper (fine-grit, 220 grit or higher)
Wood filler or auto body filler (for deep gouges)
Cloths
Hobby knife or razor blade
Clamps or heavy objects
Step-by-Step Repair for Chipped Veneer/Laminate:
1. Clean the Area: Thoroughly clean the damaged area and surrounding surface with a soft cloth and mild soap and water. Let it dry completely.
2. Repairing Minor Scratches (Veneer or Laminate):
Touch-up Markers/Pens: Select a marker that closely matches your cabinet’s color. Apply it carefully along the scratch, wiping away any excess immediately with a clean cloth.
Crayons/Colored Pencils: For very fine scratches, you can sometimes use a matching crayon or colored pencil to fill in the scratch. Rub it in gently.
Furniture Polish/Wax: For very superficial scratches, a good quality furniture polish or paste wax can sometimes make them disappear by filling and buffing.
3. Repairing Deeper Chips or Gouges (Veneer):
Fill the Void: If a piece of veneer is missing or there’s a deep chip, you’ll need to fill it. For shallow chips, wood filler is a good option. For slightly deeper damage, carefully use a putty knife to press wood filler into the gap. For very deep gouges, consider using a two-part auto body filler for extra durability, but be aware this can be harder to sand.
Shape and Sand: Once the filler or wood glue is completely dry (follow product instructions for drying times), carefully sand the repaired area smooth with fine-grit sandpaper. The goal is to make it flush with the surrounding veneer. Be very careful not to sand through the surrounding veneer.
Color Matching: After sanding, you’ll likely need to touch up the color. Use matching touch-up markers, stain, or paint on the filled area. It might take a few attempts to get a good match.
4. Repairing Peeling Veneer/Laminate:
Re-adhere: If the veneer or laminate is just peeling up at the edges, try to lift it as little as possible. Clean the underside of the peeled section and the surface it should adhere to.
Veneer: Use a thin bead of wood glue. Carefully slide a putty knife or a thin piece of plastic under the peel to work the glue in. Then, press the veneer down firmly.
Laminate: For plastic laminates, contact cement is often the best choice. Apply it thinly to both the underside of the peeling laminate and the cabinet surface. Let it dry until it’s tacky to the touch (follow the product’s instructions), then carefully press the laminate back down, working from the edge inward to avoid trapping air.
Secure While Drying: Use clamps or place heavy objects on the repaired area to keep it pressed down while the adhesive dries. If using wood glue, you might need to protect the veneer surface with a scrap piece of wood under the clamp.
5. Finishing: Once the repair is dry and sanded (if necessary), you might need to refinish the area to match the rest of the cabinet. This could involve a light coat of matching stain, paint, or a clear topcoat.
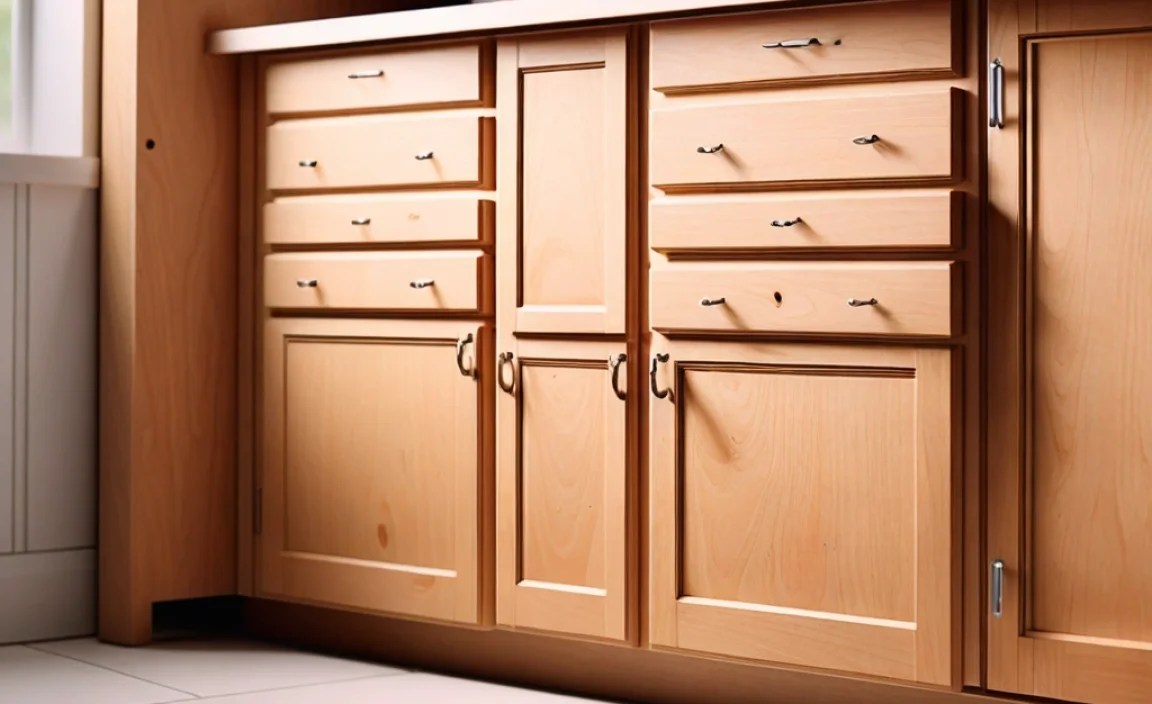
4. Loose or Damaged Drawer Fronts
Sometimes, the drawer front itself can separate from the drawer box, or the decorative elements on it might come loose.
Assessing the Problem:
Separation: Is the drawer front pulling away from the main box of the drawer?
Loose Trim/Panels: Are there decorative moldings or panels on the drawer front that are detaching?
Hardware: Are the screws for the drawer pull or handle loose or stripped?
Tools and Materials You’ll Need:
Carpenter’s glue
Clamps (bar clamps, pipe clamps, or strap clamps)
Screwdriver
Wood filler or toothpicks/golf tees
Hammer and small nails (very small finishing nails)
Wood putty (for covering nail heads)
Sandpaper
Touch-up stain or paint
Step-by-Step Repair for Loose Drawer Fronts:
1. Remove Drawer Front (if necessary): If the drawer front is severely detached, you might need to carefully remove it from the drawer box. Look for screws or nails holding it from the inside of the drawer box.
2. Apply Glue: Clean any old glue residue from both the drawer box and the back of the drawer front. Apply a generous, even coat of carpenter’s glue to the surfaces that will be joined.
3. Clamp Securely: Realign the drawer front with the drawer box. Use clamps to hold them tightly together. Ensure the drawer front is perfectly square and flush with the drawer box. If you don’t have wood clamps, you can sometimes use heavy objects or a strap clamp tightened around the whole drawer.
4. Reinforce (if needed):
From the Inside: If possible, drive small finishing nails from the inside of the drawer box into the back of the drawer front. Predrill to avoid splitting the wood.
Reinforcing Blocks: For extra strength, especially on older drawers, you can glue and nail small wooden blocks in the inside corners where the drawer front meets the box.
5. Address Hardware Holes: If the screws for the drawer pull are stripped, use the toothpick or wood filler method to repair the holes before reattaching the hardware.
6. Clean Up and Dry: Wipe away any excess glue that squeezes out with a damp cloth. Let the glue dry completely according to the manufacturer’s instructions (usually 24 hours for full strength).
7. Finishing Touches: Once dry, remove the clamps. If you used nails and they weren’t fully countersunk, you can gently tap them down. Cover any nail heads or small imperfections with wood putty, let it dry, then sand smooth. Touch up the area with matching stain or paint if needed.
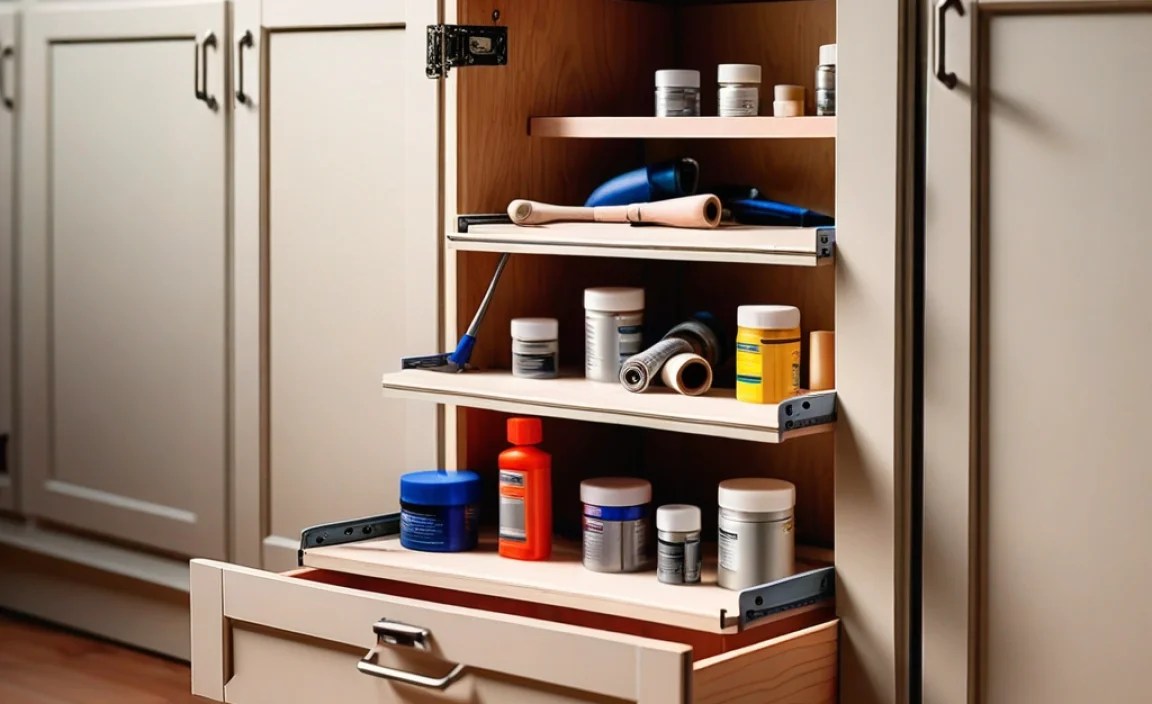
5. Sagging Cabinet Shelves
Over time, heavy items can cause cabinet shelves to sag in the middle.
Assessing the Problem:
Shelf Material: Is it solid wood, particle board, or a veneer-covered composite? Particle board and composites are more prone to sagging.
Support: Does the shelf rest on pegs, or is it fixed? Are the pegs or supports secure?
Visible Sag: Is the shelf visibly bowed?
Tools and Materials You’ll Need:
Shelf support pegs (if applicable)
Wood glue
Clamps
Sandpaper
Wood filler or epoxy filler
A piece of wood (e.g., a 1×2 or wood strip) for reinforcement
Step-by-Step Repair for Sagging Shelves:
1. Remove the Shelf: Take everything off the shelf and remove it from the cabinet. If it rests on pegs, simply pull the pegs out. If it’s fixed, you might need to unscrew it.
2. Inspect for Damage: Check the shelf for any cracks or splits, especially along the edges or where it might be breaking.
3. Reinforce from Below: This is the most effective fix for permanently sagging shelves.
Measure and Cut: Cut a piece of wood (like a 1×2 or a decorative trim piece) that is slightly shorter than the width of the shelf. The extra length will allow it to fit snugly at the front and back.
* Attach Reinforcement: Lay the shelf face down. Apply a generous amount of carpenter’s glue along the underside edge/front of the shelf. Position the wooden strip along this edge and clamp it tightly in place. Let it dry completely. This provides a strong edge that resists bowing. You can do this on both the front and/or back edge of the shelf.
4. Repair Cracks: If there are any cracks, fill them with wood glue and clamp them shut while they dry. For more severe cracks, you might need to use epoxy filler. Sand smooth once dry.
5. Address Sagging Particle Board: If the shelf is made of particle
