
Have you ever stepped into your shower and felt a crack under your feet? It’s surprising how something so small can create a big problem. A cracked shower base can lead to water leaks, mold, and even expensive repairs. But don’t worry! Repairing a cracked shower base is easier than you might think.
Picture this: your favorite relaxing shower gets interrupted by a puddle of water on the floor. Suddenly, your peaceful time turns into a stressful cleanup. What if I told you that with a few simple steps, you can fix it yourself? Many people don’t realize that they can tackle this task without hiring a professional.
In this article, we will show you how to repair a cracked shower base. You’ll learn about the materials needed, step-by-step instructions, and some handy tips. Let’s dive in and get your shower back to its perfect state!
How To Repair Cracked Shower Base: Step-By-Step Guide

Repair Cracked Shower Base
Repairing a cracked shower base is not as hard as it seems. First, clean the area well to remove dirt and soap scum. Next, use a waterproof epoxy or a specific repair kit designed for shower bases. Did you know that small cracks can lead to bigger problems? Fixing them quickly helps avoid leaks. A little time spent on repairs can save money later. Keep your shower looking great and functioning well by repairing those pesky cracks!
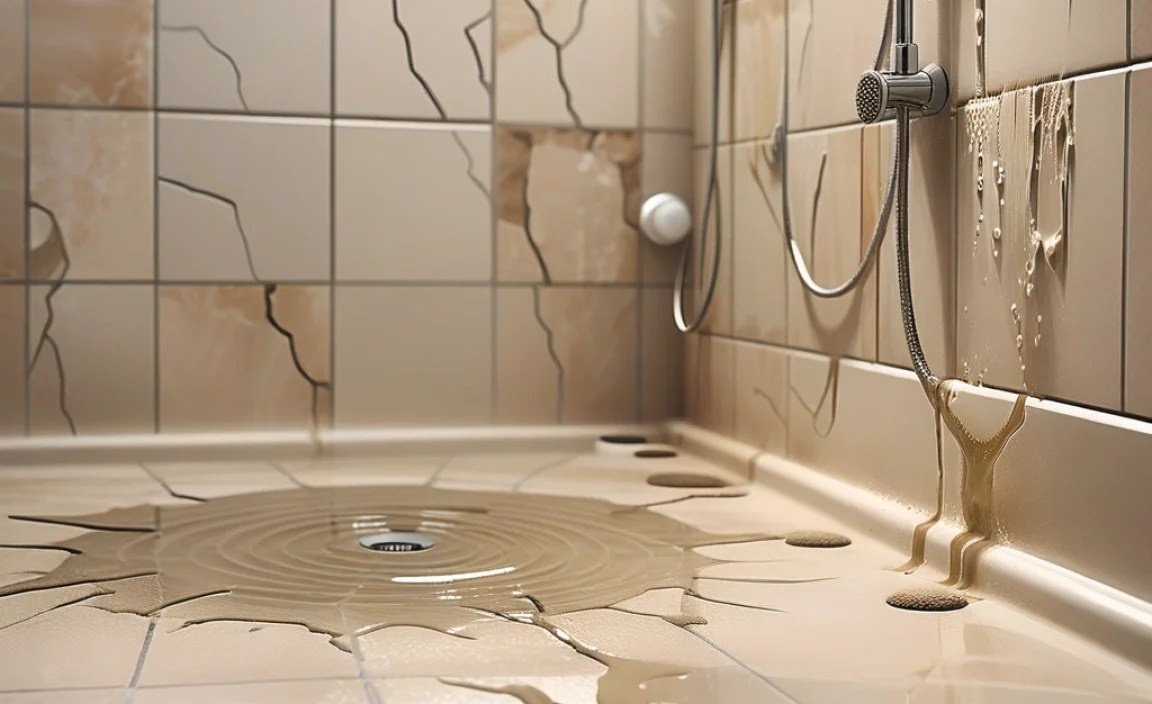
Identifying Signs of a Cracked Shower Base

Common symptoms that indicate a crack (leaks, water pooling, strange sounds).. How to visually inspect your shower base for cracks..
Look for signs that your shower base may be cracked. Common symptoms include:
- Leaks: Water seeping from the base is a strong indicator.
- Pooling: Water gathers around the shower, which shouldn’t happen.
- Strange sounds: Listen for unusual noises when you use the shower.
You can visually inspect your shower base for cracks. Check for:
- Visible gaps or lines in the base.
- Areas that seem warped or uneven.
- Water stains around the edges.
Staying attentive to these signs can help address issues early.
What are the common signs of a cracked shower base?
Common signs of a cracked shower base include leaks, water pooling, and unusual sounds. Noticing these can help you take action before the problem worsens.
Preparing for the Repair Process
Tools and materials needed for repairing a cracked shower base.. Safety precautions to take before starting the repair..
Before starting to fix a cracked shower base, gather your tools and materials. You will need:
- Epoxy or shower base repair kit
- Sandpaper
- Putty knife
- Cloth or sponge
- Masking tape
Safety is very important. Make sure to wear gloves to protect your hands. You should also wear a mask to avoid breathing in harmful dust. Keep a first-aid kit handy, just in case. Following these steps helps keep you safe while you repair your shower base!
What tools do I need to repair a cracked shower base?
You will need a few simple tools to fix the crack. Tools required include epoxy, sandpaper, a putty knife, and tape.
Step-by-Step Guide to Repairing a Cracked Shower Base
Detailed instructions for repairing fiberglass and acrylic bases.. Tips for repairing tiled shower bases..
Fixing a cracked shower base is easier than you might think! Here’s how you can tackle both fiberglass and acrylic bases:
- Clean the area well with soap and water.
- Lightly sand the crack edges to make it smooth.
- Mix a special repair kit according to the instructions.
- Apply the mixture to the crack, filling it completely.
- Let it cure for the time stated on the package.
For tiled shower bases, follow these steps:
- Remove loose tiles carefully.
- Fill in cracks with grout or caulk.
- Replace tiles once the filler dries.
Remember, patience is key to get your shower shining again!
What is the easiest way to fix a shower crack?
The easiest way is to use a repair kit. It’s quick and comes with all the tools you need!
Preventive Measures to Avoid Future Cracks
Maintenance tips for shower bases.. The importance of proper installation to prevent cracks..
Keeping your shower base crack-free is easier than you think! Start with some simple maintenance tips. Regularly check for water buildup, which can sneak up like a ninja. Next, clean it often. Soap scum can wear it down over time. Proper installation is the superhero that saves your shower base from cracks. An expert installer ensures it sits right and handles weight better, reducing the chance of cracks. Remember, a well-placed shower base is as happy as a duck in water!
| Maintenance Tips | Importance of Proper Installation |
|---|---|
| Regularly check for water buildup | Handles weight better |
| Clean often to remove soap scum | Prevents stress on the base |
| Use gentle cleaning products | Reduces risk of cracks |
When to Call a Professional
Situations where DIY repairs may not be sufficient.. How to choose the right contractor for shower repairs..
Sometimes, small problems might be easy to fix yourself. But some issues require a professional’s help. Here are situations where you should call in an expert:
- If cracks are large or spreading quickly.
- When water leaks beneath the shower base.
- If mold starts to appear around your shower.
Choosing the right contractor is important. Look for someone with good reviews and experience. Ask friends for recommendations. A trusted expert will help repair cracked shower bases safely and properly.
How do I know when to hire a professional?
You should hire a professional if the crack is serious or water damage is visible. They have the tools and skills to fix the problem right.
Cost Analysis of Shower Base Repairs
Average costs associated with DIY repairs vs. professional help.. Factors that can influence repair costs..
Repairing a shower base can bring different costs. DIY repairs can be cheaper, usually ranging from $20 to $100. However, hiring a professional might cost $150 to $500. Why such a difference? Here are some factors:
- Materials needed
- Extent of damage
- Location of the repair
- Experience of the helper
Understanding these costs can help you choose the best option.
What are the common DIY materials needed for shower base repairs?
Common materials include sealants, caulk, and patches. These help fix cracks and prevent leaks. It’s wise to compare prices before buying. Remember, sometimes spending a bit more means a longer-lasting fix!
Frequently Asked Questions
Common queries regarding shower base repairs.. Answers to myths and misconceptions about shower maintenance and repairs..
Many people wonder how to deal with cracked shower bases. They often ask questions like, “Can I fix it myself?” and “Will it leak?” Here are some answers to clear up confusion. First, you can fix minor cracks yourself, but big ones might need a pro. Some think they should ignore a crack, but that could lead to bigger problems. Fixing it early saves time and cash later!
| Common Questions | Answers |
|---|---|
| Can I use duct tape? | Only if you want it to look super fancy! |
| Do I need special tools? | Not really, a few everyday tools work. |
| Will a patch last long? | Yes, if done right, it can last years! |
Conclusion
In conclusion, repairing a cracked shower base is essential for preventing leaks and damage. You can use a repair kit or call a professional for help. Always clean and dry the area before starting. If you’re unsure, consider reading more guides or watching videos for detailed instructions. Taking action now will keep your shower safe and looking good!
FAQs
What Are The Common Causes Of Cracks In A Shower Base?
Cracks in a shower base can happen for several reasons. Often, it’s due to too much weight on the base. If the shower base is not installed correctly, it can also crack. Sometimes, temperature changes can make the material snap. Lastly, old or worn-out materials can lead to cracks too.
What Materials And Tools Are Required For Repairing A Cracked Shower Base?
To fix a cracked shower base, you need some special materials and tools. Get a repair kit made for shower bases. You will also need sandpaper to smooth the area. A putty knife helps apply the repair sticky stuff. Finally, use a cloth to clean everything up.
How Can I Determine If The Crack In My Shower Base Is Repairable Or If I Need A Full Replacement?
To see if the crack in your shower base can be fixed, first check how big it is. If the crack is small and feels smooth, you can probably repair it. If the crack is big or jagged, you might need to replace the whole shower base. Also, look for any leaks. If you see water coming out, that’s a sign you need a new one.
What Is The Step-By-Step Process For Repairing A Cracked Fiberglass Or Acrylic Shower Base?
To repair a cracked fiberglass or acrylic shower base, follow these steps: 1. First, clean the area around the crack with soap and water. 2. Then, dry it completely with a towel. 3. Next, apply a fiberglass repair kit over the crack. Follow the instructions on the kit. 4. Smooth it out with a plastic knife or tool. 5. Finally, let it dry for the time recommended on the kit, and then you can use the shower again!
Are There Any Recommended Products Or Sealants Specifically Designed For Shower Base Repairs?
Yes, there are special products for fixing shower bases. You can use silicone sealant to fill gaps. Look for ones made for bathrooms. Products like Gorilla Waterproof Caulk or DAP Kitchen and Bath Sealant are good choices. Always follow the instructions on the label for the best results.
