
Rotating bin composting problems can range from slow decomposition to unpleasant odors and pests. With the right understanding and simple solutions, you can overcome these issues, ensuring you get nutrient-rich compost efficiently and without hassle for your garden.
Welcome to the world of composting! If you’ve jumped into rotating bin composting, you might have hit a few snags. Don’t worry, it’s totally common. Many gardeners find their compost piles aren’t turning into black gold as quickly as they hoped, or worse, they attract unwanted guests. But here’s the good news: these problems are usually easy to fix. We’re going to walk through the most common issues and give you straightforward solutions. This guide will help you get your compost bin working like a champ, turning your kitchen scraps and yard waste into something amazing for your plants.
Why Rotating Bin Composting Is Popular

Rotating compost bins have gained a lot of love from home gardeners, and for good reason! They’re designed to make the composting process faster and easier than traditional piles. The big advantage is the ability to turn or “aerate” your compost with a simple spin. This mixing is crucial because it introduces oxygen, which speeds up decomposition and helps prevent those stinky, anaerobic (low-oxygen) conditions that can make your compost smell bad. Plus, many rotating bins are enclosed, which can help keep pests out and maintain moisture levels. They’re a neat and tidy way to compost, fitting well in smaller yards or even on patios.
Common Rotating Bin Composting Problems and Solutions
Even with the best intentions and a fancy rotating bin, things can occasionally go sideways. Don’t let a few hiccups discourage you! Understanding what’s happening inside your bin is the first step to fixing it. Most problems boil down to an imbalance in the key ingredients: greens, browns, moisture, and aeration. Let’s break down the most frequent issues and how to solve them.
Problem 1: My Compost Isn’t Breaking Down (Slow Decomposition)
This is perhaps the most common frustration. You’ve been diligently adding materials, turning the bin, but it seems like nothing is happening. Your heap just sits there, looking exactly the same week after week.
What Causes Slow Decomposition?
- Too many “browns” (carbon-rich materials): Your compost needs a good balance of both “greens” (nitrogen-rich) and “browns.” If you have too many brown materials like dry leaves, cardboard, or straw, the microorganisms that break down the waste won’t have enough nitrogen to fuel their work.
- Not enough moisture: Compost microbes need water to live and thrive. A compost pile that’s too dry will slow down dramatically. Think of it like trying to bake a cake with no liquid – it just won’t come together.
- Too few “greens” (nitrogen-rich materials): Conversely, not enough greens means the microbes don’t have enough “food” to reproduce and work efficiently.
- Pieces are too large: The smaller the pieces of organic matter, the more surface area there is for microbes to attack. Big chunks take a very long time to break down.
- The compost is too cold: Microbes work best in moderate temperatures. If your bin is in a location that gets very cold for extended periods, decomposition will slow down considerably.
Solutions for Slow Decomposition
- Adjust the Green-to-Brown Ratio: Aim for a ratio of roughly 2-3 parts browns to 1 part greens by volume. If your compost is mostly browns, add more kitchen scraps (fruit and veggie peels, coffee grounds) or fresh grass clippings. If it’s too green, add shredded newspaper, dry leaves, or sawdust. It’s like a recipe; getting the proportions right is key!
- Add Moisture: Your compost should feel like a damp, wrung-out sponge. If it’s dry, add water. You can use a hose with a spray nozzle or a watering can. Turn the compost as you add water to ensure it’s evenly distributed. Don’t let it get soaking wet; just moist.
- Chop or Shred Materials: Before adding larger items like stalks, thick leaves, or cardboard, consider breaking them down. You can use scissors, a shredder, or even just tear them into smaller pieces. This significantly increases the surface area for decomposition.
- Give it a Boost: If you suspect a lack of active compost microbes, you can add a shovel-full of finished compost from another source or even a scoop of garden soil. This introduces beneficial microorganisms to kickstart the breakdown process.
- Consider Location: While rotating bins are often used year-round, extreme cold will slow things down. If possible, position your bin in a sunny spot in winter to absorb some warmth.
Problem 2: Your Compost Smells Bad (Ammonia or Rotten Egg Odors)
Nobody wants a stinky compost bin! Unpleasant smells are a clear sign that something is out of balance, usually related to oxygen or the types of materials you’re adding.
What Causes Bad Smells?
- Too many “greens” (nitrogen-rich materials): An excess of green materials, especially things like grass clippings or kitchen scraps, can lead to an ammonia smell. This happens when there’s so much nitrogen that the microbes are overwhelmed and produce ammonia gas.
- Lack of aeration (anaerobic conditions): If the compost is compacted and doesn’t get enough air, it can become too wet and anaerobic. This is where the dreaded rotten egg smell (hydrogen sulfide) comes from, as certain bacteria thrive in low-oxygen, wet environments.
- Composting prohibited items: Adding meat, dairy products, oily foods, or diseased plants can lead to foul odors and attract pests. These items are best avoided in a typical home compost bin.
Solutions for Bad Smells
- Add More “Browns”: If you’re smelling ammonia, it’s time to balance out those greens. Add a generous amount of brown materials like shredded cardboard, dry leaves, straw, or sawdust. Mix them in well.
- Turn Your Bin More Often: The best way to combat anaerobic conditions is aeration. Turn or rotate your bin more frequently. This introduces oxygen, allowing aerobic bacteria to take over and break down the material much more pleasantly. Make sure the material isn’t too compacted.
- Ensure Proper Moisture: A common culprit for anaerobic smells is a waterlogged compost bin. If it’s too wet, add more brown materials to absorb excess moisture, and turn it to aerate.
- Remove Offensive Items: If you accidentally added meat, dairy, or oily foods, try to remove them if possible. Avoid these items altogether in your compost bin. Consult resources like the EPA’s composting guidelines for what is best to compost. EPA Composting at Home.
Problem 3: Your Compost Is Too Wet or Too Dry
Moisture is a Goldilocks situation for compost – it needs to be just right. Too much or too little can hinder the process. Rotating bins can sometimes make it easier to over- or under-water.
What Causes Improper Moisture Levels?
- Too Wet: Too many nitrogen-rich “greens” can release a lot of moisture. Overwatering from rain or manually adding too much water can also lead to a soggy mess. A densely packed bin with poor airflow will also retain too much moisture.
- Too Dry: Composting in very hot and dry climates, or not adding enough water, will lead to extremely dry conditions. Too many carbon-rich “browns” (especially if they are very dry materials like straw or wood chips) can also absorb moisture faster than it can be replenished.
Solutions for Improper Moisture Levels
- For Too Wet Compost:
- Add more carbon-rich “brown” materials. These act like sponges to soak up excess moisture. Think shredded cardboard, dry leaves, straw, or sawdust.
- Turn or rotate the bin more frequently to improve airflow and help it dry out.
- If the bin is in an exposed location, consider covering it loosely during heavy rain. Ensure the bin has drainage holes.
- For Too Dry Compost:
- Add water gradually while turning the compost. You can use a hose with a spray nozzle or a watering can.
- Incorporate more nitrogen-rich “green” materials. Kitchen scraps and fresh grass clippings are good sources.
- If using very dry brown materials like wood chips or straw, consider pre-moistening them slightly before adding them to the bin.
Problem 4: Attracting Pests (Insects or Rodents)
While some insects are beneficial for composting, you don’t want your bin to become a buffet for rodents or flies.
What Causes Pest Attraction?
- Visible food scraps: If you can easily see exposed kitchen scraps or other appealing food items on the surface, it’s an open invitation.
- Composting prohibited items: Meat, dairy, oily foods, and pet waste are magnets for rodents and can cause foul odors that attract flies.
- Open or damaged bins: If your bin has large gaps, holes, or isn’t properly sealed, pests can easily get in.
- Compost is too wet and smelly: Foul odors, as we’ve discussed, can attract unwanted visitors.
Solutions for Pest Attraction
- Bury Your Scraps: Always cover fresh kitchen scraps with a layer of brown material. This helps mask the scent and makes them less visible.
- Avoid Problematic Items: Do not compost meat, bones, dairy products, greasy foods, or pet waste (except for specific types of composters designed for this). Stick to fruits, vegetables, coffee grounds, tea bags, eggshells, yard waste, and shredded paper/cardboard.
- Ensure Your Bin is Secure: Make sure your rotating bin is fully enclosed and has no large openings. Check for any damage that might allow access. Many bins are designed with rodent-resistant features.
- Maintain Proper Aeration and Moisture: A well-maintained compost bin that is not too wet and has a good balance of greens and browns is less likely to attract pests due to foul odors.
- Use Enclosures if Necessary: For persistent pest problems, consider placing your rotating bin inside a larger wire mesh enclosure, especially if you’re adding a lot of kitchen scraps.
Problem 5: Your Compost Is Too Hot or Too Cold
Temperature plays a vital role in the composting process. While heat is good, it can sometimes get too extreme, or conversely, not hot enough.
What Causes Temperature Issues?
- Too Hot: A compost pile can become “thermophilic” (heat-loving) and reach temperatures of 130-160°F (55-70°C). This is ideal for speedy decomposition and killing weed seeds and pathogens. However, if the pile is too dense, too wet, or has an overwhelming amount of nitrogen, it can get excessively hot and potentially damage beneficial microbes.
- Too Cold: In cooler weather, or if the compost mixture is too lean on nitrogen or too dry, it won’t heat up sufficiently. This significantly slows decomposition.
Solutions for Temperature Issues
- For Too Hot Compost:
- Turn or rotate the compost bin more frequently. This releases excess heat and helps distribute moisture and air.
- If it’s excessively wet, add more brown materials to absorb moisture and improve aeration.
- If the issue persists, you might have too much nitrogen. Add more brown materials to balance the green-to-brown ratio.
- For Too Cold Compost:
- Add more nitrogen-rich “green” materials to give the microbes more “food.”
- Ensure adequate moisture. If too dry, add water.
- Turn and mix the materials well. Break down larger chunks to increase surface area for microbial activity.
- Consider the location. In colder climates, a sunny spot is beneficial in winter. Insulating the bin with straw bales around it can also help retain heat.
The Ideal Rotating Bin Compost Mix
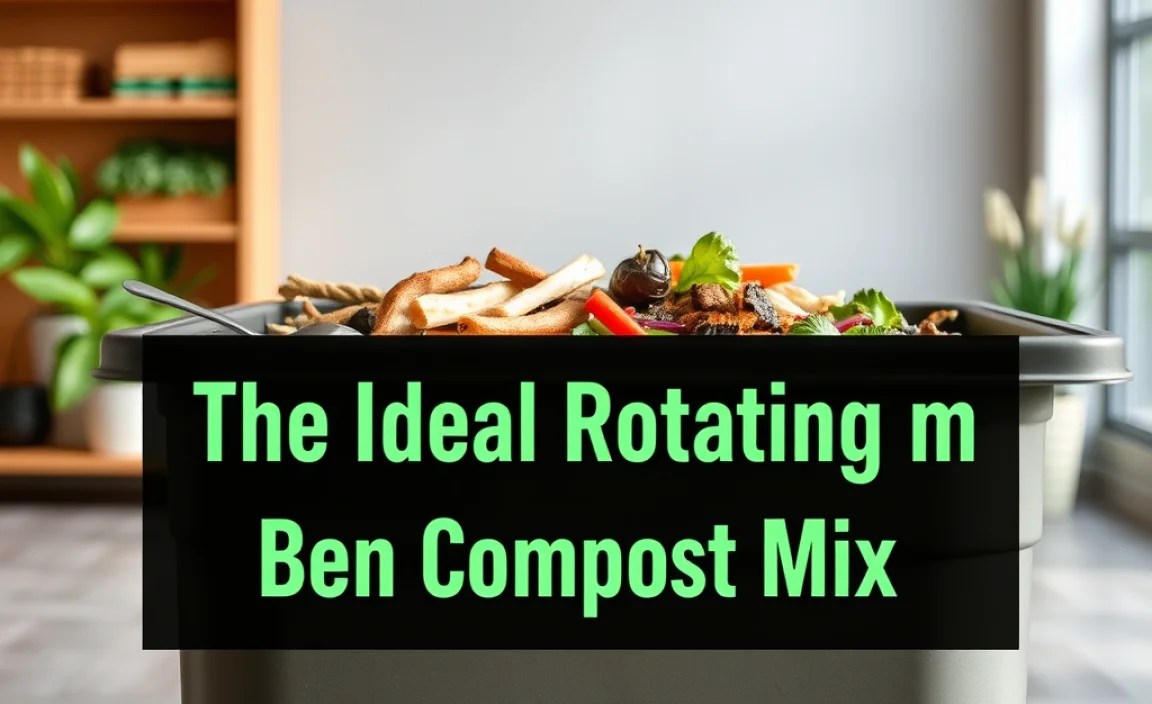
Getting the right mix is the secret to successful composting. Think of your compost bin as needing a balanced diet. You need a good blend of nitrogen-rich materials (“greens”) and carbon-rich materials (“browns”).
Greens (Nitrogen-Rich)
These provide the nitrogen that microorganisms need to multiply and work. They also help generate heat.
- Fruit and vegetable scraps
- Coffee grounds and tea bags
- Fresh grass clippings (in moderation, as too much can mat down and become anaerobic)
- Plant trimmings (soft stems, leaves)
- Manure from herbivores (cow, horse, rabbit, chicken – ensure it’s well-aged if possible)
Browns (Carbon-Rich)
These provide the carbon that microorganisms use as an energy source. They also add bulk and structure, allowing air to circulate.
- Dry leaves
- Shredded newspaper or cardboard (avoid glossy paper)
- Straw or hay
- Wood chips or sawdust (use in moderation, as they break down slowly and can tie up nitrogen)
- Pine needles (also in moderation)
- Eggshells (technically a source of calcium, but they have a structure that acts like browns)
Tip for the Perfect Mix
A good rule of thumb is to aim for about 2 to 3 parts browns to 1 part greens by volume. It’s not an exact science, and you’ll learn to eyeball it. If your compost is too wet and stinky, add more browns. If it’s dry and not heating up, add more greens and moisture.
Tools That Can Help Your Composting Journey

While a rotating bin is the star of the show, a few simple tools can make the process even smoother and more effective.
Essential Tools:
- Kitchen Compost Caddy: A small container with a lid to collect kitchen scraps before taking them out to the bin. Look for one with a charcoal filter to reduce odors.
- Pitchfork or Compost Aerator: Useful for breaking up clumps or turning larger, stationary compost piles, but also handy for helping to mix materials within the rotating bin if needed.
- Garden Gloves: Essential for keeping your hands clean and protected.
- Watering Can or Hose with Spray Nozzle: For adding moisture to a dry compost pile.
- Shredder (Optional): For quickly breaking down large amounts of cardboard or yard waste.
How to Use These Tools Effectively
- Kitchen Caddy: It’s your first line of defense against odors and fruit flies in the kitchen. Empty it regularly, preferably daily, into your main compost bin.
- Pitchfork/Aerator: While rotating bins are meant to be turned by spinning, sometimes materials can get compacted or clumped inside, especially if you haven’t added enough browns. A quick jab with a pitchfork before spinning can help break these up, improving aeration.
- Gloves: Always use them when handling compost materials, especially when adding or turning.
- Watering/Spraying: Add water while you are turning or mixing the compost. This ensures the moisture is evenly distributed, preventing pockets of dryness or excessive wetness. Aim for that “damp sponge” feel.
- Shredder: For faster composting, shredding your browns (like cardboard boxes or large dry.
