
Quick Summary: Don’t let a shower breakdown drain your budget! Simple DIY fixes for common issues like low water pressure, leaky faucets, and clogged drains are often achievable with basic tools and a few bucks, saving you plumber fees and restoring your shower’s comfort quickly.
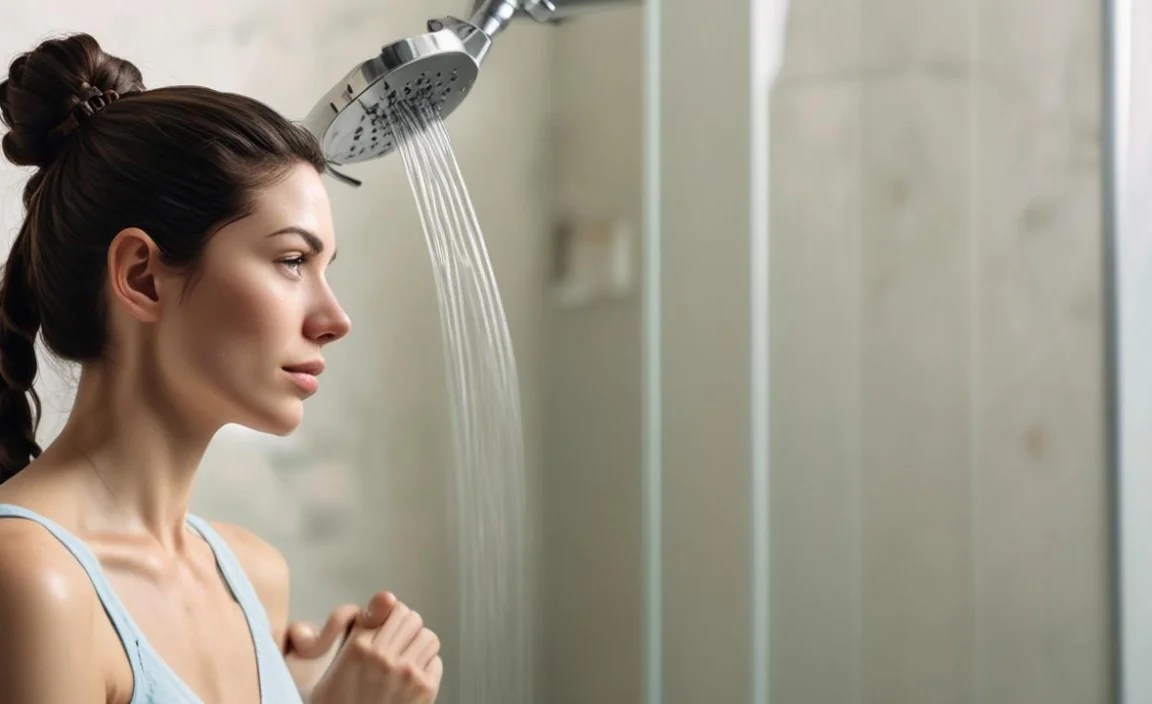
Ever stepped into your shower only to be greeted by a dribble instead of a downpour? Or perhaps a persistent drip that mocks your attempts to relax? Shower problems are incredibly common, and they can be a real headache. It’s easy to feel overwhelmed, thinking you’ll need to call a pro and shell out a good chunk of change. But the good news is, many common “shower breakdowns” are actually quite simple to fix yourself, often with just a few affordable tools and a bit of guidance. This guide will break down these issues and show you exactly how to tackle them, saving you time, money, and stress.
Common Shower Woes and How to Conquer Them

Your shower is a central part of your daily routine, a place for rejuvenation or a quick refresh. When it’s not working as it should, it disrupts that flow. Let’s look at the most frequent culprits and their budget-friendly solutions.
1. The Sad, Weak Showerhead: Low Water Pressure Explained
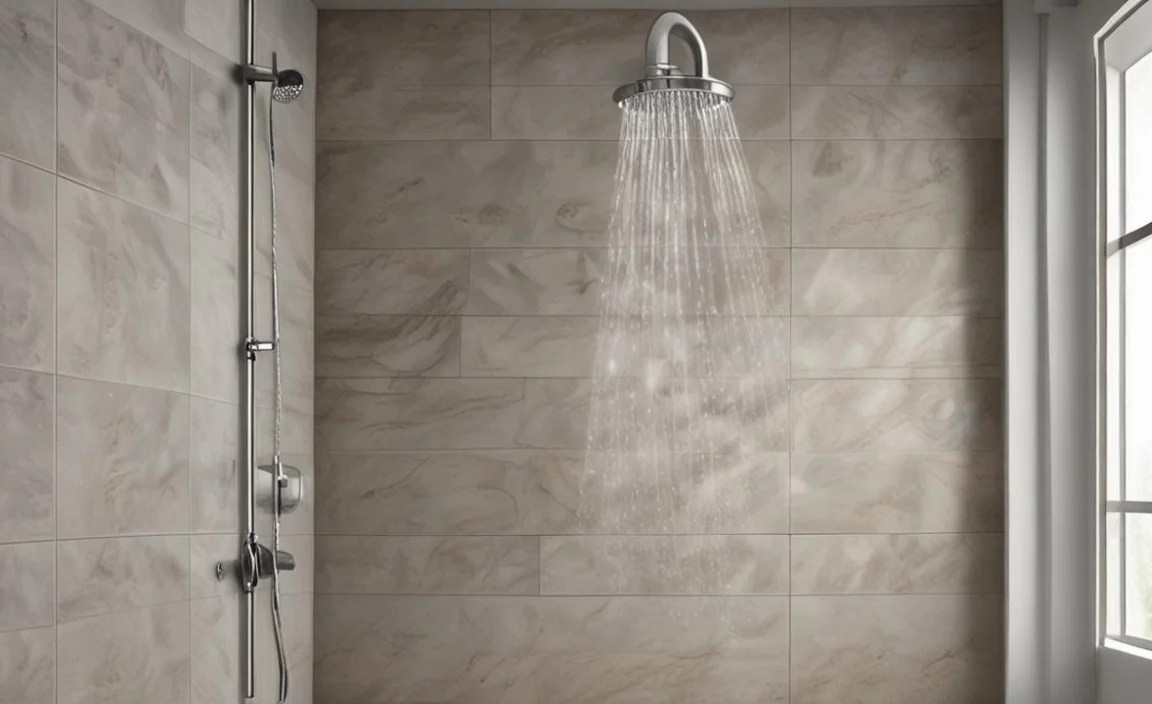
One of the most frustrating shower issues is when the water pressure is so low, it feels less like a shower and more like a gentle mist. This can be caused by several things, but the most common and easily fixable is a clogged showerhead. Over time, mineral deposits from your water supply (like calcium and lime) can build up inside the tiny holes of your showerhead, restricting water flow.
Why Does This Happen?
Hard water is the usual suspect. When water evaporates, it leaves behind these mineral deposits. In showerheads, these minerals harden, creating blockages. Other less common causes include kinks in your water supply line or issues with your home’s overall water pressure, but we’ll focus on the easiest fix first.
DIY Fix: Cleaning Your Showerhead

This is a super simple, affordable fix that can make a world of difference. You likely won’t need any special tools!
What You’ll Need:
- A plastic bag (like a sandwich bag or gallon bag)
- A rubber band or twist tie
- White vinegar
- An old toothbrush or a soft cloth
- A wrench (optional, for stubborn showerheads)
- Plumber’s tape (optional, if you need to re-seal the connection)
Step-by-Step Cleaning Process:
- Prepare the Bag: Pour enough white vinegar into the plastic bag to fully submerge the showerhead.
- Attach the Bag: Carefully place the bag over the showerhead, ensuring the entire head is immersed in the vinegar. Secure the bag tightly around the shower arm with the rubber band or twist tie.
- Let It Soak: Leave the bag in place for at least 4-8 hours, or preferably overnight. The acidity of the vinegar will work to break down the mineral deposits.
- Remove and Rinse: After soaking, remove the bag. You might see some of the mineral deposits floating in the vinegar.
- Scrub Gently: Use an old toothbrush or a damp cloth to gently scrub away any remaining loosened debris from the showerhead nozzles. If your showerhead is particularly stubborn, you can remove it first. Gently grip the base of the showerhead with a wrench (wrap a cloth around it to prevent scratches) and twist it counter-clockwise. Clean it more thoroughly, then reattach it using plumber’s tape on the threads for a good seal.
- Flush the System: Turn on the shower water to a hot setting for a minute or two. This will flush out any remaining loose particles from the showerhead and the pipe.
- Test It Out: Enjoy your revitalized shower experience!
This method is incredibly effective for most minor clogs and costs virtually nothing if you have vinegar and a plastic bag on hand.
2. The Annoying Drip, Drip, Drip: Fixing a Leaky Shower Faucet

A dripping shower faucet isn’t just annoying; it’s a waste of water and can even increase your water bill. This common problem usually points to a faulty washer, O-ring, or cartridge inside the faucet handle. These small rubber or plastic parts wear out over time and need replacement.
Why Does This Happen?

The constant turning on and off of the faucet, along with water pressure, causes wear and tear on the internal components. These parts are designed to create a seal, and when that seal weakens, water can seep through.
DIY Fix: Replacing Faucet Washers and O-Rings

This repair might sound a bit more involved, but it’s well within the reach of a DIY beginner. The exact steps can vary slightly depending on your faucet type (compression, cartridge, ball, or ceramic disk), but the principle of replacing a worn-out seal remains the same. We’ll focus on the most common compression faucet for this example.
What You’ll Need:
- Screwdriver set (Phillips and flathead)
- Adjustable wrench
- Pliers (needle-nose can be helpful)
- Replacement washers and O-rings (it’s best to buy a variety pack or know your faucet model to get the exact sizes)
- Plumber’s grease (silicone-based)
- Rag or towel
- A small bucket or container
Step-by-Step Repair Process (for a Compression Faucet):
- Turn Off the Water: This is the MOST IMPORTANT step for safety. Find the main water shut-off valve for your house or, if possible, shut off the hot and cold water supply valves specifically for your shower/bathroom. Open the faucet to drain any residual water.
- Remove the Handle: Look for a decorative cap on the faucet handle. Pry it off gently with a flathead screwdriver. You’ll find a screw underneath; remove it. Then, pull the handle straight off the valve stem. It might be stuck, so a gentle wiggle or a specialized “handle puller” (available at hardware stores) can help.
- Expose the Stem: Once the handle is off, you’ll see a trim piece or escutcheon. This might be screwed on or simply decorative. Remove any visible screws and carefully pull it away to expose the faucet stem.
- Unscrew the Packing Nut: Use your adjustable wrench to turn the large hexagonal nut (packing nut) counter-clockwise to loosen and remove it.
- Extract the Stem: With the packing nut removed, you should be able to pull or unscrew the valve stem assembly out of the faucet body. Keep track of any small parts that come out with it.
- Identify and Replace Worn Parts: At the bottom of the stem, you’ll find a small screw holding a rubber washer. Remove the screw and the old washer. Replace it with a new, compatible washer. Also, check for any O-rings around the stem body; replace them if they look worn, cracked, or flattened. Apply a thin layer of plumber’s grease to the new washer and O-rings.
- Reassemble: Insert the stem back into the faucet body. Re-screw the packing nut, tightening it enough to prevent leaks but not so much that the handle is stiff. Reattach the trim piece and the faucet handle, securing them with their screws.
- Restore Water and Test: Slowly turn the water supply back on. Check carefully for any leaks around the handle and stem. If there are no drips from the spout, you’ve successfully fixed your leaky faucet!
For other faucet types, the process involves replacing a cartridge or seals within the faucet body. Many manufacturers provide diagrams for their specific models online, which can be a lifesaver. A quick search for your faucet brand and model number followed by “repair diagram” or “replacement parts” can be very helpful.
3. The Slow Drain: Clearing Those Clogged Shower Drains

A shower that drains slower than molasses is usually due to a buildup of hair, soap scum, and other debris in the drainpipe. This gunk traps water and prevents it from flowing away smoothly. It’s a common problem, especially if multiple people use the shower regularly.
Why Does This Happen?

Hair, especially long hair, is sticky and catches soap scum and lint from body washes and loofahs. Over time, this accumulation forms a dense clog. Additionally, if you use bar soap, the residue can contribute to the buildup. For a comprehensive guide on drain maintenance, the EPA’s WaterSense program offers excellent, reliable tips on water conservation and pipe protection.
DIY Fix: Unclogging Your Shower Drain
You don’t always need harsh chemical drain cleaners, which can be bad for your pipes and the environment. Here are safer, more effective methods:
What You’ll Need:
- Rubber gloves
- Old rags or towels
- Screwdriver or pliers (to remove the drain cover)
- Drain snake (also called an auger) or a bent coat hanger
- Plunger (optional, but can be effective)
- Boiling water
- Baking soda and vinegar (for a natural option)
Step-by-Step Unclogging Process:
- Remove the Drain Cover: Most shower drain covers are held in place by a screw or simply rest on top. Carefully remove any screws with a screwdriver or pry the cover up with pliers or a flathead screwdriver.
- Initial Hair Removal: Reach into the drain opening with your gloved fingers or use a coat hanger bent into a hook shape to pull out any visible clumps of hair and gunk. This step alone can sometimes solve minor clogs.
- Use a Drain Snake (Auger): This is the most effective tool for deeper clogs.
- Insert the Snake: Feed the end of the drain snake into the drainpipe.
- Crank and Pull: Gently push the snake further in until you feel resistance. Crank the handle of the snake. This will cause its coiled end to grab onto the clog.
- Retrieve the Clog: Slowly pull the snake back out, bringing the debris with it. You may need to repeat this process a few times.
A basic drain snake is a very inexpensive tool that pays for itself quickly. You can find them at any hardware store.
- Plunger Power (Optional): If you don’t have a snake or the clog is near the surface, a plunger can work. Ensure there’s enough water in the shower base to cover the plunger cup. Create a tight seal with the plunger over the drain and pump vigorously up and down several times.
- The Baking Soda & Vinegar Method: This is a natural and effective alternative for less severe clogs.
- Pour about 1/2 cup of baking soda down the drain.
- Follow with 1/2 cup of white vinegar.
- The mixture will fizz and bubble. Immediately cover the drain with a stopper or rag to direct the action downwards.
- Let it sit for 30-60 minutes.
- Flush the drain with boiling water. Be cautious with boiling water, especially on PVC pipes.
This method helps break down soap scum and grime.
- Flush with Hot Water: After attempting any of these methods, pour a kettle of very hot or boiling water down the drain to flush away any remaining loosened debris.
- Replace the Cover: Once the water is draining freely, reattach the drain cover.
If these methods don’t work, the clog might be further down the main drain line. While professional help might be needed for very stubborn clogs, these DIY steps resolve the vast majority of shower drain issues.
4. The Loose Handle or Faucet Body: Tightening Things Up

Sometimes, a “shower breakdown” isn’t a functional failure but a physical one – a wobbly handle or a faucet base that feels loose. While this might seem minor, it can lead to bigger problems if left unchecked, like a damaged valve or even water leaks behind the wall.
Why Does This Happen?

Over time, the screws that hold your faucet handle or trim plate in place can loosen due to vibration from the water flow and general use. The mounting nuts that secure the faucet body to the wall behind the fixture can also loosen.
DIY Fix: Securing Loose Fixtures

This is one of the easiest fixes and requires minimal tools.
What You’ll Need:
- Screwdriver set (appropriate for your screws)
- Adjustable wrench or pliers
- Rag
Step-by-Step Tightening Process:
- Identify the Loose Part: Wiggle the faucet handle and the main faucet body to pinpoint exactly where the looseness is coming from.
- Tighten Handle Screws: If the handle is loose, look for a set screw, often located on the underside of the handle, or pry off a decorative cap to access a screw holding the handle to the stem. Tighten these screws firmly.
- Tighten Trim Plate/Escutcheon: If the decorative plate around the handle is loose, check for screws attaching it to the wall. Tighten these securely.
- Secure the Faucet Body: For a loose faucet body, you might need to remove the handle and trim plate to access the mounting hardware behind the wall. There are typically nuts or screws that secure the faucet body. Carefully tighten these. Be cautious not to overtighten, as this can damage the pipes or wall.
- Test the Stability: Once all accessible screws and nuts are tightened, check the faucet handle and body for stability.
This simple tightening can prevent more significant damage and restore the solid feel of your fixtures.
5. The Water Temperature Gamble: Fixing Inconsistent Hot Water

Is your shower a roulette wheel of scalding hot and freezing cold? Inconsistent water temperature can be a real shock, especially in the morning. While complex plumbing issues or a faulty water heater thermostat can be the cause, sometimes simpler issues are at play within the shower valve itself.
Why Does This Happen?
Inside your shower valve (often called a mixing valve), there are mechanisms that blend hot and cold water to your desired temperature. If worn-out parts like cartridges or seals within this valve are compromised, they can fail to regulate the mix properly, leading to erratic temperatures. Sometimes, issues with the corresponding hot water heater settings or sediment buildup in the heater can also contribute.
DIY Fix: Adjusting the Water Heater and Shower Valve Stop**

Important Safety Note: Adjusting your water heater is a more involved task. Always consult your water heater’s manual and prioritize safety. If you are uncomfortable, it’s best to call a professional. For more information on water heater safety, Energy.gov provides crucial guidance.
Adjusting the Water Heater Temperature:
- Locate the Thermostat: Most water heaters have a dial or a temperature adjustment option on the front or side.
- Check the Current Setting: The default setting is often higher than necessary. Settings above 120°F (49°C) increase the risk of scalding.
- Lower the Temperature: If your water heater seems to be set too high, gradually lower the temperature setting. Wait several hours for the water to adjust.
- Observe Shower Performance: Test your shower. If the water is too cold, slowly increase the temperature of the water heater until you reach a comfortable and safe level.
Adjusting the Shower Valve Temperature Limit (Anti-Scald Device):
Many modern shower valves have a built-in temperature limit stop to prevent accidental scalding. This is usually a plastic ring or cam that restricts the handle’s movement towards maximum hot water.
- Turn Off Water: Ensure the water supply to the shower is off.
- Remove Handle and Trim: As described in the leaky faucet section, remove the shower handle and any trim plates to expose the valve body.
- Locate the Stop: You’ll see a plastic disc or ring, often with notches, located behind the handle stem.
- Adjust the Stop: This often involves rotating the stop or adjusting its position. Some require a small screw to be loosened, then the stop rotated, and the screw re-tightened. The exact mechanism varies by manufacturer. Your shower valve’s manual will be key here.
- Reassemble and Test: Reassemble the handle and trim. Turn the water back on and test the temperature range of the shower. You may need to try a few adjustments to find the perfect balance.
This temperature-limiting feature is crucial for safety in homes with children or elderly individuals. If your shower valve doesn’t have this feature.
