
Planning your tiles layout in construction is key to a professional finish. This guide simplifies choosing patterns, calculating materials, and preparing your space for stunning, durable tile installations, giving you the confidence to tackle any tiling project from start to finish.
Laying tiles can seem a bit daunting, right? You see those perfectly straight lines or intricate patterns in showrooms and wonder how it’s done. Don’t worry! Getting your tiles laid out correctly is one of the most important steps for a beautiful and long-lasting result. A good layout prevents awkward cuts and ensures your room looks its best. We’re here to make this process super simple, breaking it down step-by-step so you can feel confident and achieve a fantastic finish without the stress.
We’ll cover everything from picking the right pattern to making sure you have enough tiles. Get ready to transform your space with perfectly laid tiles!
Why Tile Layout Matters: More Than Just Looks

Let’s be honest, the way your tiles are arranged, or the “tile layout,” is a big deal! It’s not just about aesthetics; it impacts the overall feel and functionality of a room. A well-planned layout can make a small bathroom feel more spacious or a large kitchen feel more cohesive. On the flip side, a poorly thought-out layout can lead to wasted materials, unsightly cuts, and a finish that just doesn’t look right. It’s the foundation of your tiling job, and getting it right from the start sets you up for success.
Think of it like planning a road trip. You wouldn’t just hop in the car and drive; you’d map out your route, know your stops, and make sure you have enough gas. Tile layout is the same principle – it’s about strategic planning before you get your hands dirty.
Understanding Basic Tile Layout Concepts
Before we dive into planning, let’s get familiar with some fundamental ideas in tile layout. These concepts will help you make informed decisions about your project.
The Field Tile: Your Main Player
The field tile is simply the primary tile you’ll be using in the main area of your room. It’s the tile that covers the largest expanse. The layout of this tile is what dictates the overall pattern and flow.
Control Joints and Expansion Gaps: The Unsung Heroes
It might sound technical, but control joints (often called expansion joints in flooring) and expansion gaps are vital for the longevity of your tile installation, especially in larger areas or where there are significant temperature changes. They allow the tile and substrate (the surface underneath) to move slightly without cracking. For residential floors, this typically involves leaving a small gap (e.g., 1/8 inch or 3mm) around the perimeter of the room, which is then covered by baseboards or trim. Tile Magazine offers more in-depth details on their importance and proper installation.
Grout Lines: The Connectors
Grout lines are the spaces between your tiles that are filled with grout. The width of your grout lines significantly impacts the final look. Thinner lines create a more seamless, modern appearance, while wider lines can add a decorative element or be practical for certain tile types like natural stone. Consistency in grout line width is crucial for a professional finish.
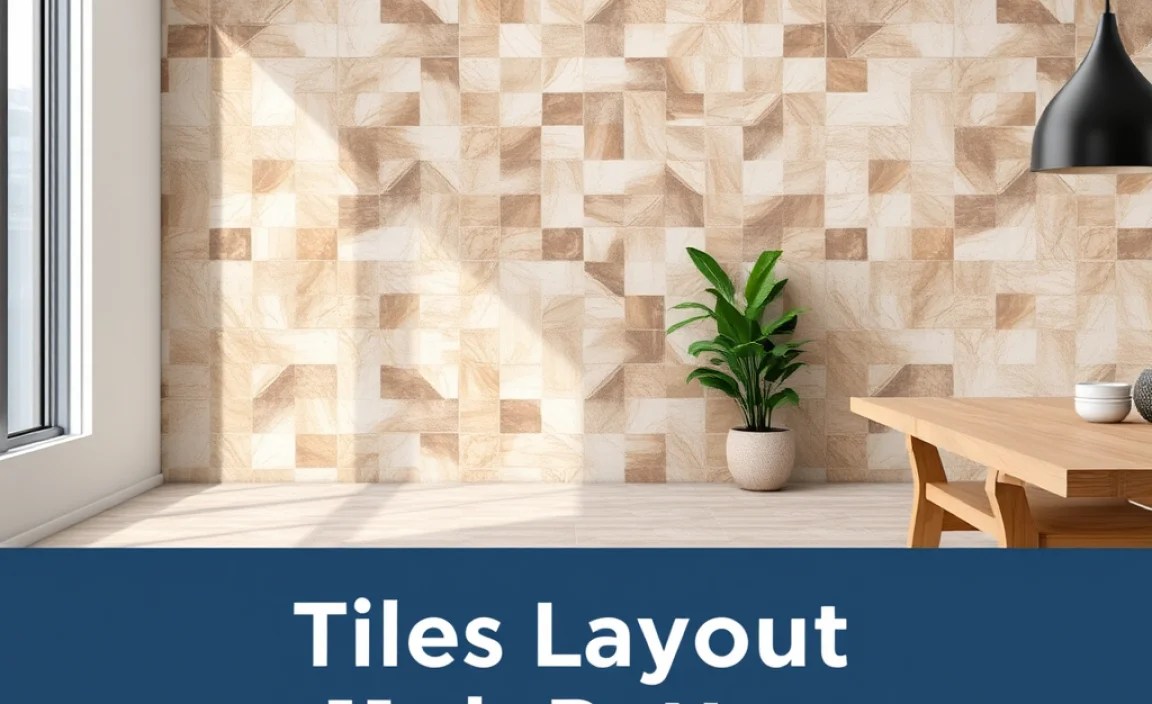
Common Tile Layout Patterns for Beginners
1. The Grid Layout (Straight Lay)
This is the most straightforward and popular layout, especially for beginners. Tiles are laid in straight, parallel rows and columns, creating a clean, uniform look. It’s perfect for square or rectangular tiles and works well in almost any room, from bathrooms to kitchens and hallways.
Pros:
- Extremely easy to plan and execute.
- Minimizes waste due to straightforward cuts.
- Visually expands small spaces by emphasizing straight lines.
- Complements most decor styles.
Cons:
- Can sometimes look a bit too simple or plain for some tastes.
- Can highlight imperfections in the walls or floor if they aren’t perfectly square.
2. The Staggered/Offset Layout (Brick Pattern)
Imagine a brick wall – that’s the idea here! Rectangular tiles are laid so that the end of one tile lines up with the center of the two tiles in the row next to it. A common variation is the 1/3 offset, where tiles are offset by one-third of their length. This adds visual interest and can mask slight irregularities in the subfloor better than a grid layout.
Pros:
- Adds visual interest and dynamism to a room.
- Effectively disguises minor subfloor imperfections.
- A classic look that suits many styles.
Cons:
- Requires more precise cuts, especially at edges.
- Can be trickier to get perfect than a grid layout.
- May not look as good with very small or very large rectangular tiles compared to medium sizes.
3. The Diagonal Layout
In this pattern, tiles are laid at a 45-degree angle to the walls. It creates a dynamic, eye-catching look and is fantastic for making a room feel larger and more open. It’s especially popular for square tiles in entryways or smaller rooms.
Pros:
- Can make a room appear larger and more spacious.
- Adds a sophisticated and visually appealing element.
- Excellent for drawing the eye towards a focal point.
Cons:
- Requires many angled cuts, which can be time-consuming and lead to more waste.
- Best reserved for those who are a bit more comfortable with cutting tiles.
- Can be more challenging to execute perfectly, especially around obstacles.
4. The Herringbone Layout
This is a more advanced pattern where rectangular tiles are laid in a V-shape, creating a visually striking zigzag effect. It’s a classic and elegant design that adds a lot of character.
Pros:
- Creates a highly decorative and sophisticated look.
- Can be used to create a sense of movement and flow.
- A timeless design that remains popular.
Cons:
- Significantly more complex to lay out and cut accurately.
- Requires precise measurement and careful execution.
- Can lead to substantial tile waste if not planned well.
- Not recommended for absolute beginners.
Choosing the Right Pattern for Your Project
Selecting the best tile layout is a blend of personal preference, room size, tile shape, and your skill level. Here’s how to decide:
Consider the Room’s Size and Shape
For smaller rooms, a grid or diagonal layout can make the space feel bigger. The diagonal layout, in particular, can trick the eye into perceiving more depth. In larger rooms, you have more flexibility. A straight lay can provide a sense of order, while a staggered or even a more complex pattern like herringbone can add visual interest without overwhelming the space.
Think About the Tile Shape and Size
- Square Tiles: Work well in a grid or diagonal layout.
- Rectangular Tiles: Are perfect for grid, staggered (brick), or herringbone patterns. Large rectangular tiles in a straight lay can look very modern and clean.
- Large Format Tiles: Often look best in a straight or staggered layout to maintain their impact and minimize grout lines.
- Small Tiles (Mosaics): Typically come pre-mounted on sheets, and their layout is determined by the sheet’s pattern.
Evaluate Your Skill Level (and Patience!)
If you’re new to tiling, start with the grid or a simple 1/3 staggered offset. These are forgiving and easier to get right. As you gain experience, you can tackle more intricate patterns like the diagonal or herringbone. Don’t underestimate the time and precision required for more complex layouts!
Match the Style of Your Home
A traditional home might suit a classic brick pattern, while a modern home could rock a clean grid with minimal grout lines. Consider the overall aesthetic you’re aiming for.
Preparing Your Space for Tile Layout

A successful tile installation relies heavily on preparation. Don’t skip these crucial steps!
1. Measure Your Space Accurately
Measure the length and width of the room. Note down the dimensions. It’s always best to measure twice! For irregular rooms, break them down into simpler rectangular sections and measure each one.
2. Dry Laying: The Best Way to Visualize
This is arguably the most important step for planning your layout. Before you mix any thinset or cut any tiles, lay out your tiles on the floor or wall surface without adhesive. This allows you to:
- Visualize the pattern.
- See where full tiles, cut tiles, and potentially awkward cuts will fall.
- Determine the best starting point.
- Make adjustments to the pattern if needed.
How to Dry Lay:
- Start from your chosen starting point (often the center of the room or a prominent focal wall).
- Lay out your first row of tiles, leaving consistent gaps for grout.
- Continue laying rows until you reach the opposite wall.
- See how much space is left. If it’s a very small sliver, you might adjust your starting point slightly to have larger, more balanced cuts on both sides.
- Repeat for the perpendicular direction to get a full picture.
3. Finding the Center of the Room
For many layouts, finding the center of the room is the most efficient starting point. Here’s how:
- Measure the length of two opposite walls. Find the midpoint of each.
- Snap chalk lines connecting these midpoints. These are your centerlines.
- Where the chalk lines intersect is the center of your room.
Starting from the center ensures that you have balanced cuts on opposite sides of the room, which generally looks more pleasing than having a tiny sliver of a tile on one side and a larger piece on the other.
4. Planning for Field Cuts and Edge Cuts
During your dry lay, pay close attention to where cuts will be necessary.
Field cuts are cuts made in the main field of the tile area.
Edge cuts are made at the perimeter of the room.
You want to minimize awkward cuts (like tiny slivers) and try to ensure that any cuts at the edges can be hidden by baseboards or trim where possible. If you’re planning to use decorative trim or a different type of tile (like a border), your layout will need to accommodate that as well.
Calculating Tile Quantities: Don’t Run Short!
Running out of tiles halfway through a project is a common and frustrating problem. Proper calculation is key.
Step 1: Calculate the Area of Your Room
Multiply the length of the room by its width. For example, a room that is 10 feet long and 12 feet wide has an area of 10 x 12 = 120 square feet.
Step 2: Calculate the Area of One Tile
If your tiles are square, like 12×12 inches (which is 1 sq ft), then one tile covers 1 square foot. If your tiles are 18×18 inches, that’s 1.5 feet x 1.5 feet = 2.25 square feet per tile. Always check the tile’s packaging for its coverage area.
Step 3: Divide Room Area by Tile Area to Get the Base Number
For a 120 sq ft room and 12″x12″ tiles (1 sq ft per tile): 120 sq ft / 1 sq ft/tile = 120 tiles.
Step 4: Add Extra for Waste and Cuts (Crucial!)
You must add extra tiles to account for cuts, breakage during installation, and potential future repairs. This is often called “wastage” or “overage.”
- Standard layout (grid, staggered): Add 10% for wastage.
- Diagonal or complex patterns (herringbone): Add 15-20% for wastage due to the increased number of angled cuts.
Continuing our example: For a grid layout in the 120 sq ft room, you need 10% extra tiles.
120 tiles * 0.10 (10%) = 12 extra tiles.
Total tiles needed = 120 + 12 = 132 tiles.
Table: Waste Percentage Guidelines
Here’s a quick guide:
| Tile Layout Type | Recommended Waste Percentage | For Example (100 Tiles Needed) |
|---|---|---|
| Straight Grid | 10% | 10 extra tiles (Total 110) |
| Staggered (Brick) | 10% | 10 extra tiles (Total 110) |
| Diagonal | 15% | 15 extra tiles (Total 115) |
| Herringbone | 20% | 20 extra tiles (Total 120) |
| Irregular Shapes/Many Obstructions | 20% | 20 extra tiles (Total 120) |
Always buy from the same dye lot to ensure color consistency, which is easy when you buy your extra percentage upfront.
Tools and Materials You’ll Need
Having the right tools makes the job much smoother and safer. Here’s a list of essentials for your tile layout and installation:
Essential Tools:
- Measuring Tape: For accurate room and tile measurements.
- Chalk Line or Laser Level: To establish straight reference lines on the floor or wall. A laser level can be a game-changer for accuracy.
- Pencil or Marker: For marking cut lines on tiles.
- Tile Saw (Wet Saw Recommended): Essential for making clean, precise cuts, especially for diagonal or complex layouts. For simpler jobs, a snap cutter might suffice for straight cuts, but a wet saw is an investment worth considering. Visit resources like Family Handyman for buying guides.
- Tile Nippers/Cutters: For small adjustments or creating curves.
- Notched Trowel: To spread the tile adhesive (thinset). The notch size depends on the tile size.
- Spacers: To ensure consistent grout lines.
- Level (2ft or 4ft): To ensure tiles are laid flat.
- Rubber Mallet: To gently tap tiles into place and set them evenly.
- Utility Knife: For scoring and cutting backer board or other materials.
- Safety Glasses: Absolutely crucial when cutting tiles.
- Work Gloves: To protect your hands.
- Knee Pads: For comfort and protection during long hours on the floor.
Key Materials:
- Tiles: Your chosen tiles.
- Tile Adhesive (Thinset Mortar): The correct type for your tiles and substrate.
- Grout: To fill the spaces between tiles.
- Backer Board (e.g., Cement Board or Specialty Tile Backer): For floors and walls that are not concrete, to provide a stable, water-resistant substrate.
- Screws: For attaching backer board.
- Silicone Sealant: For expansion joints and corners in wet areas.
Step-by-Step Guide to Laying Out Your Tiles
Now that you’re prepared, let’s get to the actual process of laying out your tiles. We’ll focus on the most common scenarios, assuming you’ve chosen a straightforward pattern like the grid or staggered lay.
Step 1: Prepare Your Substrate
Ensure your subfloor or wall surface is clean, dry, level, and structurally sound. If you’re tiling over an existing floor, remove all old flooring and adhesive. If you’re installing backer board, do so according to the manufacturer’s instructions, ensuring it’s securely fastened.
2. Find the Center and Mark Your Lines
As discussed earlier, find and mark the center of your room with chalk lines or a laser level. These lines are your primary reference guide.
Step 3: Establish Your Starting Point
For a grid or staggered layout, the best starting point is often at the intersection of your two centerlines.
