
Don’t let clogged grout ruin your day! This guide shows you how to easily and affordably unclog grout using simple household items, restoring its beauty and function without expensive tools or harsh chemicals. Get ready for sparkling clean grout in no time!
Hey there, DIY warriors! Bryan Lee here, your go-to guy for making home maintenance less of a chore and more of a triumph. Have you ever admired a beautifully tiled surface, only to notice that over time, the grout lines aren’t so pristine anymore? They can start to look a bit… well, clogged. It’s a common issue, whether it’s soap scum in the shower, food splatters in the kitchen, or just general grime building up. It can make even the nicest tiles look dull and neglected. But before you start thinking about expensive professional cleaning or harsh chemicals, let me tell you, there’s a much simpler, cheaper, and surprisingly effortless way to tackle this. We’ll dive into easy-to-find solutions and a straightforward process that will have your grout looking like new. Ready to bring back the sparkle? Let’s get those grout lines clear!
Why Does Grout Get Clogged Anyway?
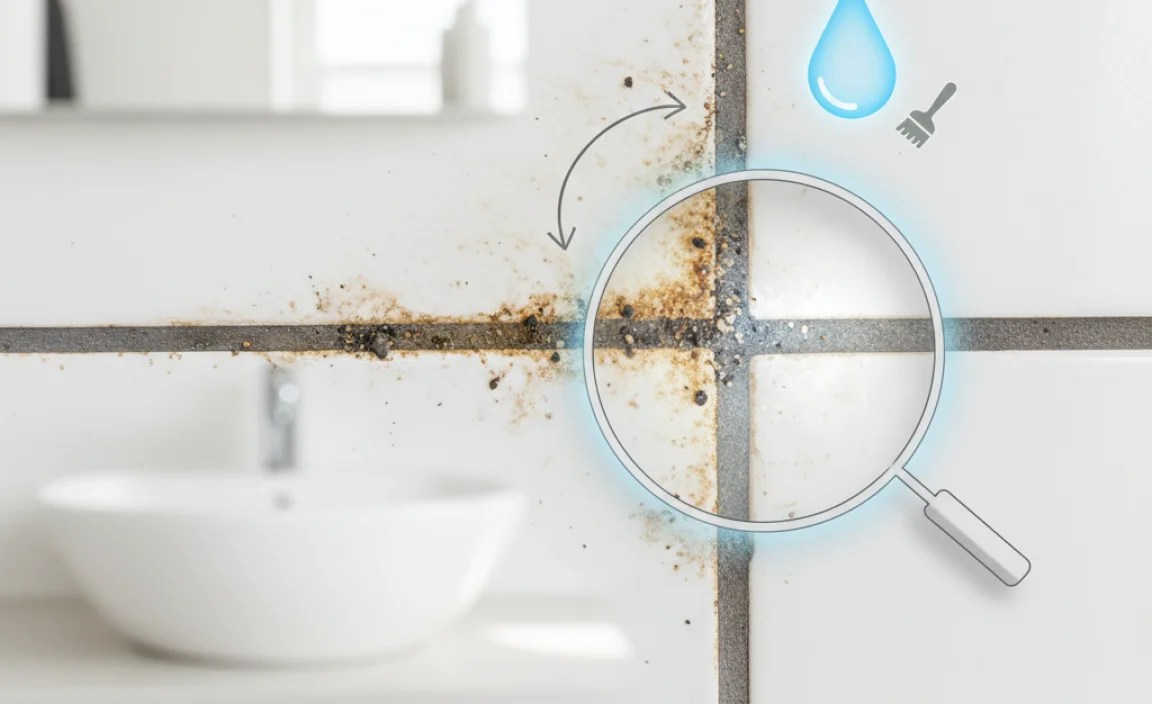
Think of grout as the unsung hero of your tiled surfaces. It’s the material that fills the gaps between tiles, holding everything together and preventing water and dirt from seeping beneath. But because it’s porous, it acts like a sponge for all sorts of unwanted guests. Over time, common culprits like:
- Soap Scum and Residue: This is a major offender in bathrooms. As soap breaks down, its oils and minerals can mix with water and build up on grout lines, creating a stubborn, often discolored film.
- Grease and Food Stains: In kitchens, oil, sauces, and food particles can easily find their way into the pores of the grout, leading to unsightly dark spots and discoloration.
- Mildew and Mold: Damp environments, especially bathrooms, are breeding grounds for mold and mildew. These fungi thrive in grout, causing discoloration and releasing that unpleasant musty odor.
- Dirt and Grime: Everyday foot traffic, dust, and general living can introduce dirt particles that embed themselves deep into the grout.
- Hard Water Deposits: In areas with hard water, mineral buildup can leave a chalky or rusty-looking residue on grout surfaces.
The texture of grout makes it a prime target for these accumulators. Unlike smooth tile surfaces, its slightly rough, porous nature means it can trap and hold onto these substances, making them harder to remove with a simple wipe-down. The good news is that with the right approach, you can effectively “unclog” these lines without breaking a sweat or your budget.
The Ultimate Cheap & Easy Grout Cleaning Arsenal

Forget those fancy, expensive grout cleaners that promise miracles but often deliver headaches. We’re going to stick to tried-and-true, budget-friendly heroes found right in your pantry or at your local dollar store. These are the workhorses that will get the job done effectively:
Essential Cleaning Agents:
- Baking Soda: A mild abrasive and natural deodorizer. It’s fantastic for gently scrubbing away grime without scratching surfaces.
- White Vinegar: A natural disinfectant and degreaser. Its acidity helps break down soap scum, mineral deposits, and other stubborn residues. (Note: Use cautiously on unsealed or natural stone grout, as the acid can etch it.)
- Hydrogen Peroxide (3% solution): A powerful disinfectant and a natural bleaching agent that can help lift stains and kill mold/mildew.
- Dish Soap: A simple degreaser that helps lift grease and grime, making them easier to wash away.
Tools of the Trade:
- Old Toothbrush: The perennial champion for grout cleaning. Its small head and stiff bristles are perfect for getting into those tight lines.
- Spray Bottle: For easily applying liquid cleaning solutions.
- Microfiber Cloths or Old Rags: For wiping, scrubbing, and drying.
- Small Bowl: For mixing cleaning pastes.
- Grout Brush (Optional, but recommended): If you plan on tackling grout regularly, a dedicated grout brush with a comfortable handle can make the job much easier and more effective. You can often find these affordably.
- Squeegee: Useful for removing excess water after rinsing, especially in shower areas.
- Gloves: To protect your hands, especially when using vinegar or hydrogen peroxide.
The Effortless Step-by-Step Guide to Unclogging Grout

Ready to get started? This method is designed to be super simple and effective. We’ll walk through it, step by step, so you can follow along with ease. Remember, the key is patience and letting our cleaning agents do the heavy lifting.
Step 1: Prepare Your Cleaning Solution
First things first, let’s mix up our cleaning power. You have a couple of great options here, depending on what you’re dealing with:
Option A: The Baking Soda Paste (Good for general grime and stains)
In a small bowl, mix approximately 1/2 cup of baking soda with just enough water to form a thick paste. It should have the consistency of toothpaste – thick enough to stick to the grout without dripping.
Option B: The Vinegar & Water Spray (Excellent for soap scum and mildew)
Fill a spray bottle equally with white vinegar and water. Shake gently to combine. This diluted solution is effective and less harsh than straight vinegar.
Important Safety Note: While vinegar and baking soda are generally safe, it’s always a good idea to test any cleaning solution on a small, inconspicuous area of your grout first. Also, never mix vinegar with bleach, as this creates dangerous toxic fumes. For tackling mold specifically, hydrogen peroxide can be a great standalone option or mixed with a bit of baking soda.
Step 2: Apply the Cleaning Solution
Now it’s time to target those clogged grout lines:
- For Baking Soda Paste: Using your old toothbrush or a small spatula, apply the paste directly onto the grout lines, ensuring they are well covered. Work in manageable sections.
- For Vinegar & Water Spray: Generously spray the solution directly onto the grout lines. Let it sit for a few minutes to start working on the grime.
Give your chosen solution some time to work its magic. For the baking soda paste, let it sit for about 10-15 minutes. For the vinegar spray, let it sit for 5-10 minutes. This resting period allows the cleaning agents to break down the dirt, soap scum, and whatever else is clogging your grout.
Step 3: Scrub Away the Grime
This is where your trusty toothbrush (or grout brush) comes into play. Armed with your cleaning agent and your brush, it’s time to scrub:
- Gently but firmly scrub the grout lines. Use a back-and-forth motion, paying attention to any visible discoloration or debris.
- The baking soda paste will act as a mild abrasive, helping to lift the gunk.
- The vinegar solution will be working to dissolve stubborn soap scum and mineral deposits.
- Don’t be afraid to apply a little pressure, but remember you’re not trying to damage the tile or grout.
- If you’re using the baking soda paste, you might need to reapply a little solution or water to your brush to keep it from drying out too much while you scrub.
This step is the most active part, but with the cleaning solution pre-loosening the grime, it should feel much less like hard labor and more like a systematic clean. You’ll likely start to see the difference as you scrub!
Step 4: Rinse Thoroughly
Once you’ve scrubbed all the sections, it’s crucial to rinse away all the loosened dirt and cleaning solution.
- Use a damp microfiber cloth or rag to wipe down the grout lines. Rinse the cloth frequently in clean water.
- Alternatively, if you’re cleaning a larger area like a shower floor, you can carefully use a squeegee or a hose with low water pressure to rinse the grout lines clean.
- Make sure to remove all traces of the cleaning paste or vinegar solution. Leftover residue can attract more dirt.
A thorough rinse ensures that all the dirt you’ve worked to lift is actually removed from the surface and doesn’t just get smeared around.
Step 5: Dry and Inspect
The final step is to let your newly cleaned grout dry completely and then take a look.
- Pat the grout lines dry with a clean, dry microfiber cloth or allow them to air dry.
- Once dry, inspect the grout. You should see a significant improvement! Grout lines will look brighter, cleaner, and visibly less clogged.
- If you notice any particularly stubborn spots, you can repeat the process or try another method such as using hydrogen peroxide (see below).
This is the moment of satisfaction when you see the results of your simple, cheap cleaning efforts!
Advanced (But Still Cheap!) Techniques for Tough Stains

Sometimes, despite our best efforts, a few stubborn spots might remain. Don’t worry, we have a couple more budget-friendly tricks up our sleeve:
Hydrogen Peroxide for Stubborn Stains and Mold
Hydrogen peroxide is a fantastic, inexpensive cleaner that’s great for lifting tough stains and combating mold or mildew. It has mild bleaching properties that can brighten grout without using harsh chemicals commonly found in commercial cleaners. You can find it in a standard 3% solution at any pharmacy or grocery store.
How to Use It:
- Apply a 3% hydrogen peroxide solution directly to the stained or moldy grout lines using a spray bottle or by dabbing it on with a cloth.
- Let it sit for about 10-20 minutes. You might see it fizzing, which indicates it’s working to break down the stain and kill microbes.
- Scrub gently with your toothbrush or grout brush.
- Rinse thoroughly with clean water.
- Dry completely.
For extra power against tough stains, you can create a paste by mixing hydrogen peroxide with baking soda, similar to the first paste method, and apply it to the grout. Let it sit for at least 30 minutes before scrubbing and rinsing.
Using Baking Soda and Dish Soap Combination
This combination is great for cutting through greasy buildup, especially in kitchen areas.
How to Use It:
- In a small bowl, mix about 1/4 cup of baking soda with a tablespoon of dish soap. Add just enough water to create a thick, spreadable paste.
- Apply the paste to the grout lines using your toothbrush.
- Let it sit for 15-20 minutes.
- Scrub with your toothbrush.
- Rinse thoroughly with warm water.
- Dry the area.
The dish soap helps to emulsify and lift grease, while the baking soda provides the scrubbing power.
Tips for Maintaining Clean Grout Long-Term
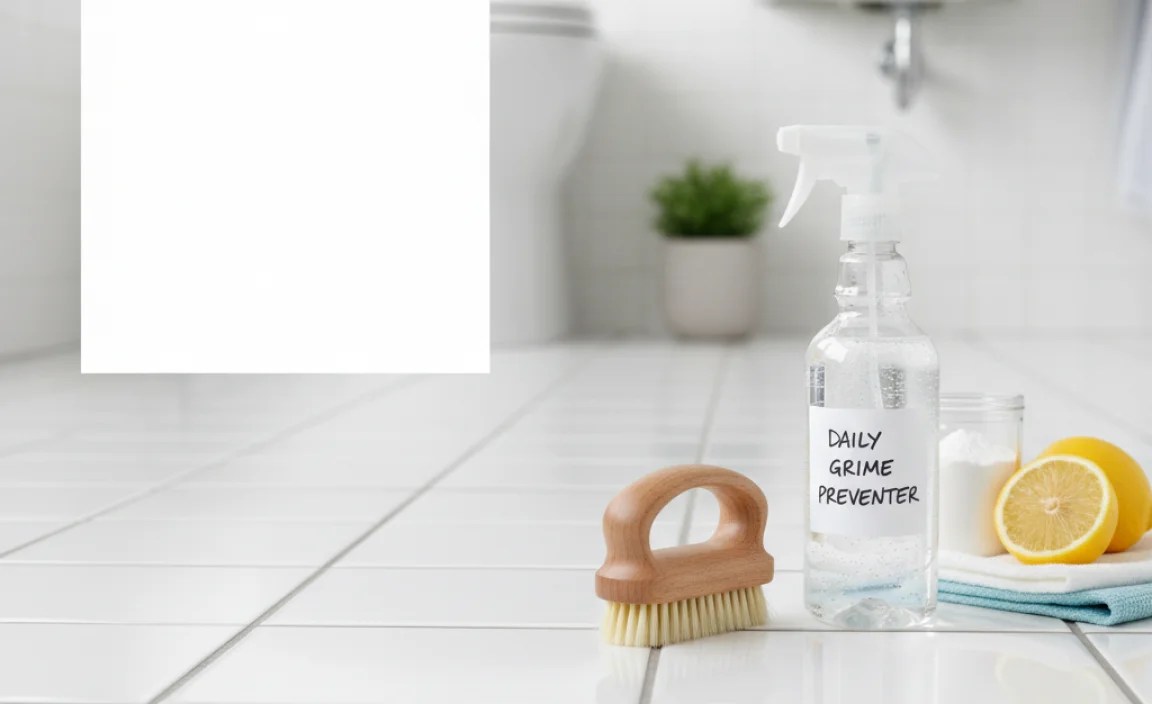
Preventing grout from getting heavily clogged in the first place is always easier than cleaning it later. Here are some simple habits to keep your grout looking great:
- Regular Wiping: After showering, quickly wipe down shower walls and floors with a squeegee or microfiber cloth. This removes excess moisture and soap residue before it can soak into the grout. In the kitchen, wipe up spills immediately.
- Ventilation: Ensure good ventilation in bathrooms by using exhaust fans or opening windows. This helps to reduce humidity, which in turn discourages mold and mildew growth.
- Mild, pH-Neutral Cleaners: For routine cleaning, a simple solution of warm water and a bit of pH-neutral dish soap is often enough. Avoid harsh chemical cleaners that can degrade grout over time. For more specific cleaning needs, stick to the methods we’ve discussed, which use very accessible and mild ingredients.
- Address Spills Quickly: Don’t let food or liquid spills sit on tiled surfaces, especially in the kitchen. Wipe them up promptly to prevent staining.
- Consider Grout Sealing: Once your grout is clean and completely dry, applying a good quality grout sealer can make a huge difference. Sealer creates a barrier that repels liquids and stains, making future cleaning much easier. This is an essential step for protecting your grout, and it’s a relatively inexpensive DIY project. For more information on grout sealing and its importance, you can refer to resources from organizations like The National Park Service, which offers insights into material preservation.
A little bit of preventative maintenance goes a long way in keeping your grout looking fresh and preventing those frustrating clogs.
When to Call in the Pros (Or When to Upgrade)
While these DIY methods are incredibly effective for most common grout-related issues, there are a few situations where you might consider professional help or a more significant upgrade.
- Extremely Damaged Grout: If your grout is crumbling, cracked, or has large missing sections, it might be beyond simple cleaning and could indicate underlying water issues or structural problems.
- Historical or Delicate Surfaces: For very old homes, historical buildings, or tiles made of delicate materials like natural stone that are prone to etching, it’s wise to consult a professional who understands how to preserve these surfaces.
- Persistent Mold Infestations: If you have a severe mold problem that permeates deeply into the wall or subfloor, it’s a health hazard that requires specialized remediation.
- Extensive Re-tiling or Re-grouting: If your grout is beyond repair and looks terrible even after cleaning, the only long-term solution might be to remove the old grout and re-grout the area, or even consider re-tiling.
However, for the vast majority of us dealing with everyday grime, soap scum, and minor stains, the cheap and easy methods we’ve covered will be more than sufficient!
Frequently Asked Questions About Unclogging Grout
Q1: How often should I clean my grout?
A1: For high-traffic or high-moisture areas like bathrooms and kitchens, a good scrub every 1-3 months is usually sufficient. For less used areas, once or twice a year might be fine. Regular maintenance wipes will help extend the time between deep cleans.
Q2: Can I use bleach on my grout?
A2: While bleach can whiten grout, it’s generally not recommended for regular cleaning. It can be harsh, damage the grout over time, and doesn’t address the underlying cause of clogs (like soap scum). Plus, it’s crucial to never mix bleach with other cleaners like vinegar or ammonia, as this creates toxic fumes. Stick to safer, more effective methods like baking soda and vinegar.
Q3: My grout is stained; will these methods remove old stains?
A3: These methods, especially the baking soda paste and hydrogen peroxide, are very effective at lifting many common stains. For very old or deep-set stains, you might need to repeat the process a few times or let the cleaning solution sit a bit longer. Sealing your grout after cleaning also helps prevent future staining.
Q4: Does the type of grout matter (e.g., epoxy vs. cementitious)?
A4: The methods described are best suited for traditional cementitious grout, which is porous and common in homes. Epoxy grout is non-porous and generally stain-resistant, so it rarely needs “unclogging” in the same way. If you have epoxy grout, it usually just needs a wipe-down with mild cleaner. Always be cautious with acidic cleaners like vinegar on sensitive materials.
Q5: How can I prevent my shower grout from getting clogged with soap scum?
A5: The best prevention is to squeegee excess water and soap residue from shower walls and doors after each use. Ensure good ventilation to dry the space quickly. Using a liquid soap with fewer additives can also help reduce scum buildup. Regular light cleaning with safe solutions will also go a long way.
Q6: Is it cheaper to use DIY cleaners or buy commercial grout cleaners?
A6: Definitely cheaper! Household items like baking soda, vinegar, and hydrogen peroxide are significantly less expensive per use than specialized commercial grout cleaners. They are also often more environmentally friendly and safer to use in your home.
Conclusion: Sparkling Grout, Happy Home
There you have it – a budget-friendly, beginner-approved path to unclogging your grout! We’ve navigated the common culprits contributing to grout buildup and armed ourselves with simple, readily available cleaning agents. You’ve learned how to mix effective pastes and solutions, scrub away grime with ease, and rinse your way to brighter, cleaner grout lines.
Remember, the magic lies in the simplicity and affordability of these methods. No need for expensive gadgets or harsh chemicals. With a little bit of elbow grease and the power of baking soda, vinegar, or hydrogen peroxide, you can restore the beauty of your tiled
