
Unclog grout tools and methods are simple when you know the right techniques. This guide offers proven, effortless solutions to clear stubborn grout buildup, restoring your tile’s fresh look with easy-to-follow steps and common household items. Get ready to make your grout lines shine again!
Tired of dingy grout lines that make your beautiful tiles look dull and old? You’re not alone! Grout, the material that fills the gaps between tiles, can easily trap dirt, grime, soap scum, and mold. This buildup not only looks unsightly but can also harbor bacteria, affecting the overall hygiene and appeal of your home. It can feel like a daunting task to tackle, leaving many homeowners unsure where to start or what tools to use.
But don’t worry! Unclogging and cleaning grout doesn’t require professional help or a hefty budget. With the right approach and a few handy tools, you can effectively tackle even the most stubborn grout grime. This guide will walk you through simple, effective methods to restore your grout to its former glory. You’ll discover how to choose the best tools and techniques for your specific situation, making the entire process manageable and surprisingly satisfying. Let’s get started on making your tiles look brand new again!
Why Does Grout Get Clogged and Dirty?
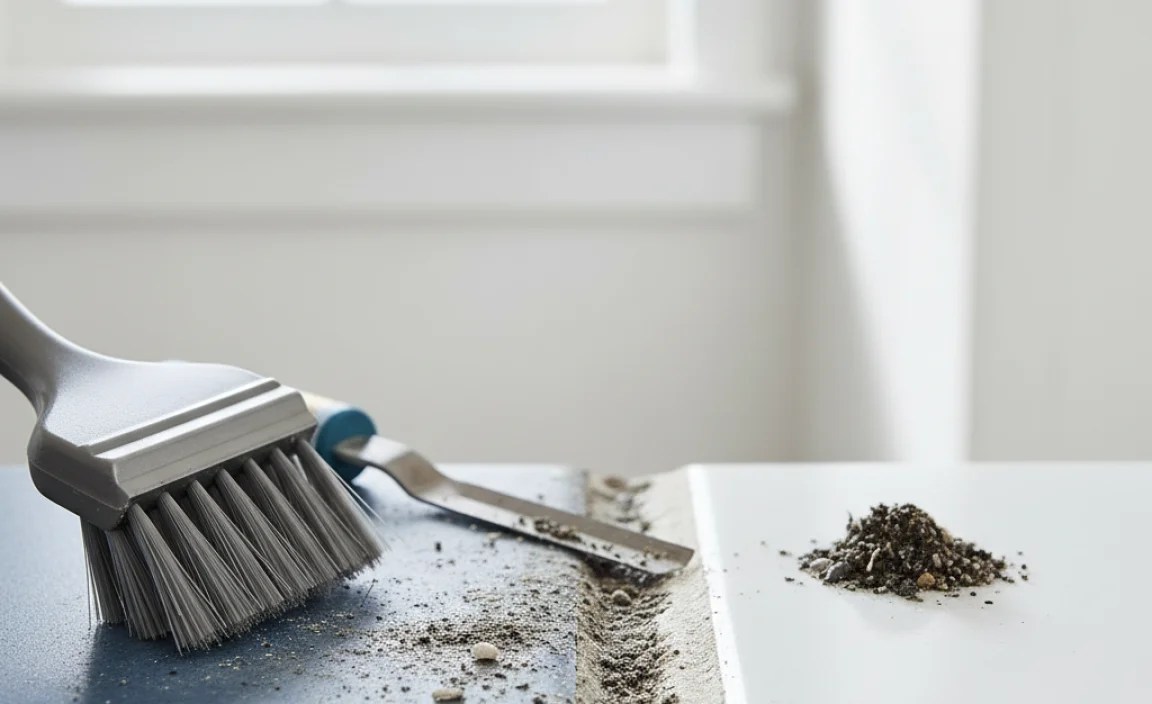
Grout lines are essentially tiny little trenches running between your tiles, and like any small space, they are magnets for all sorts of household mess. Think about it: water splashes, soap residue in the shower, food spills in the kitchen, dust bunnies in hallways – they all find their way into those porous gaps.
The primary reason grout gets “clogged” isn’t usually a physical blockage in the way a sink drain gets clogged with hair. Instead, it’s a deep-seated accumulation of dirt, oils, and microscopic particles that work their way into the pores of the grout material. Because grout is porous, it absorbs liquids and traps solids.
Over time, this absorbed grime hardens and becomes ingrained, giving the grout a darkened, dirty appearance. In moist environments like bathrooms, this can also lead to mildew and mold growth, which adds to the discoloration and can even cause an unpleasant odor. Regular cleaning methods might get the surface dirt, but to truly “unclog” the grout and remove this deep-seated mess, you need specific tools and techniques.
Understanding Grout Types
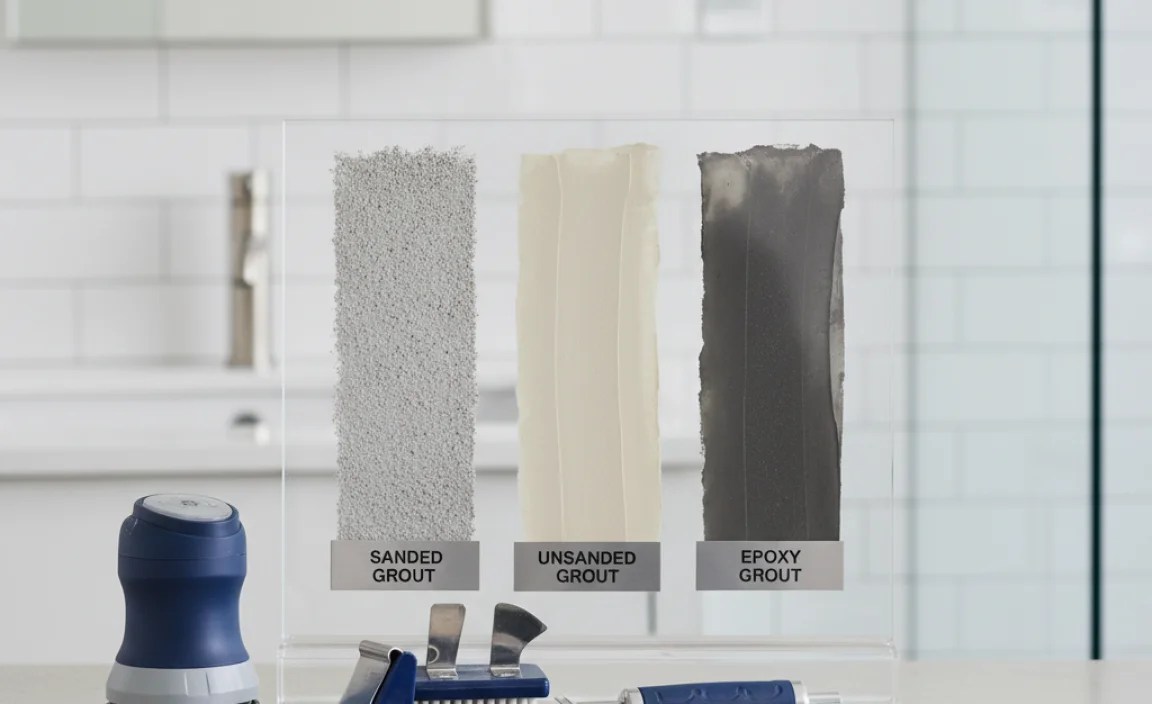
Before we dive into cleaning and unclogging, it’s helpful to know what kind of grout you’re dealing with. This can influence the cleaning methods and products you use, helping you avoid damage. The most common types are:
- Cementitious Grout: This is the most common type, made from cement, water, and sand. It’s porous and can stain easily. It’s often sealed to make it more resistant to stains and moisture.
- Epoxy Grout: This type is made from epoxy resins and hardeners. It’s non-porous, incredibly durable, and highly resistant to stains and chemicals. It’s more expensive and harder to work with initially but requires less maintenance.
- Furan Grout: This is a less common type used in industrial settings due to its extreme chemical resistance. It’s generally not found in residential homes.
For most DIYers, you’ll be dealing with cementitious grout. If your grout is sealed, it will be easier to clean. If it’s unsealed cementitious grout, it will absorb more and require more effort to keep clean.
Essential Tools for Unclogging Grout
Having the right tools is key to making grout cleaning effortless. You don’t need a lot of fancy equipment. Many effective tools are common household items or inexpensive to acquire.
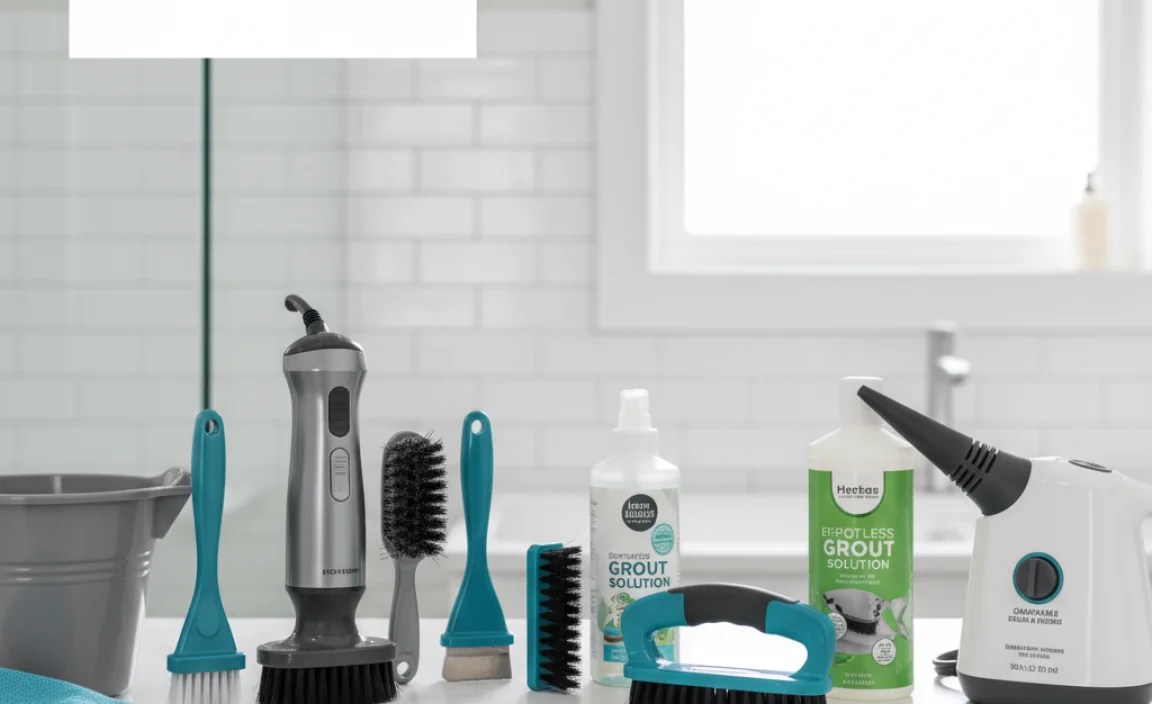
Here’s a list of helpful tools:
- Grout Brush: These are specially designed brushes with stiff bristles that fit into grout lines. They come in various shapes and sizes, some with angled heads or long handles. A small, handheld grout brush is perfect for tight spots.
- Old Toothbrush: For smaller areas or as a substitute for a dedicated grout brush, an old toothbrush works surprisingly well. Its small size allows for focused scrubbing.
- Scrub Brush: A larger scrub brush can be helpful for cleaning larger tile areas and the grout lines simultaneously.
- Microfiber Cloths: Essential for wiping away cleaning solutions and grime, and for drying. Microfiber is excellent at trapping dirt and moisture without scratching surfaces.
- Squeegee: Useful for removing excess water and cleaning solutions from larger tile surfaces after scrubbing.
- Putty Knife or Plastic Scraper: For carefully scraping away any hardened, thick accumulations on the surface of grout lines. Be cautious with these to avoid scratching tile.
- Spray Bottle: For applying cleaning solutions evenly.
- Bucket: For mixing cleaning solutions or rinsing tools.
- Gloves: To protect your hands from cleaning chemicals and grime.
- Grout Saw or Grout Rake: For more persistent clogs or when you need to remove old grout for re-grouting, though these are typically for more intensive jobs than just cleaning.
- Steam Cleaner (Optional): A steam cleaner can be highly effective for deeply embedded dirt and grime, sanitizing as it cleans without harsh chemicals.
Proven & Effortless Solutions: Step-by-Step Guides

Let’s get down to business! These methods are designed to be effective for beginners, using readily available items and straightforward steps.
Method 1: The Baking Soda & Vinegar Power Duo
This is a classic, natural cleaning combination that’s effective against most common grout grime.
What You’ll Need:
- Baking soda
- White vinegar
- Water
- Spray bottle
- Grout brush or old toothbrush
- Microfiber cloths
- Gloves
Steps:
- Prepare the Area: Sweep or vacuum the tiled area to remove loose debris.
- Make a Baking Soda Paste: In a small bowl, mix about ½ cup of baking soda with just enough water to form a thick paste. You want it to be spreadable but not runny.
- Apply the Paste: Using your finger or a small spatula, apply the baking soda paste directly to the grout lines. Ensure all grout lines are covered. Let it sit for about 10-15 minutes. This allows the baking soda to start breaking down the grime.
- Spray with Vinegar: Fill a spray bottle with equal parts white vinegar and water. Generously spray this mixture over the baking soda paste. You’ll see a fizzing reaction. This is the vinegar reacting with the baking soda, which helps lift dirt and grime.
- Let it Work: Allow the fizzing mixture to sit for another 10-15 minutes. For very dirty grout, you might let it sit a bit longer.
- Scrub Vigorously: Dip your grout brush or old toothbrush into the mixture and begin scrubbing the grout lines in a back-and-forth motion. Apply firm pressure.
- Rinse Thoroughly: Wipe away the paste and loosened grime with a damp microfiber cloth. You may need to rinse your cloth multiple times or use a second clean, damp cloth. A squeegee can help remove excess water from the tiles.
- Dry the Area: Use a dry microfiber cloth to thoroughly dry the tiles and grout lines. This prevents water spots and can help reveal how much cleaner the grout is.
- Repeat if Necessary: For stubborn stains, you might need to repeat the process. You can also try applying the paste and letting it sit for longer before scrubbing.
Method 2: Hydrogen Peroxide & Baking Soda Paste
Hydrogen peroxide is a mild bleaching agent that can help whiten dingy grout and kill mold or mildew.
What You’ll Need:
- Baking soda
- 3% Hydrogen peroxide (the kind found in most drug stores)
- Spray bottle (optional)
- Grout brush or old toothbrush
- Microfiber cloths
- Gloves
Steps:
- Safety First: Put on your gloves. Hydrogen peroxide can lighten skin and fabrics, so protection is smart.
- Prepare the Paste: Mix baking soda with enough hydrogen peroxide to create a thick, spreadable paste.
- Apply to Grout: Spread the paste directly onto the grout lines using your finger or a spatula.
- Let it Dwell: Allow the paste to sit on the grout for at least 10-15 minutes. For tougher grime or discoloration, you can let it sit for up to 30 minutes.
- Scrub: Use your grout brush or toothbrush to scrub the grout lines thoroughly.
- Rinse: Wipe away the paste and loosened dirt with a damp microfiber cloth. Rinse your cloth and repeat until all residue is removed.
- Dry: Dry the tiles and grout with a clean, dry microfiber cloth.
Method 3: Using a Commercial Grout Cleaner
Sometimes, a dedicated product is the most efficient solution. The market offers many effective grout cleaners. Always follow the manufacturer’s instructions and test in an inconspicuous area first.
What You’ll Need:
- Commercial Grout Cleaner (e.g., from brands like CLR, Zep, or Mr. Clean)
- Grout brush or scrub brush
- Microfiber cloths
- Bucket
- Gloves
- Protective eyewear (recommended for strong chemical cleaners)
Steps:
- Ventilate the Area: Open windows and doors to ensure good airflow.
- Sweep and Dampen: Sweep the floor or wall. Lightly dampen the grout lines with water (don’t soak them). This helps the cleaner penetrate better.
- Apply the Cleaner: Follow the product’s instructions. Some cleaners are sprays, others require dilution in a bucket. Apply directly to the grout lines.
- Let it Sit (Dwell Time): Allow the cleaner to sit for the time recommended by the manufacturer. This can range from a few minutes to 15-20 minutes, depending on the product’s strength.
- Scrub: Use your grout brush or scrub brush to work the cleaner into the grout lines.
- Rinse: Thoroughly rinse the area with clean water. Use a damp cloth and a bucket, or a hose if cleaning a large outdoor area. Ensure all cleaner residue is removed.
- Dry: Dry the tiles and grout with a clean microfiber cloth.
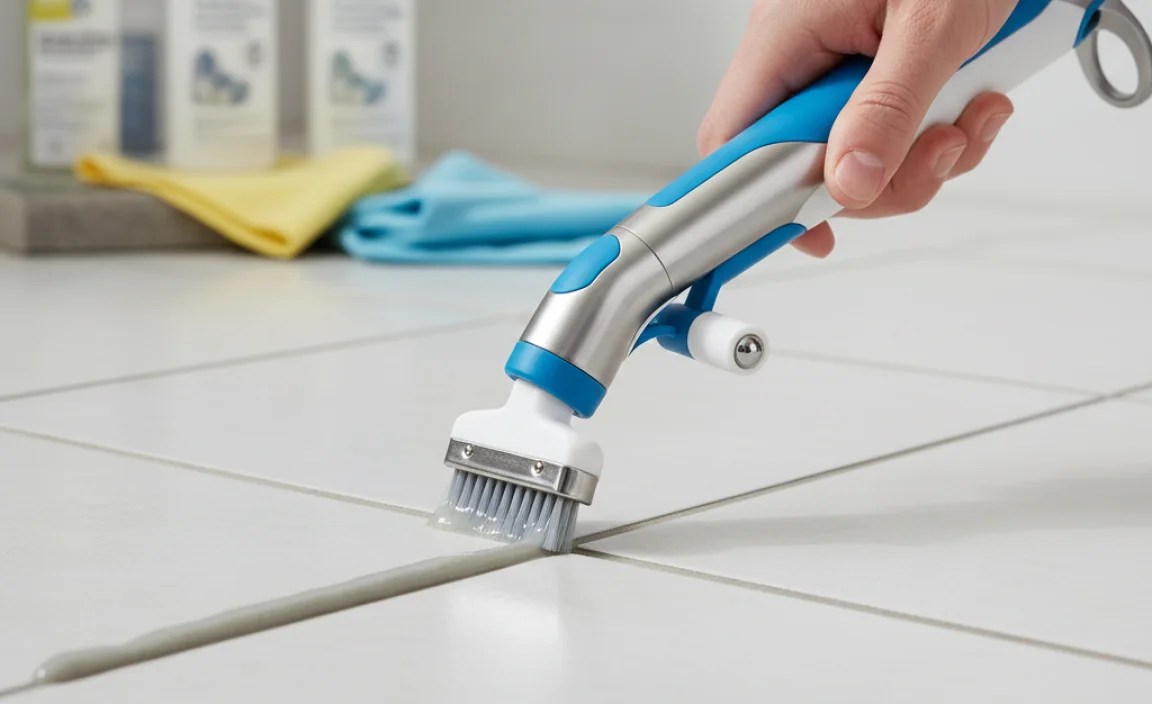
Method 4: Steam Cleaning for Deep Grime
A steam cleaner uses hot, pressurized vapor to lift dirt and kill bacteria without chemicals. It’s an excellent option for tough, ingrained dirt and for those who prefer a chemical-free approach. You can rent or buy steam cleaners, or some multi-surface vacuums come with steam attachments.
What You’ll Need:
- Steam cleaner with a grout nozzle attachment
- Microfiber cloths
- Gloves (optional, for handling hot nozzle)
Steps:
- Read Your Manual: Familiarize yourself with your steam cleaner’s operating instructions.
- Prepare the Area: Sweep or vacuum the tiled surface.
- Attach the Grout Nozzle: Secure the appropriate nozzle for grout lines onto your steam cleaner.
- Steam and Scrub: Hold the steam nozzle a few inches above the grout line and move it slowly along the grout. The steam will loosen the dirt. You may need to follow immediately with a grout brush to scrub the loosened grime, or some units work best with a single sweep.
- Wipe and Rinse: Immediately wipe away the loosened dirt with a damp microfiber cloth. Rinse the cloth frequently.
- Dry: Dry the grout and tiles with a clean, dry microfiber cloth.
External Link: For more on the science of steam cleaning and its effectiveness against bacteria, you can refer to resources from the U.S. Environmental Protection Agency (EPA) regarding cleaning and disinfection methods.
Preventing Future Grout Clogs
Once your grout is clean, the real magic is keeping it that way! Prevention is always easier than cure.
Here are some key strategies:
- Seal Your Grout: This is the single most effective way to protect your grout. Sealant creates a barrier that repels liquids and stains. Unsealed grout is like an open sponge for dirt. You can buy grout sealants at most hardware stores. They typically come in spray or liquid form and are applied with a small brush or applicator. Reapply the sealant periodically, usually every 6-12 months, depending on traffic and cleaning frequency. A good time to check is when water stops beading on the grout.
- Regular Cleaning: Don’t let dirt build up. A quick sweep or vacuum daily and a weekly damp mop with a pH-neutral cleaner will make a huge difference. For bathrooms, a daily spray-down with water after showering can prevent soap scum buildup.
- Wipe Up Spills Immediately: Especially in the kitchen or dining areas, tackle spills as soon as they happen.
- Use pH-Neutral Cleaners: Harsh acidic or alkaline cleaners can degrade grout and sealant over time. Stick to mild, pH-neutral cleaners for regular maintenance.
- Improve Ventilation: In bathrooms, ensure good ventilation by using exhaust fans or opening windows to reduce moisture, which can lead to mold and mildew growth.
- Use a Bath Mat: In showers and tubs, a bath mat can help catch excess water and soap before it runs into grout lines.
Comparing Cleaning Methods
To help you choose the best approach, here’s a quick comparison of the methods discussed:
| Method | Pros | Cons | Best For |
|---|---|---|---|
| Baking Soda & Vinegar | Natural, inexpensive, readily available ingredients, effective for general grime, safe for most surfaces. | Requires some elbow grease, can take time for very stubborn stains, vinegar smell (temporary). | Everyday cleaning, light to moderate grime, eco-conscious cleaning. |
| Hydrogen Peroxide & Baking Soda | Natural bleaching action helps whiten grout, kills mold/mildew, effective for stains. | Requires caution (can bleach fabric/skin), may require longer dwell times for deep stains. | Yellowed, stained, or moldy grout. |
| Commercial Grout Cleaner | Fast-acting, specifically formulated for tough stains, often requires less scrubbing. | Can contain harsh chemicals, requires careful handling and ventilation, more expensive. | Severely stained or neglected grout, when speed is essential. |
| Steam Cleaning | Chemical-free, sanitizes surfaces, very effective for deep-seated dirt and grease, good for sensitive individuals. | Requires special equipment, can be time-consuming, may still require some manual scrubbing depending on the unit. | Deeply ingrained dirt, sanitizing, chemical-free cleaning preference. |
No matter which method you choose, remember that consistency is key. Regular cleaning and sealing will make future grout maintenance much easier and more effective.
Frequently Asked Questions (FAQ)
Q1: How often should I clean my grout?
For most homes, a thorough grout cleaning every 6-12 months is sufficient, especially if the grout is sealed and spills are wiped up promptly. However, high-traffic areas or bathrooms with heavy soap scum may require more frequent attention, perhaps quarterly.
Q2: Can I use bleach on my grout?
While bleach can whiten grout, it’s often not the best solution. Bleach can damage grout over time, especially if it’s sealed, and it doesn’t always remove the ingrained dirt effectively. It also produces fumes. Safer and more effective options like baking soda, vinegar, or hydrogen peroxide are generally recommended.
Q3: My grout is crumbling. What should I do?
Crumbling grout indicates it’s old or damaged. You may need to remove the old grout completely and re-grout the area. For this, you would use tools like a grout saw or rake. If the crumbling is widespread, it might be a sign of underlying structural issues, and consulting a professional may be wise.
Q4: Can I paint my grout instead of cleaning it?
Yes, you can use grout paint or stain to change the color or cover up stains if cleaning is no longer effective. However, proper cleaning and sealing of the grout are still crucial steps before painting for the paint to adhere well and wear properly. Grout paint can also chip or wear off over time, especially in high-moisture areas.
Q5: How do I get rid of black mold in my grout?
For black mold, hydrogen peroxide is often very effective during the cleaning process. You can use the hydrogen peroxide and baking soda paste method (Method 2), letting it sit for at least 30 minutes before scrubbing. For persistent or extensive mold, you might consider a commercial mold and mildew remover specifically designed for grout
