
Unclog grout tips are surprisingly simple and effective! With DIY-friendly methods, you can conquer stubborn grout clogs, restore tile beauty, and prevent future buildup. Here’s how to clear them safely and efficiently.
Ever notice how those spaces between your tiles, the grout lines, can sometimes look less than fresh? It’s a common sight in kitchens and bathrooms, where daily life can lead to grime, soap scum, and even mildew stubbornly clinging to these porous lines. This buildup can not only make your beautiful tiles look dingy but can also, surprisingly, lead to clogs that trap moisture and cause other issues. Don’t let dirty grout get you down! With a few everyday household items and some straightforward techniques, you can bring back the sparkle. We’ll walk you through proven, essential fixes that are easy enough for any beginner to tackle, leaving your grout looking new again and your home feeling cleaner.
Why Does Grout Get Clogged Anyway?
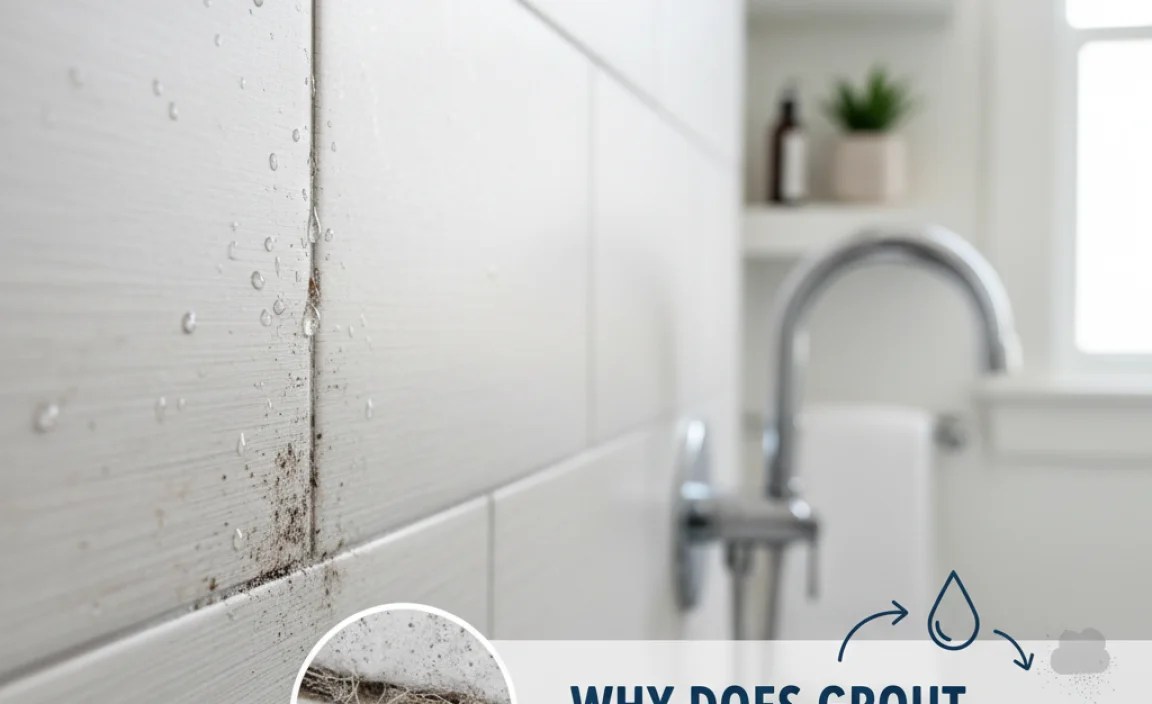
Think of your grout as a sponge. Its slightly rough, porous surface is fantastic for filling the gaps between tiles, creating a smooth finish. However, this porous nature also means it readily absorbs liquids and traps small particles. In busy areas like your kitchen or bathroom, this can include:
- Soap scum: A common culprit in showers and tubs, combining soap residue with minerals from hard water.
- Grease and food particles: In kitchens, splashes and spills can easily find their way into grout lines.
- Dirt and dust: Everyday airborne particles settle and get pushed into grout.
- Mold and mildew: Damp environments provide the perfect breeding ground for these unsightly and sometimes smelly organisms.
- Mineral deposits: Hard water can leave behind chalky white residues.
Over time, these substances accumulate, making the grout appear darker, discolored, and sometimes even rough to the touch. This is what we commonly refer to as “clogged” grout. It’s not a true plumbing clog, but rather a surface and subsurface accumulation that needs a good cleaning.
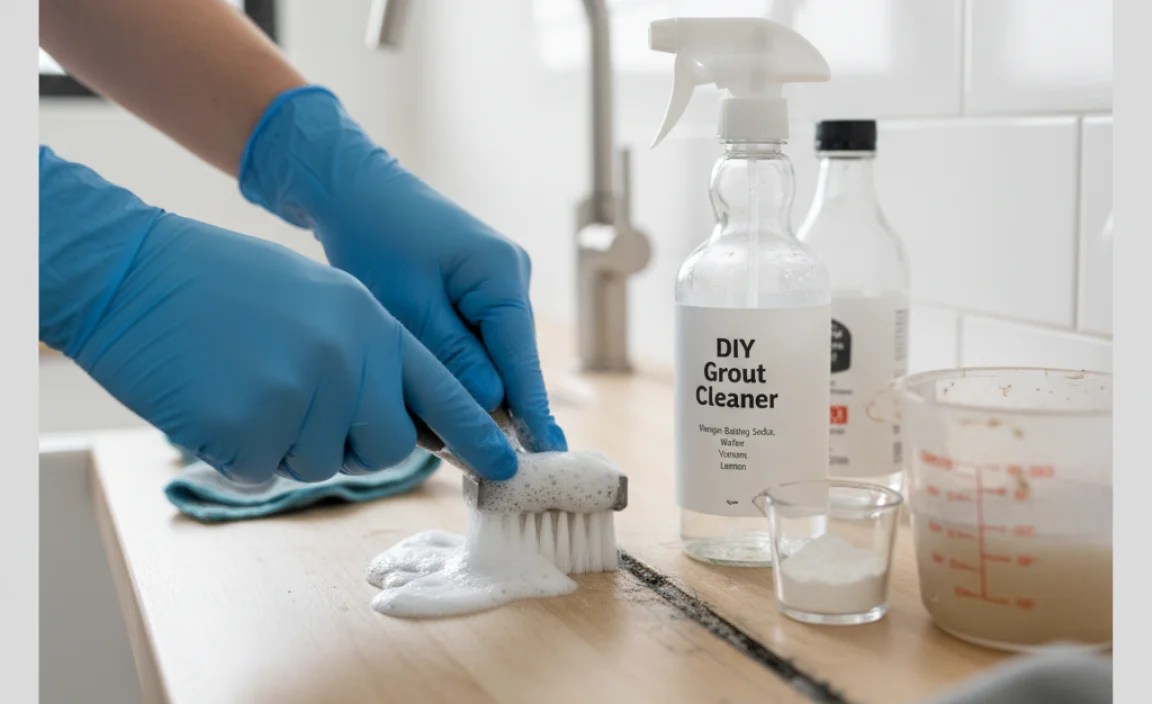
Essential Tools and Materials for Unclogging Grout

Before we dive into the cleaning process, let’s gather what you’ll need. The good news is that most of these items are probably already in your home or are inexpensive to pick up:
- Safety Gear:
- Rubber gloves (to protect your hands from cleaning solutions)
- Safety glasses (to protect your eyes from splashes)
- Cleaning Solutions:
- Baking soda (a gentle abrasive and deodorizer)
- White vinegar (an acidic cleaner effective against soap scum and mineral deposits)
- Dish soap (cuts through grease)
- Hydrogen peroxide (a mild bleach and disinfectant)
- Commercial grout cleaner (optional, for tougher jobs)
- Scrubbing Tools:
- Stiff-bristled brush (a dedicated grout brush is ideal, but an old toothbrush or a sturdy scrub brush will work)
- Microfiber cloths (for wiping and drying)
- Sponge
- Spray bottle (for applying diluted solutions)
- For Tougher Jobs (Optional):
- Grout saw or utility knife (for scraping out stubborn, impacted debris)
- Steam cleaner (for deep cleaning without chemicals)
DIY Grout Unclogging Methods: Step-by-Step
Let’s get your grout looking clear and clean. We’ll start with the gentlest methods and move to more robust solutions if needed. Remember to always test any cleaning solution on an inconspicuous area first to ensure it doesn’t damage or discolor your grout or tiles.
Method 1: The Baking Soda Paste Powerhouse
Baking soda is a fantastic, eco-friendly cleaner. Its mild abrasive quality helps lift grime without scratching surfaces, and it’s also great at absorbing odors.
- Prepare the Paste: In a small bowl, mix baking soda with just enough water to form a thick paste. Think of the consistency of toothpaste.
- Apply the Paste: Using your finger or a small spoon, apply the paste directly to the grout lines you want to unclog. Don’t be shy; cover the entire affected area.
- Let It Sit: Allow the paste to sit on the grout for about 10-15 minutes. This gives the baking soda time to work its magic.
- Scrub: Dampen your stiff-bristled brush and scrub the grout lines vigorously. Work in back-and-forth motions to lift the grime.
- Wipe and Rinse: Wipe away the paste and loosened dirt with a damp microfiber cloth or sponge. Rinse thoroughly with clean water to remove all residue.
- Dry: Dry the area with a clean, dry cloth.
Method 2: Vinegar and Baking Soda Fizz Factor
This classic combination creates a chemical reaction that helps break down soap scum and mineral deposits. It’s more potent than baking soda alone but still relatively gentle.
- Start with Baking Soda: Sprinkle a generous amount of baking soda over the grout lines.
- Add Vinegar: Pour or spray white vinegar over the baking soda. You’ll notice an immediate fizzing reaction. This is the vinegar and baking soda working together!
- Let It React: Allow the mixture to fizz and bubble for about 15-20 minutes.
- Scrub with Force: Use your stiff-bristled brush to scrub the grout lines. The fizzing action helps loosen the debris, making scrubbing easier.
- Rinse Thoroughly: Wipe down the area with a damp cloth, rinsing it frequently in clean water. Make sure all vinegar residue is removed, as prolonged exposure can sometimes etch stone tiles.
- Dry the Area: Pat the grout and tiles dry with a clean towel.
Method 3: Dish Soap for Greasy Grime
If your kitchen grout is clogged with grease, a good dish soap is your best friend. It’s specifically designed to break down oils and fats.
- Mix Solution: In a bucket or bowl, mix a few drops of liquid dish soap with warm water.
- Apply and Scrub: Dip your brush into the soapy water and scrub the grout lines. You might need to scrub a bit more vigorously if the grease is stubborn.
- Rinse Well: Wipe the grout clean with a damp cloth, rinsing the cloth often. Ensure all slippery soap residue is gone.
- Dry: Dry the area completely with a microfiber cloth.
Method 4: Hydrogen Peroxide for Discoloration and Mildew
Hydrogen peroxide is a mild bleaching agent that can help lift stubborn stains and kill mildew. It’s a great alternative to harsher chemical bleaches.
- Apply Directly: Pour a small amount of 3% hydrogen peroxide directly onto the grout lines, or use a spray bottle for easier application.
- Let It Sit: Let the hydrogen peroxide work for about 10-15 minutes. You might see some mild bubbling if there’s mildew present.
- Scrub: Use a stiff brush to scrub the grout.
- Rinse and Dry: Wipe clean with a damp cloth and dry thoroughly.
Safety Note: While hydrogen peroxide is safer than chlorine bleach, it can still lighten colored grout. Always test in an inconspicuous spot first.
Method 5: The Power of Steam
For a chemical-free and highly effective deep clean, a steam cleaner can work wonders. The heat and moisture loosen dirt and kill bacteria.
- Prepare Steam Cleaner: Fill your steam cleaner with distilled or demineralized water (as per manufacturer instructions).
- Use Grout Attachment: Attach the appropriate nozzle for grout or tight spaces.
- Steam and Scrub: Hold the steam nozzle a few inches above the grout line and allow the steam to penetrate for a few seconds. Immediately follow with a stiff brush while the grout is still hot and damp.
- Wipe Clean: Wipe away the loosened grime with a microfiber cloth.
- Dry: Ensure the area is completely dry.
Steam cleaning is incredibly effective for breaking down tough grime and can be a game-changer for heavily soiled grout. You can find affordable steam cleaners for home use online or at home improvement stores.
Method 6: Grout Saw or Utility Knife for Impacted Debris
Sometimes, grout clogs aren’t just surface-level grime. Small pebbles, hardened old sealant, or stubborn gunk can become physically lodged in the grout lines. In these cases, a bit of careful physical removal might be necessary.
- Identify the Obstruction: Carefully inspect the grout line to pinpoint the exact material causing the blockage.
- Gently Scrape: Using a grout saw (designed for this purpose) or the tip of a utility knife, very carefully scrape away the offending material. The key here is to be gentle. You are trying to remove the debris, not damage the grout or the tile.
- Work in Sections: Take your time and work in small sections.
- Clean Afterward: Once the physical debris is removed, clean the area using one of the methods above (like baking soda paste or vinegar solution) to remove any residual dirt or grime.
- Rinse and Dry: Rinse thoroughly and dry the area.
Important Caution: This method requires significant care. Pushing too hard with a sharp object can chip tiles or gouge the grout, creating more problems. If you’re not comfortable with this, it might be time to call a professional or try a less invasive method extensively.
When to Call in the Professionals

While most grout issues can be tackled with DIY methods, there are times when it’s best to get expert help:
- Extremely Damaged Grout: If your grout is crumbling, cracked, or extensively missing, it needs repair or regrouting, not just cleaning.
- Sensitive Materials: If you have delicate natural stone tiles (like marble or travertine) and are unsure about the best cleaning agent, a professional knows how to handle them safely.
- Persistent Stains: For deep-set stains that cleaning won’t touch, professionals have access to more potent, specialized treatments.
- Time Constraints: If you’re short on time and want the job done quickly and efficiently.
A professional tile and grout cleaner has the knowledge, specialized equipment, and commercial-grade cleaners to tackle even the toughest jobs without damaging your surfaces. You can find reputable local services through online reviews or by asking for recommendations.
Preventing Future Grout Clogs
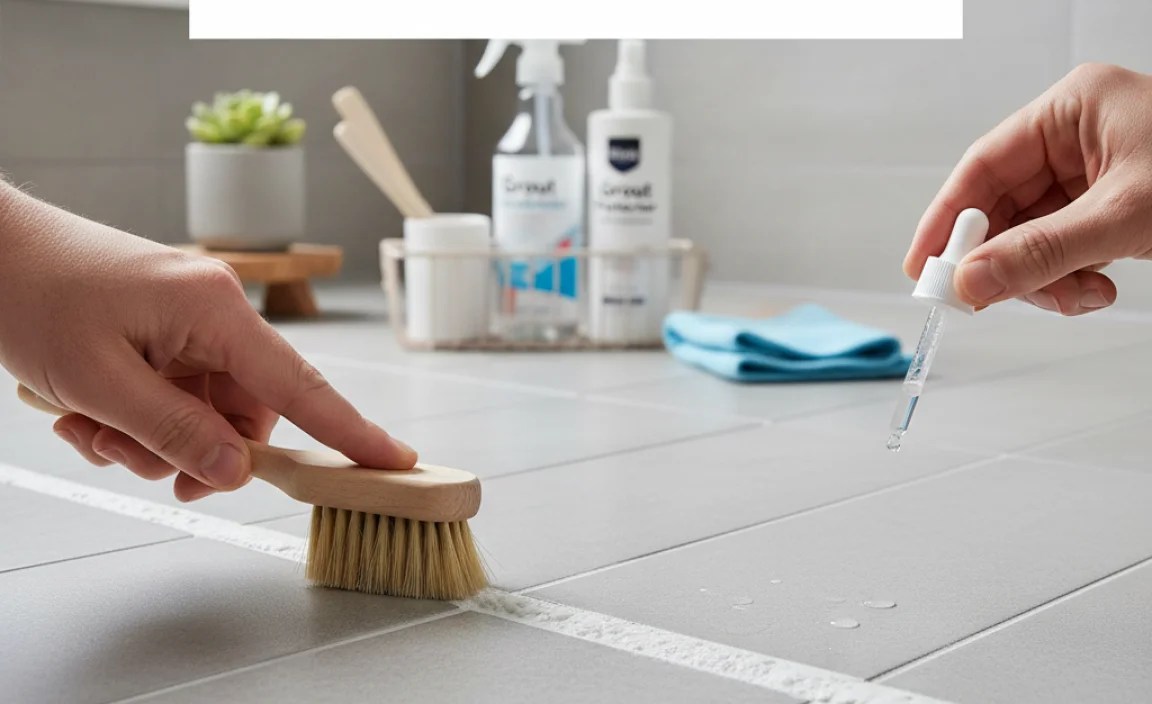
The best defense is a good offense! Once your grout is clean, keeping it that way is much easier than dealing with clogs.
- Regular Cleaning: A quick wipe down with a damp cloth or a light spray of your chosen (mild!) cleaner after use can prevent buildup.
- Proper Ventilation: Ensure bathrooms are well-ventilated to reduce moisture, which fuels mold and mildew. Use exhaust fans and open windows when possible.
- Deal with Spills Promptly: Wipe up spills in the kitchen and bathroom immediately.
- Seal Your Grout: This is one of the most effective preventative measures. Grout sealers fill in the pores, making it much harder for dirt, grease, and moisture to penetrate. Most sealers need to be reapplied every 1-3 years, depending on the product and the area’s usage. For more information on grout sealing, check out resources from organizations like the Tile, Stone & Grout Lawns & Gardens website.
- Use a Grout Brush: Periodically use a grout brush during your regular cleaning routine to keep the lines clear.
Sealing your grout is a game-changer. It creates a protective barrier that keeps most spills and grime from soaking in. You can easily find grout sealers at your local hardware store or online, and application is typically straightforward.
Grout Cleaner Comparison Table
Choosing the right cleaner can make all the difference. Here’s a quick guide:
| Cleaner Type | Best For | Pros | Cons | DIY Availability |
|---|---|---|---|---|
| Baking Soda Paste | General grime, light stains, deodorizing | Gentle, natural, inexpensive, readily available | May not be strong enough for severe clogs | High |
| White Vinegar | Soap scum, hard water deposits, mildew | Effective disinfectant, natural, inexpensive | Can etch some natural stones; smell can be strong | High |
| Dish Soap | Grease, kitchen grime | Cuts through oil, gentle | Requires thorough rinsing to avoid residue | High |
| Hydrogen Peroxide (3%) | Discoloration, mold, mildew | Mild bleach, disinfectant, natural | Can lighten colored grout; test first | High |
| Steam Cleaner | Deep cleaning, sanitizing, stubborn grime | Chemical-free, highly effective, sanitizing | Requires equipment purchase/rental; can be labor-intensive | Medium (equipment needed) |
| Commercial Grout Cleaner | Tough stains, deep-set grime | Formulated for specific issues, powerful | Can contain harsh chemicals; follow instructions carefully; test first | High |
Frequently Asked Questions About Unclogging Grout
Q1: How often should I clean my grout?
It’s a good idea to give your grout a light cleaning at least once a month. A deeper clean to address clogs or stains can be done every 2-3 months, or as needed based on how dirty it looks.
Q2: Can I use bleach on my grout?
Chlorine bleach can be effective for whitening and disinfecting, but it’s harsh. It can damage colored grout, irritate your skin and lungs, and is not ideal for regular use. Hydrogen peroxide is a safer, milder alternative for DIYers.
Q3: What’s the difference between clogged grout and mildew on grout?
Grout clogs are typically a buildup of dirt, soap scum, grease, and minerals. Mildew is a type of mold that thrives in damp environments and appears as black, green, or pinkish spots, often within the grout. Both can often be treated with similar cleaning methods.
Q4: My grout is stained from something spilled long ago. Can these methods help?
For older, set-in stains, you might need to repeat the cleaning process a few times or use a slightly more targeted cleaner. Hydrogen peroxide or a specialized commercial grout cleaner might be more effective for deep stains.
Q5: Can these tips be used on tile floors as well as walls?
Yes, these methods are suitable for both floor and wall grout. Just be mindful of your footing on floor tiles when cleaning, and ensure you rinse thoroughly to avoid slippery surfaces.
Q6: How long does it take to unclog grout?
A quick clean with baking soda might take 20-30 minutes. More intensive methods, like using vinegar or a steam cleaner, could take an hour or more, depending on the size of the area and how stubborn the clogs are. Remember to factor in drying time.
Q7: Should I avoid vinegar on my granite or marble tiles?
Yes, absolutely. Acids like vinegar can etch and dull natural stone surfaces like granite, marble, and travertine. For these materials, stick to pH-neutral cleaners or baking soda paste. Always test any cleaner in an inconspicuous spot first.
Conclusion
Dealing with clogged grout might seem daunting, but as you can see, it’s a very manageable part of home maintenance, even for beginners. By understanding what causes these blockages and employing simple, proven DIY methods, you can restore the clean, fresh appearance of your tiled surfaces. From the gentle power of baking soda and dish soap to the more potent fizz of vinegar or the deep-cleaning capabilities of steam, there’s a solution for every level of grime. Remember to prioritize safety by wearing gloves and glasses, and always test your chosen method in a small, hidden area first.
Don’t forget that prevention is key! Regular cleaning and, most importantly, sealing your grout will save you time and effort in the long run. Once your grout is clear and sparkling, make sealing it your next quick project to keep it looking its best. With these essential tips, you’re well-equipped to tackle grout clogs and maintain a beautiful, hygienic home. Happy cleaning!
