
Quick Summary: To unclog a grout leak, first identify the source and stop water flow. Then, carefully remove the old caulk or grout around the leak, clean the area thoroughly, apply a suitable sealant like silicone caulk, and allow it to cure properly to prevent future leaks.
Dealing with a leak from your grout can be a real head-scratcher. It’s that sneaky drip or persistent damp spot that shows up when you least expect it, often in bathrooms or kitchens. You might be wondering how water is getting through seemingly solid tile and grout. Don’t worry, this is a common issue many homeowners face, and thankfully, it’s usually a fixable one with the right approach. We’ll walk through exactly how to tackle an unclogged grout leak step-by-step, so you can get it sealed up and feel confident in your home again. Let’s get started on fixing that pesky leak!
Why Do Grout Leaks Happen?
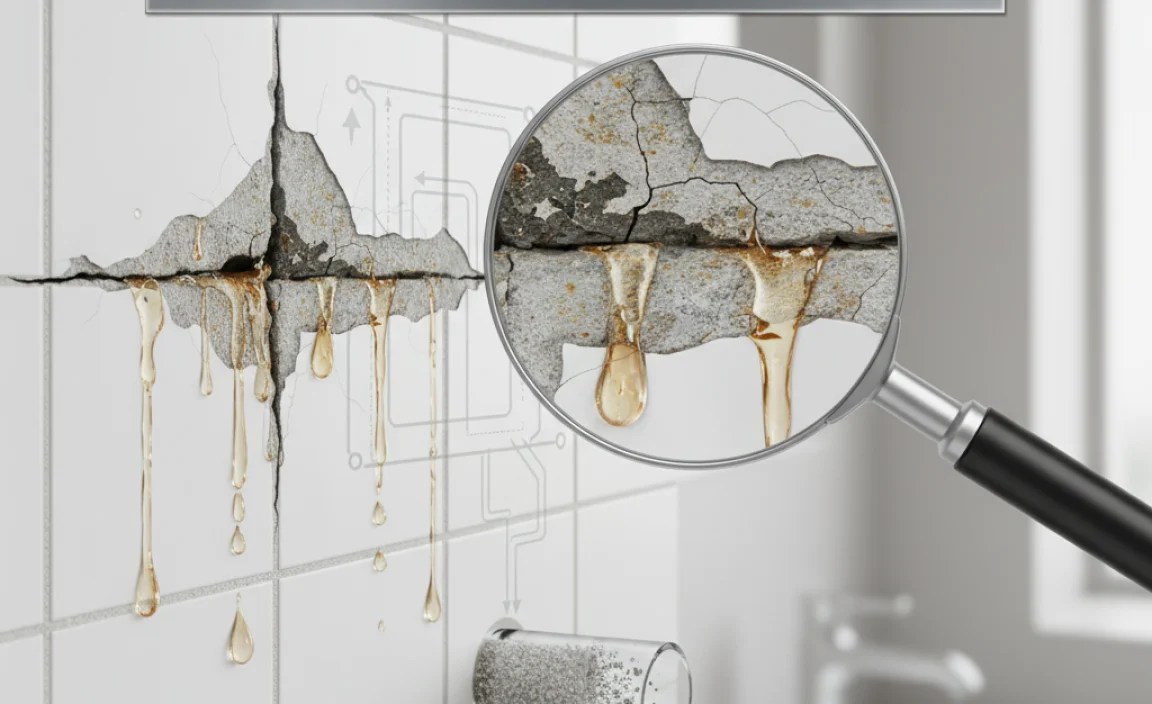
Grout, that stuff filling the spaces between your tiles, is porous. This means it can absorb water. Over time, several things can cause it to fail and let water seep through:
- Cracking and Deterioration: Grout can crack due to age, house settling, or improper installation. Once cracked, it loses its ability to keep water out.
- Wear and Tear: Constant exposure to water, cleaning products, and foot traffic can wear down the grout, making it less effective.
- Mold and Mildew Growth: These can break down grout over time, creating tiny pathways for water.
- Damaged Sealant: If the grout was sealed, the sealant can wear away, allowing moisture to penetrate.
- Faulty Plumbing or Waterproofing: Sometimes, the grout leak is a symptom of a larger issue, like a pipe leak behind the wall or a failure in the underlying waterproofing membrane. This is a more serious concern that might require professional attention.
Understanding these reasons helps us pinpoint the best way to fix the current leak and prevent future ones. We’re going to focus on the common scenario where the grout itself is the culprit.
Essential Tools and Materials You’ll Need

Before we start, let’s gather everything you need. Having your tools ready will make the job smoother and faster. You don’t need to be a pro to use these items!
For Identifying and Stopping the Leak:
- Flashlight: To closely inspect the area and find the exact leak source.
- Towels or Rags: For immediate cleanup of any water.
- Bucket: To catch drips if the leak is active and continuous.
- Gloves: To protect your hands from cleaning solutions and old caulk.
- Safety Glasses: Always a good idea when working with tools, liquids, or dusty materials.
For Removing Old Caulk/Grout and Cleaning:
- Utility Knife or Grout Saw: For carefully cutting away old caulk or deteriorated grout. A grout saw is specifically designed for this and is very effective.
- Putty Knife or Scraper: To help lift away loosened material.
- Stiff Brush or Old Toothbrush: For scrubbing away debris and mold.
- Household Cleaner or Mildew Remover: To sanitize the area.
- Rubbing Alcohol or Denatured Alcohol: For final cleaning and degreasing, ensuring a good seal.
- Vacuum Cleaner with Crevice Tool: To suck up loose dust and debris.
For Sealing the Leak:
- Caulk Gun: If you’re using a caulk tube.
- High-Quality Silicone Caulk or Grout Sealant: Choose a product specifically designed for kitchens and bathrooms, as it’s waterproof and mildew-resistant. Look for terms like “100% silicone” or “kitchen & bath sealant.”
- Caulk Smoothing Tool or Your Finger (with glove): To create a neat, even finish.
- Paper Towels or Damp Cloth: For wiping away excess caulk.
Having all these items on hand will set you up for success. Don’t worry if some of these sound unfamiliar; we’ll explain how to use them in the steps below.
Step-by-Step Guide to Unclogging a Grout Leak

Let’s get down to business. Follow these steps carefully, and you’ll be well on your way to a leak-free space.
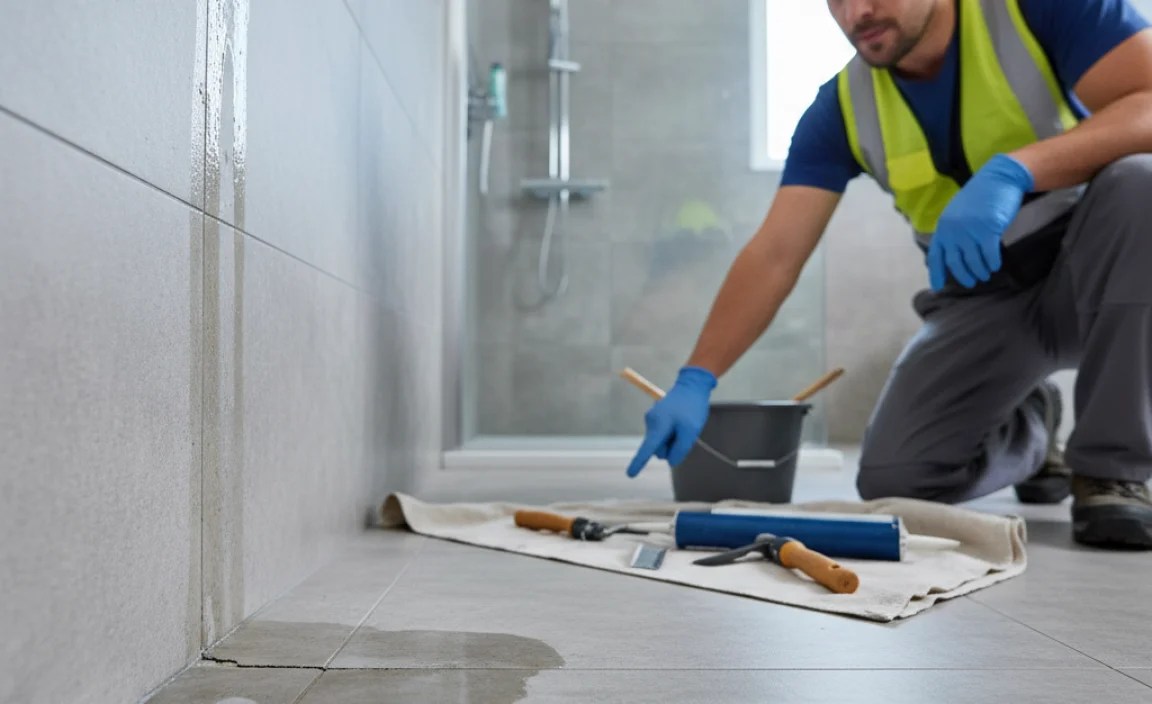
Step 1: Locate and Isolate the Leak Source
This first step is crucial. You need to be sure where the water is coming from. Often, it doesn’t appear directly below the initial cause.
- Turn off the water supply to the area if possible. This might mean shutting off the valve under a sink or the main water supply to your bathroom or kitchen.
- If you can’t shut off the water, try to minimize water usage in the affected area. Don’t run the shower or faucet for a while.
- Use your flashlight to meticulously examine the grout lines. Look for any visible cracks, holes, or deteriorating sections, especially around fixtures like faucets, drains, and showerheads, or along the tub or sink edge.
- If the leak is active, place a bucket and towels to catch any water and dry the area thoroughly. A dry area is essential for the next steps.
Step 2: Remove Damaged Grout or Caulk
Now, we need to clear out the weak points. This creates a clean slate for new sealant.
- If the leak is coming from a caulked seam (like where the tile meets the tub or countertop), use a utility knife to carefully cut along both edges of the old caulk.
- Gently pry out the old caulk with your knife or a putty knife. Work slowly to avoid damaging the tile or the surface beneath.
- If the leak is through the grout itself, use a grout saw or the sharp edge of a utility knife. Carefully cut along the grout line, aiming to remove the damaged grout without cutting into the tiles. You want to remove enough grout to get to solid material and create a small channel.
- Use your putty knife and stiff brush to remove any loose debris from the cut lines.
Safety First: Always cut away from yourself when using a utility knife. If using a grout saw, apply steady, even pressure.
Step 3: Thoroughly Clean the Area
A clean surface is vital for a strong, lasting seal. Any dirt, soap scum, or residue will prevent the new sealant from adhering properly.
- Scrub the area where you removed the grout or caulk with a stiff brush and your chosen cleaner. Pay attention to any signs of mold or mildew and use a mild mildew remover if needed.
- Rinse the area thoroughly with clean water.
- Wipe the area down with rubbing alcohol or denatured alcohol. This will help remove any remaining oils or residues and ensure the surface is bone dry for ideal adhesion.
- Allow the area to air dry completely. This might take a few hours, especially in a humid bathroom. You can speed this up with a fan or hairdryer on a cool setting.
For more on cleaning porous surfaces, you might find guidance from resources like the U.S. Environmental Protection Agency (EPA) helpful regarding safe and effective cleaning practices.
Step 4: Apply New Sealant
This is where we seal up the leak! Whether you’re using caulk or a grout sealant, the application is key.
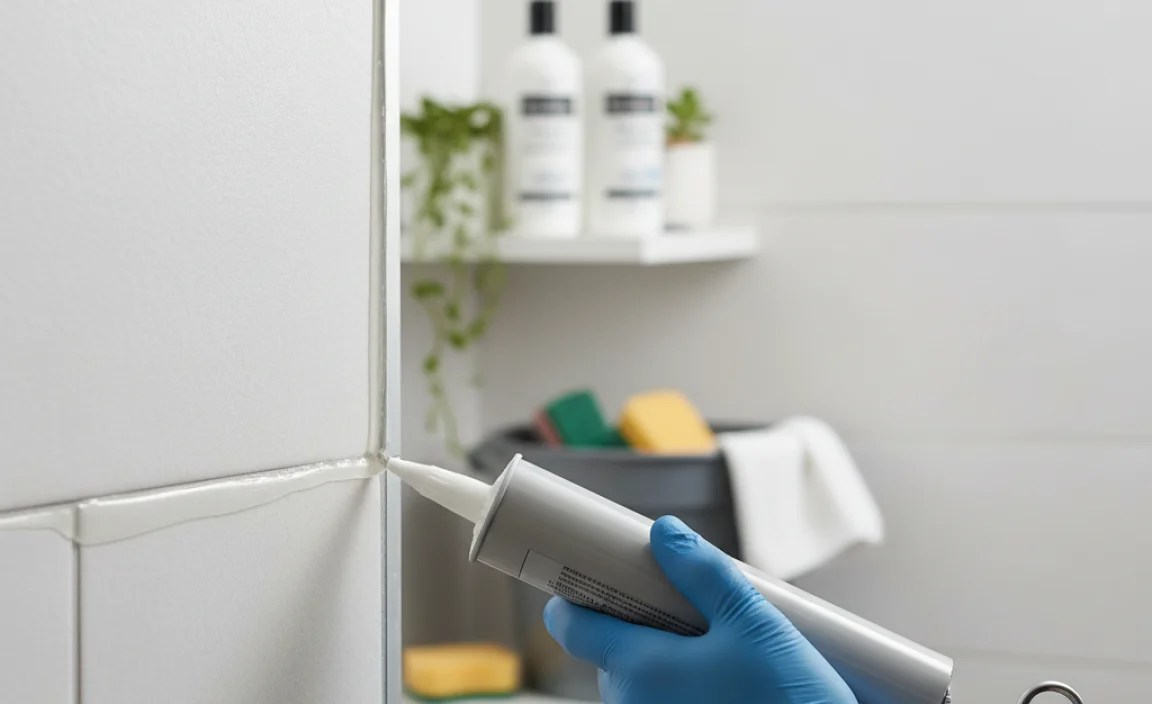
If Sealing a Caulked Seam:
- Cut the tip of the caulk tube at a 45-degree angle. Start with a small opening; you can always make it larger.
- Place the caulk tube nozzle at the beginning of the seam.
- Apply steady, consistent pressure to the caulk gun trigger as you move the nozzle smoothly along the seam. Aim to fill the gap completely with caulk.
- Immediately after applying, use a caulk smoothing tool or a gloved finger dipped in slightly soapy water to create a clean, concave bead. This pushes the caulk into the gap and removes excess.
- Wipe away any excess caulk with a damp cloth or paper towel before it starts to skin over.
If Sealing Grout Lines:
- If you removed deteriorated grout and are now filling the gap with grout filler specifically designed for repairs, follow the product instructions precisely. This may involve mixing a small amount of grout.
- Once the repair grout is cured according to its directions, you will then want to apply a grout sealer over the repaired area and surrounding grout lines.
- Apply the grout sealer with a small brush or applicator, ensuring it penetrates into the grout lines. Wipe away any excess from the tile surface promptly.
- For significant grout line repairs where you’ve removed a good amount of grout, consider using a grout repair pen or a small tube of grout repair caulk that matches your grout color. Apply as you would silicone caulk, smoothing with a damp finger or tool.
Tip: Work in smaller sections if you have a large area to seal. It’s easier to get a clean finish when the caulk is still wet.
Step 5: Allow Sealant to Cure
This is perhaps the most important and often overlooked step. Curing is when the sealant hardens and becomes waterproof. Rushing this can undo all your hard work.
- Check the caulk or sealant manufacturer’s instructions for specific curing times. These can vary significantly.
- Typically, silicone caulk needs at least 24 hours to cure fully, but some products may require longer, especially in damp or cool environments.
- Avoid exposing the newly sealed area to water or heavy use during the curing period. If it’s a shower, you’ll need to go without showering in that area for the full curing time.
- Once cured, the area should be waterproof and ready for use.
Step 6: Test Your Fix
After the curing time is up, it’s time to see if your hard work paid off.
- Slowly turn the water supply back on if you shut it off.
- Carefully run water in the area you repaired. For a shower or tub, let it run for a few minutes. For a sink, run the faucet.
- Watch closely for any signs of moisture or dripping in the area you sealed and in the vicinity where the leak originally appeared.
- If you don’t see any leaks, congratulations, you’ve successfully unclogged your grout leak!
- If you still notice a leak, don’t despair. Re-examine the area. You might have missed a crack, or the sealant might not have adhered properly. You may need to repeat the cleaning and sealing process, or it could indicate a larger underlying issue.
When to Call a Professional
While many grout leaks are DIY-friendly, there are times when it’s best to bring in an expert.
- Persistent Leaks: If you’ve tried fixing it multiple times and the leak keeps returning, there might be a more complex problem.
- Suspected Plumbing Issues: If you think the leak might be due to a cracked pipe, a faulty valve, or a problem with your home’s water pressure, a plumber is needed.
- Extensive Water Damage: If you see signs of mold spreading, water stains on ceilings or walls in other rooms, or structural damage, it’s time to call in professionals.
- Lack of Confidence or Tools: If you’re not comfortable with the steps or don’t have the right tools, it’s better to hire someone to ensure the job is done correctly and safely the first time.
According to the HGTV, knowing when to call a professional is a crucial part of home maintenance, saving you time, money, and potential headaches down the line.
Preventing Future Grout Leaks
Once you’ve fixed the leak, you’ll want to keep it from coming back. Prevention is key!
- Regular Sealing: Grout should be sealed periodically – typically every 6 to 12 months, depending on the sealant used and the amount of moisture exposure. This helps to keep it from absorbing water.
- Proper Cleaning: Use pH-neutral cleaners on your tile and grout. Avoid harsh or acidic chemicals that can degrade the grout and sealant over time.
- Good Ventilation: Ensure your bathroom or kitchen has adequate ventilation. Using exhaust fans during and after showering or cooking helps to dry out the area quickly, reducing moisture buildup.
- Wipe Up Spills: Don’t let water and spills sit on tile surfaces for extended periods. Give them a quick wipe to prevent saturation.
- Address Small Cracks Immediately: If you notice new small cracks in grout or caulk, fix them as soon as possible before they can become entry points for water.
Common Grout Leak Scenarios and Fixes
Let’s look at a couple of common problem areas and how our general guide applies:
| Scenario | Likely Cause | Primary Fix Location | Recommended Sealant Type |
|---|---|---|---|
| Water seeping from the base of a tub or shower surround | Failed caulk seal between the wall and tub/shower base, or cracked grout in the lower tile courses. | The entire seam around the tub/shower, and any cracked grout lines near the base. | 100% Silicone Kitchen & Bath Caulk. |
| Dampness behind a sink vanity or behind tiling near a faucet | Failed caulk around the faucet fixture base, or a cracked/deteriorated grout line near the faucet. | The caulk around the faucet base and any compromised grout lines in the backsplash or surrounding wall. | 100% Silicone Kitchen & Bath Caulk. |
| Water appearing on the floor below a shower or tub | Significant grout failure, cracked tile, or a problem with the waterproofing membrane beneath the tiles. | Focus on the grout and caulked seams around the perimeter of the shower/tub. If a large area of grout is deteriorated, it may need more substantial repair or replacement. | For small grout repairs, use grout repair caulk. For seams, 100% Silicone Kitchen & Bath Caulk. If extensive, professional assessment. |
These scenarios highlight how the basic principles of locating, removing, cleaning, and sealing remain consistent, but the specific points of application might differ slightly. It’s always about finding that weak point where water is making its escape.
Frequently Asked Questions About Unclogging Grout Leaks
Q1: Is it normal for grout to leak?
No, it’s not normal for grout to actively leak. While grout is porous and can absorb moisture, significant leaks mean it’s compromised. Cracks, deterioration, or a failure of sealant are usually the cause.
Q2: How long does silicone caulk take to cure?
Most silicone caulks take about 24 hours to cure fully. However, always check the product packaging for specific instructions, as curing times can vary based on humidity and temperature.
Q3: Can I just caulk over old caulk or grout?
No, you should never caulk over old caulk or grout. The new sealant won’t adhere properly, and the leak will likely return. Always remove the old material first.
Q4: What if the leak is coming from a pipe, not the grout?
If you suspect a pipe leak, it’s a more serious issue. You’ll likely see water stains, hear dripping sounds from within walls, or notice persistent dampness that isn’t explained by surface moisture. In this case, turn off the water and call a licensed plumber immediately.
Q5: How often should I reseal my grout?
Grout typically needs to be resealed every 6 to 12 months. However, this depends on the type of sealant, the amount of moisture exposure, and regular cleaning practices.
Q6: Can I use epoxy grout for repairs?
Epoxy grout is much less porous and more stain-resistant than cementitious grout. It can be a good option for repairs, especially in high-moisture areas, but it can be trickier to work with than traditional grout. If you’re comfortable working with it, it offers excellent durability.
Conclusion
You’ve now learned the essential steps to identify, fix
