
Unclog grout fast with simple, effective DIY methods. Achieve stunning, clean grout lines quickly by combining the right cleaning agents and gentle scrubbing techniques. Our guide breaks down the process, making it easy for anyone to restore their grout’s sparkle in no time.
Dirty, stained grout can cast a shadow over even the most beautiful tile work. It’s a common frustration for homeowners, making kitchens and bathrooms look tired and grimy. But don’t worry! You don’t need a professional to bring back that pristine, just-like-new look. We’re here to show you how to unclog grout fast, using everyday items and straightforward techniques. Get ready to transform your tiled surfaces and feel proud of your home again. Let’s dive into making those grout lines shine!
Why Does Grout Get Clogged and Stained?
Grout is like a sponge for your tile. It’s porous, meaning it has tiny little holes. Over time, these holes trap dirt, soap scum, grease, and mineral deposits. Think of it as a miniature battlefield in your bathroom or kitchen where everyday grime wins the war against pristine white lines. This buildup not only looks unsightly but can also start to break down the grout itself if left unchecked.
Several common culprits contribute to clogged and stained grout:
- Soap Scum: In bathrooms, soap residue mixes with minerals from your water and body oils to create a stubborn film.
- Grease and Food Particles: Kitchen grout is susceptible to splatters from cooking, which can leave behind oily stains.
- Dirt and Grime: Foot traffic, dust, and general household activity track in dirt that settles into grout lines.
- Mold and Mildew: Damp environments are perfect breeding grounds for mold and mildew, which can discolor grout and cause unpleasant odors.
- Hard Water Deposits: If you have hard water, mineral buildup can appear as white or chalky stains on grout.
Gather Your Cleaning Arsenal: Tools & Supplies

Before we begin, let’s get our tools ready. Having everything on hand makes the process smoother and faster. You probably already have most of these items around your house!
Essential Tools:
- Stiff-bristled Brush: An old toothbrush, a grout brush, or a scrub brush with firm bristles works wonders for getting into those grooves.
- Spray Bottle: For applying your chosen cleaning solution evenly.
- Microfiber Cloths or Rags: For wiping and rinsing. Old t-shirts or towels work fine too.
- Bucket: For mixing cleaning solutions and rinsing your brush.
- Squeegee (Optional): Can help remove excess water.
- Gloves: To protect your hands from cleaning solutions.
- Safety Glasses (Recommended): Especially if using stronger cleaning agents.
Cleaning Agents:
You have several effective options for tackling grout. We’ll explore a few at-home, budget-friendly solutions and a slightly stronger option for tougher jobs.
- Baking Soda and Water Paste: A gentle yet effective abrasive.
- White Vinegar: A natural disinfectant and degreaser.
- Hydrogen Peroxide: A mild bleaching agent that helps lift stains.
- Commercial Grout Cleaner: For stubborn stains, a specially formulated cleaner can be very effective. Always follow the manufacturer’s instructions carefully.
Effortless Steps to Unclog Grout Fast

Ready to see your grout líneas regain their former glory? Follow these simple, step-by-step instructions. We’ll start with the gentlest methods and move to more potent ones if needed.
Step 1: Prepare the Area and Protect Yourself
First things first, clear the clutter. Remove any items from the countertops or floors that might get in your way. Open windows for ventilation, especially if you plan to use vinegar or a commercial cleaner. Put on your gloves and safety glasses. A little preparation goes a long way in ensuring a safe and efficient cleaning session.
Step 2: Choose Your Cleaning Solution
Let’s decide which cleaner is right for your grout’s condition.
Option A: Baking Soda Paste (Gentle & Natural)
This is your go-to for everyday dirt and light staining. It’s safe, inexpensive, and readily available.
- In a small bowl, mix about 1/2 cup of baking soda with just enough water to form a thick paste. It should have a consistency similar to toothpaste.
Option B: Vinegar Solution (For Grime & Mildew)
Vinegar is excellent for cutting through soap scum and tackling mildew. Its acidity helps break down grime.
- In a spray bottle, mix equal parts white vinegar and water (e.g., 1 cup vinegar, 1 cup water).
- Important Note: Never mix vinegar with bleach. This creates toxic chlorine gas. Also, avoid using vinegar on unsealed natural stone, as it can etch the surface. Always test in an inconspicuous area first.
Option C: Hydrogen Peroxide (For Stubborn Stains)
Hydrogen peroxide has mild bleaching properties that can tackle tougher stains and kill mold and mildew spores.
- You can use 3% hydrogen peroxide straight from the bottle or mix it with a little baking soda to create a paste.
- Caution: While generally safer than bleach, hydrogen peroxide can still lighten colored grout. Always test on a small, hidden area.
Option D: Commercial Grout Cleaner (For Toughest Jobs)
If DIY solutions aren’t cutting it, a specialized cleaner is your next step. Look for one suitable for your tile type (ceramic, porcelain, natural stone).
- Follow the product instructions precisely. Most require application, a short waiting period, and scrubbing.
Step 3: Apply the Cleaner
Now it’s time to get cleaning! Work in small sections, about 2-3 square feet at a time. This prevents the cleaner from drying out before you can scrub it.
- Baking Soda Paste: Apply the paste directly to the grout lines using your brush or a spoon.
- Vinegar Solution: Generously spray the solution onto the grout lines.
- Hydrogen Peroxide: Spray or apply the paste directly onto the grout.
- Commercial Cleaner: Apply according to the product label.
Step 4: Let It Work (The Waiting Game)
Give your chosen cleaner some time to break down the dirt and grime. This is crucial for an effortless clean!
- Baking Soda Paste: Let it sit for 5-10 minutes.
- Vinegar Solution: Let it sit for 10-15 minutes.
- Hydrogen Peroxide: Let it sit for 10-15 minutes.
- Commercial Cleaner: Follow product instructions, typically 5-15 minutes.
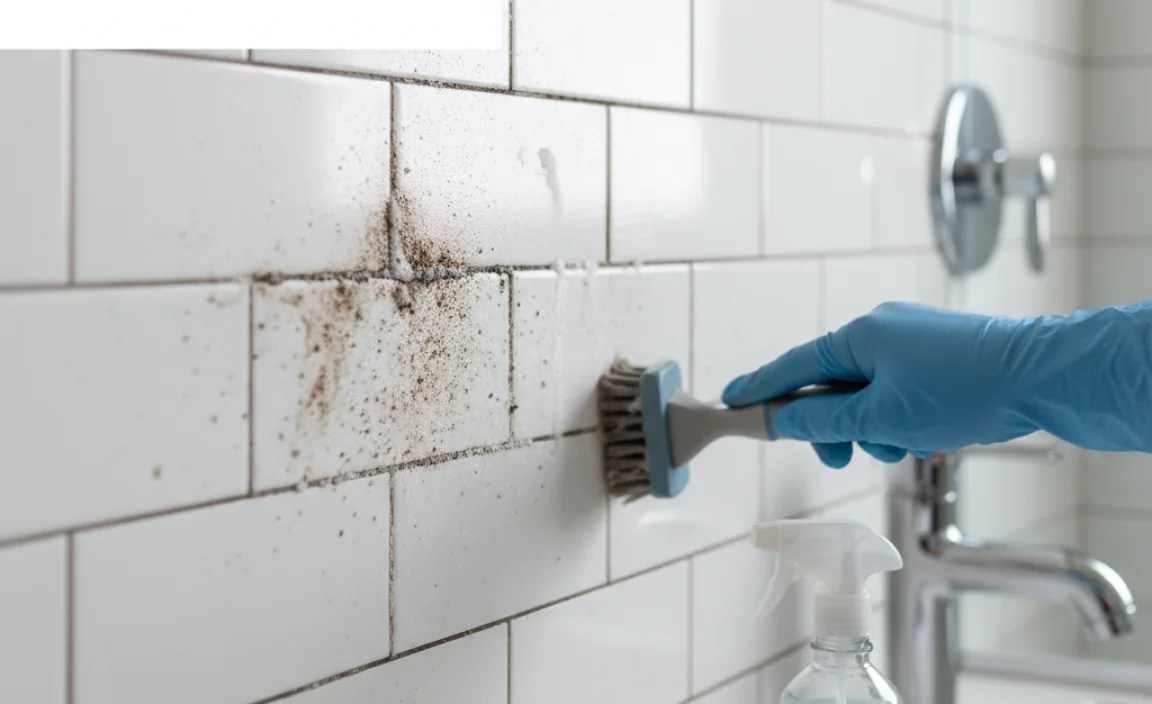
Step 5: Scrub Away the Grime
This is where the magic happens! Grab your stiff-bristled brush and a bucket of clean water.
- Dip your brush into the clean water (or your cleaning solution if it’s a paste you want to reactivate).
- Scrub the grout lines with firm, back-and-forth motions. You should see the dirt lifting away.
- For tougher spots, add a little more elbow grease or let the cleaner sit a few minutes longer.
- Rinse your brush frequently in the bucket of clean water to avoid spreading dirt.
Step 6: Rinse and Wipe Clean
Once you’ve scrubbed a section, it’s time to remove the loosened dirt and cleaner.
- Use a damp microfiber cloth or sponge to wipe away the cleaning solution and the lifted grime.
- Rinse your cloth or sponge frequently in a bucket of clean water.
- For larger areas, a squeegee can help push excess water towards a drain or a towel.
- Ensure all cleaning residue is removed to prevent streaks or haze.
Step 7: Inspect and Repeat (If Necessary)
Take a look at your freshly cleaned grout. If you see any stubborn spots or areas that could be brighter, repeat steps 3 through 6 in those specific areas. Sometimes, a second application is all it takes to achieve that stunning, clog-free look.
Step 8: Dry Thoroughly
After cleaning and rinsing, use a clean, dry microfiber cloth to buff the tile and grout dry. This prevents water spots and helps maintain the shine. Proper drying also discourages mold and mildew growth.
Advanced Techniques for Stubborn Grout Lines
Sometimes, despite your best efforts, grout can be exceptionally stubborn. For these areas, consider these slightly more intensive methods:
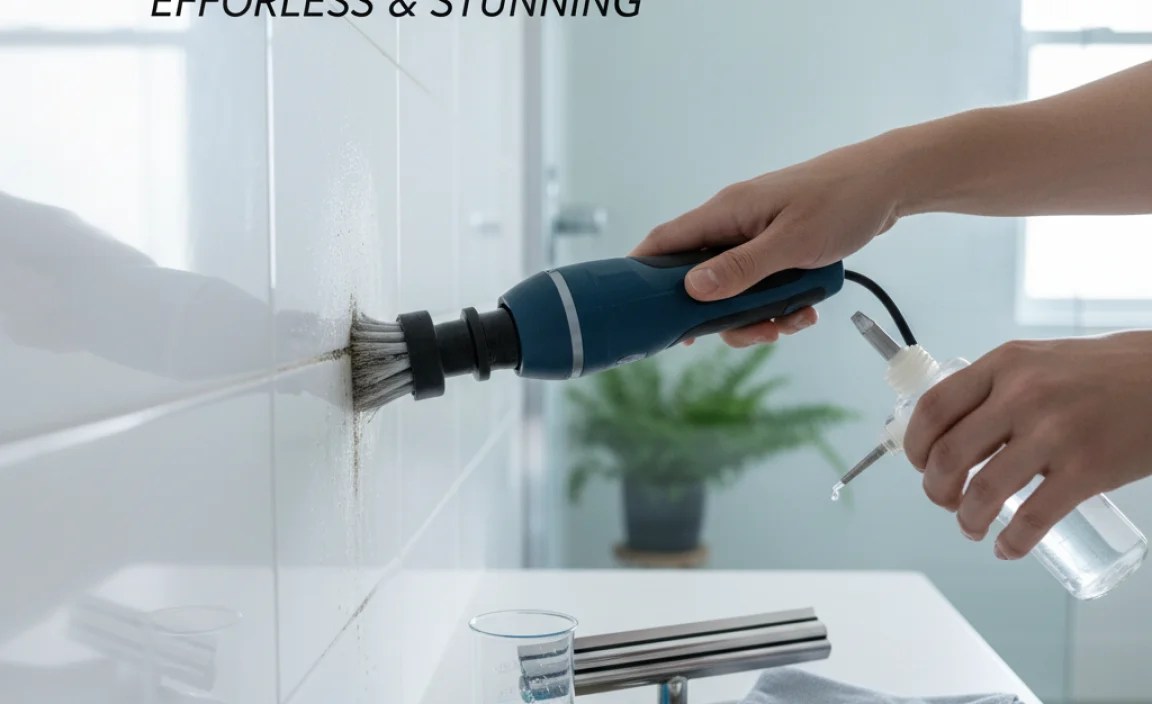
Steam Cleaning
A steam cleaner can be an incredibly effective tool for deep cleaning grout. The hot steam loosens dirt, kills bacteria, and disinfects without harsh chemicals. Many handheld steam cleaners come with specialized grout brush attachments that make the job easier.
- How to: Follow your steam cleaner’s instructions. Typically, you’ll fill it with distilled water, let it heat up, and then apply the steam directly to the grout lines using the appropriate attachment. Wipe away loosened grime with a microfiber cloth as you go.
For more on steam cleaning, the U.S. Environmental Protection Agency (EPA) offers insights into using steam for cleaning and disinfecting, highlighting its effectiveness against microbes. You can learn more about their recommendations for a healthy home environment at EPA’s Safer Choice program.
Grout “Sacrificial” Scrub (for the Truly Tough Stuff)
This method involves creating a more potent cleaning paste. It’s for areas that are heavily stained or clogged and haven’t responded to milder treatments.
- Mix: Combine baking soda and a small amount of a mild liquid dish soap (a few drops) to create a paste. You can also add a teaspoon of hydrogen peroxide to this mix for extra stain-lifting power.
- Apply: Apply this thick paste generously to the grout lines.
- Wait: Let it sit for at least 20-30 minutes.
- Scrub: Use your stiff-bristled brush with vigorous scrubbing.
- Rinse: Thoroughly rinse and wipe clean as described in Step 6.
This paste is more abrasive and holds its cleaning power longer, making it effective for deep-seated grime. Remember to test this in an inconspicuous area first, as the added ingredients can be harsher than plain baking soda.
Preventing Future Grout Clogs: The Best Defense

Once you’ve achieved that stunning, clog-free grout, the best strategy is prevention! A little bit of regular maintenance can save you a lot of scrubbing later.
Regular Cleaning is Key
Wipe down your tile and grout surfaces regularly with a mild cleaner (like soapy water or a diluted vinegar solution) after heavy use, especially in kitchens and bathrooms. This prevents dirt and grime from accumulating.
Seal Your Grout
This is a game-changer! Grout sealing creates a protective barrier that makes grout less porous and resistant to stains and moisture. It’s relatively inexpensive and can be done DIY.
- How to Seal:
- Ensure grout is completely clean and dry (wait at least 24-72 hours after cleaning before sealing).
- Apply a grout sealer using a small brush, a roller, or a clean cloth, concentrating on the grout lines.
- Wipe off any excess sealer from the tile surface immediately with a clean cloth; sealer left on tiles can be difficult to remove once dry.
- Allow the sealer to cure as per the manufacturer’s instructions (usually several hours or overnight) before exposing the area to water.
Sealing is recommended by tiling professionals and manufacturers alike. Resources from the Tile Council of North America (TCNA) often emphasize the importance of proper grout sealing for tile longevity and appearance.
Address Spills Immediately
Don’t let spills in the kitchen or bathroom sit on tiled surfaces. Wipe them up promptly to prevent them from soaking into the grout.
Improve Ventilation
In bathrooms, ensure good ventilation (use an exhaust fan) to reduce moisture, which combats mold and mildew growth.
How Often Should You Deep Clean Grout?
The frequency of deep cleaning your grout depends on several factors, including the type of tile, the location (e.g., high-traffic areas, kitchens vs. bathrooms), and whether the grout is sealed.
Here’s a general guideline:
- High-Traffic Areas (Kitchen Floors, Entryways): Every 2-3 months.
- Standard Bathrooms (Showers, Floors): Every 4-6 months.
- Areas with Minimal Use: Every 6-12 months.
Always keep an eye on your grout lines. If they start to look dingy, grimy, or stained, it’s time for a cleaning, regardless of the schedule.
Comparing Grout Cleaning Methods
Here’s a quick look at some common methods and their pros and cons:
| Method | Pros | Cons | Best For |
|---|---|---|---|
| Baking Soda & Water Paste | Inexpensive, non-toxic, readily available, gentle scrubbing | May require more effort for heavy stains | Daily grime, light staining, renters |
| Vinegar Solution | Effective degreaser, kills mildew, inexpensive | Can damage unsealed natural stone, strong odor, requires ventilation | Soap scum, grease, mild mildew |
| Hydrogen Peroxide | Mild bleaching, disinfects, effective on stains | Can lighten colored grout, requires caution, test first | Discoloration, mold, mildew stains |
| Commercial Grout Cleaners | Often very effective, formulated for specific issues | Can be more expensive, may contain harsh chemicals, follow instructions closely | Deep-set stains, difficult grime |
| Steam Cleaning | Chemical-free, disinfects, deep cleaning power | Requires equipment, can be time-consuming for large areas | Stubborn dirt, sanitizing, all grout types |
Choosing the right method often starts with the least aggressive option and moves up if needed. Remember to always consider your tile type and grout’s condition.
Frequently Asked Questions About Unclogging Grout
Q1: Can I use bleach to clean my grout?
While bleach can whiten grout, it’s generally not recommended for regular cleaning. It can be harsh, damage the grout over time, and is toxic when mixed with other cleaners (like ammonia or vinegar). Plus, it often just bleaches the surface dirt rather than truly cleaning the pores. Safer alternatives like hydrogen peroxide or commercial grout cleaners are usually better.
Q2: My grout is really old and damaged. Can cleaning fix it?
Cleaning can certainly improve the appearance of older grout and remove surface buildup. However, if the grout is crumbling, deeply cracked, or missing in spots, cleaning won’t repair the physical damage. Structural issues may require regrouting or professional assessment. For minor chips, specialized grout repair products might be an option.
Q3: How do I clean colored grout without fading it?
Colored grout can be tricky. Always test any cleaning solution in an inconspicuous area first. Baking soda paste and gentle, pH-neutral cleaners are usually safe. Avoid harsh acids like strong vinegar or bleach, as they can strip color. Diluted hydrogen peroxide might be okay, but test it. When in doubt, opt for cleaners specifically designed for colored grout.
Q4: My shower grout is constantly moldy. What’s the best way to handle this?
Mold thrives in moisture. The best approach is a combination of cleaning and prevention. For cleaning, hydrogen peroxide or a dedicated mold and mildew grout cleaner works well. For prevention, improve ventilation (use exhaust fans, leave the shower door open post-shower), wipe down surfaces after use, and ensure grout is sealed. Resealing regularly is key in high-moisture areas.
Q5: How long does it take to unclog grout?
For light to moderate dirt, the actual scrubbing and rinsing might take anywhere from 30 minutes to a couple of hours
