
Upgrading your bathroom faucet is a surprisingly simple DIY project that can dramatically enhance your bathroom’s look and feel. Follow this guide for expert tips on choosing, preparing, and installing a new faucet, transforming your space with confidence and style.
Is your bathroom faucet looking a little tired? Maybe it’s dripping, hard to turn, or just doesn’t match your style anymore. Don’t worry, upgrading your faucet is a fantastic way to give your bathroom a fresh, modern look without a full renovation. It’s more achievable than you might think, and with a few simple steps, you can dramatically improve both the appearance and functionality of your bathroom. This guide will walk you through everything you need to know, from picking the perfect faucet to getting it installed smoothly. Get ready to boost your bathroom’s appeal!
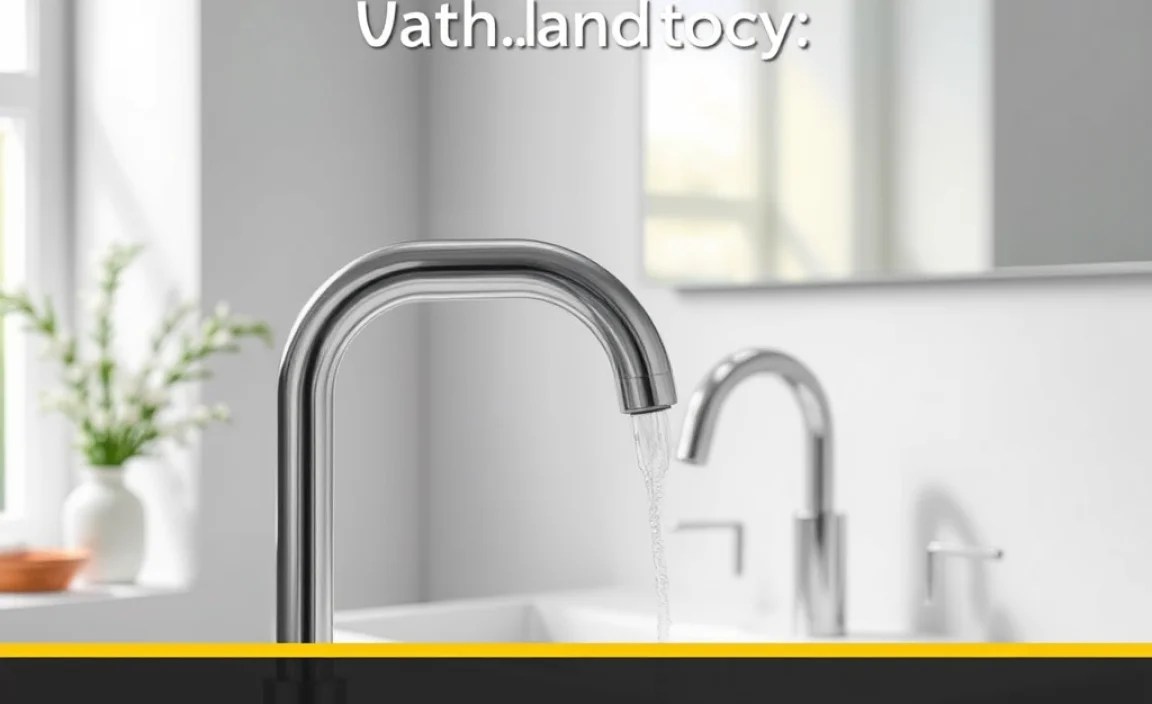
Why Upgrade Your Bathroom Faucet?

Updating your bathroom faucet is one of the most impactful, yet budget-friendly, DIY projects you can tackle. It’s like giving your bathroom a new set of sparkling eyes! Beyond just aesthetics, a new faucet can solve common annoyances like leaks or difficult handles that plague older fixtures. Think about the daily interaction you have with your faucet – a smooth, responsive, and stylish one makes a big difference. It can elevate the entire feel of your bathroom, making it a more pleasant space to be in.
Boost Your Bathroom’s Aesthetics
Faucets come in a dazzling array of finishes and styles, from sleek modern chrome to classic brushed nickel or even trendy matte black. Choosing a new faucet allows you to:
- Update the Style: Match your faucet to your bathroom’s decor, whether it’s minimalist, farmhouse, or spa-like.
- Add a Touch of Luxury: High-end faucets often feature elegant designs and premium finishes that instantly upgrade the perceived value of your bathroom.
- Create a Focal Point: A unique or particularly well-designed faucet can become a beautiful centerpiece in your bathroom.
Improve Functionality and Efficiency
Old faucets can be frustrating. A new faucet often brings improved performance:
- Smooth Operation: Modern cartridges ensure easy handle movement and prevent drips.
- Water Saving Options: Many new faucets are WaterSense certified, meaning they use less water without sacrificing performance, saving you money on your utility bills. The EPA WaterSense program provides guidelines and certified products to help you conserve water.
- Easier Cleaning: Newer finishes are often more resistant to spotting and corrosion, making maintenance a breeze.
Choosing the Right Faucet: What to Look For

The world of faucets can seem vast, but breaking it down makes choosing the perfect one much easier. Consider these key factors:
Faucet Types and Configurations
Your sink will dictate the type of faucet you need. Standard configurations are based on the number of holes in your sink or countertop:
- Centerset Faucets: This is the most common type for smaller bathrooms. All parts (hot and cold handles, spout) are mounted on a single base plate, fitting sinks with three holes spaced 4 inches apart. They are typically very easy to install.
- Widespread Faucets: These offer a more custom look, with separate handles for hot and cold water and a spout. They require three holes spaced 8 inches or more apart. They provide a more luxurious feel and can be very stylish.
- Single-Hole Faucets: These have all components (handle and spout) integrated into a single unit. They fit sinks with only one hole. They offer a clean, modern aesthetic and are also often easy to install. Sometimes a base plate is included to cover additional holes if you’re replacing a faucet with more.
- Wall-Mount Faucets: Perfect for vessel sinks or unique countertop designs, these are mounted directly to the wall above the sink. Installation is more complex as it involves plumbing within the wall.
Finishes: Style Meets Durability
The finish of your faucet plays a huge role in its appearance and how well it holds up over time. Here’s a look at popular choices:
| Finish | Pros | Cons | Best For |
|---|---|---|---|
| Chrome | Durable, affordable, easy to clean, versatile style. | Shows water spots and fingerprints easily. | All bathroom styles; high-traffic areas. |
| Brushed Nickel | Hides water spots and fingerprints well, warm/neutral tone, durable. | Can be more expensive than chrome, might not match polished fixtures. | Transitional to modern styles; families. |
| Matte Black | Trendy, sophisticated, hides water spots well, creates a strong contrast. | Can be prone to scratching if not cleaned gently, might show hard water buildup. | Modern, industrial, or minimalist bathrooms. |
| Polished Brass/Gold | Adds a touch of vintage or luxury, warm color. | Can tarnish or show wear over time if not properly maintained, can look dated if not styled carefully. | Traditional, vintage, or luxurious bathrooms. |
| Brushed Gold/Bronze | Luxurious and warm, hides water spots better than polished gold, more contemporary than antique brass. | Can be pricier, may require specific cleaning products. | Glam, modern, or transitional styles. |
Important Features to Consider
- Handle Type: Single-handle faucets are convenient for one-handed operation, while double-handle faucets offer more precise temperature control.
- Spout Height and Reach: Ensure the spout is high enough to clear your sink basin and long enough to reach comfortably over it. Measure your sink to be sure!
- Valve Type: Look for faucets with ceramic disc valves. These are highly durable, long-lasting, and provide a drip-free seal, far superior to older compression or ball valves.
- WaterSense Certification: As mentioned, WaterSense labeled faucets meet EPA criteria for water efficiency, typically using 1.5 gallons per minute or less.
Getting Ready for Your Faucet Upgrade: Tools and Preparation

You’ve picked out your stunning new faucet! Now, let’s get you ready for the installation. Proper preparation makes the job smoother and helps avoid common pitfalls.
Essential Tools You’ll Need
Don’t worry, you likely have most of these already, or they are easy to find. Having the right tools makes all the difference:
- Adjustable Wrenches (2): Essential for loosening and tightening nuts and fittings. Having two allows you to hold one fitting while turning another.
- Basin Wrench: This specialized tool is a lifesaver for reaching nuts in tight spaces behind the sink. If you don’t have one, consider buying or borrowing one. This Old House has a great guide on using one.
- Plumber’s Putty or Silicone Sealant: Used to create a watertight seal between the faucet base and the sink. Check your faucet’s instructions; some come with integrated gaskets and don’t require extra sealant.
- Bucket: To catch any residual water in the supply lines.
- Teflon Tape (Pipe Thread Tape): For sealing threaded connections to prevent leaks.
- Screwdrivers (Phillips and Flathead): For any screws holding the old faucet in place or for securing the new one.
- Safety Glasses: Always protect your eyes!
- Old Towels or Rags: To wipe up spills and protect surfaces.
- Flashlight or Headlamp: It’s often dark under the sink!
- Utility Knife or Putty Knife: To help loosen old sealant.
Safety First: Shutting Off the Water
This is the most critical step. You absolutely must shut off the water supply before you begin removing the old faucet. Look under your sink for two shut-off valves, one for hot water and one for cold. They typically have a small oval or round handle.
- Turn the Handles: Turn the valve handles clockwise until they stop.
- Test: Turn on the old faucet to drain any remaining water in the lines and to confirm that the water is indeed off. Let it run until only a trickle or no water comes out.
If you don’t have individual shut-off valves under your sink, you’ll need to locate the main water shut-off valve for your entire house and turn that off. Remember to inform others in your household before doing this!
Removing the Old Faucet
Once the water is off and the lines are drained, it’s time to say goodbye to the old fixture.
- Disconnect Water Supply Lines: Use your adjustable wrench to carefully loosen and disconnect the hot and cold water supply lines from the shut-off valves. Have your bucket ready for any drips.
- Remove Mounting Nuts: Underneath the sink, you’ll find nuts or screws holding the faucet in place. This is where your basin wrench will be your best friend. Loosen and remove these.
- Lift Out the Old Faucet: Once all connections and mounting hardware are removed, the old faucet should lift out from the top of the sink. You might need to gently pry it if old putty is holding it.
- Clean the Sink Surface: Use a putty knife or scraper to remove any old plumber’s putty or sealant from the sink surface. A clean surface is essential for a good seal with the new faucet.
Step-by-Step Faucet Installation: A Beginner’s Guide

Now for the exciting part: installing your gorgeous new faucet! Take your time, follow these steps, and remember to consult your faucet’s specific installation manual.
Step 1: Prepare the New Faucet
Most new faucets come with detailed instructions. Read through them carefully:
- Assemble Components: If your faucet has separate handles and spout (widespread), assemble them according to the manual.
- Apply Sealant (if needed): If your faucet doesn’t have a built-in gasket, apply a bead of plumber’s putty or silicone sealant around the base of the faucet or escutcheon plate (the decorative piece that covers the sink holes).
Step 2: Position and Secure the New Faucet
- From Above: Carefully lower the new faucet into the holes on the sink or countertop. Ensure it’s centered and facing the correct direction.
- From Below: Underneath the sink, slide any provided washers and then thread the mounting nuts onto the faucet shanks. Hand-tighten first, ensuring the faucet is still aligned correctly from above.
- Tighten: Use your basin wrench or the tool recommended by the manufacturer to snug up the nuts. Don’t overtighten, as this can crack your sink or damage the faucet.
Step 3: Connect the Water Supply Lines
This is where you’ll connect your new faucet to your home’s water supply.
- Connect to Faucet: Screw the new water supply lines onto the threaded shanks of the faucet. Hand-tighten, then use an adjustable wrench to give them a final quarter-turn. Often, rubber gaskets inside the supply lines create the seal, so overtightening isn’t needed and can damage the fitting.
- Connect to Shut-Off Valves: Connect the other end of the hot and cold supply lines to their respective shut-off valves. Again, hand-tighten and then give a gentle quarter-turn with a wrench. Avoid Teflon tape on these compression fittings unless specifically instructed by the manufacturer, as it can interfere with the seal.
Step 4: Test for Leaks
This is a crucial step before you begin using the faucet normally.
- Slowly Turn Water On: Open the hot and cold shut-off valves under the sink slowly.
- Inspect Connections: Carefully examine all the connections you just made (where supply lines meet valves and where they meet the faucet) for any drips or leaks. Check both above and below the sink.
- Gentle Tightening: If you see a small drip, try tightening the connection slightly (about an eighth to a quarter turn).
- Full Test: Once you’re confident there are no leaks, turn the faucet on to both hot and cold. Let the water run for a minute to flush out any debris from installation and to ensure proper operation.
Step 5: Final Touches
- Wipe Down: Clean up any plumber’s putty or sealant residue around the base of the faucet.
- Install Drain Assembly (if applicable): If your new faucet came with a new drain assembly, this is the time to install it, following its own instructions.
Troubleshooting Common Installation Issues
Even with the best preparation, things can sometimes go a bit awry. Here are a few common issues and how to fix them:
Issue 1: Leaky Connections
- Cause: Fittings are not tight enough, or threads may be damaged. Supply lines may not have been seated correctly.
- Solution: Gently tighten the connection by a quarter turn. If the leak persists, turn off the water, disconnect the line, and re-examine the threads on both the valve and the supply line fitting for damage. Ensure any rubber washers or seals are properly seated.
Issue 2: Faucet Wobbles
- Cause: Mounting nuts underneath are too loose.
- Solution: Tighten the mounting nuts securely using your basin wrench. Ensure the faucet is properly aligned before final tightening.
Issue 3: Water Flow Seems Weak
- Cause: Aerator is clogged with debris from installation, or a shut-off valve is not fully open.
- Solution: Unscrew the aerator (the small screen at the tip of the spout). Rinse it thoroughly and screw it back in. Double-check that both shut-off valves are fully open – sometimes they can be stiff and appear open when they are not.
Issue 4: Difficulty Reaching Nuts Underneath
This is a classic plumbing challenge, especially in tighter spaces.
- Cause: Limited space and awkward angles make standard tools difficult to use.
- Solution: A basin wrench is designed for this exact situation. Its long shaft and pivoting jaw allow you to reach and turn those hard-to-access nuts. If you can’t get one, consider renting one or seeking help from a handy friend.
Maintaining Your New Faucet
Once your beautiful new faucet is installed, a little regular care will keep it looking stunning and functioning perfectly for years to come.
Regular Cleaning
- Daily Wipe-Down: Use a soft, damp cloth to wipe away water spots and fingerprints after each use. This is especially helpful for chrome and polished finishes.
- Gentle Cleaning Products: For tougher grime or hard water deposits, use a mild soap or a cleaner specifically designed for your faucet’s finish. Avoid abrasive cleaners, scouring pads, or harsh chemicals like bleach, as these can damage the finish.
- Check the Aerator: Periodically (every few months), unscrew the aerator at the tip of the spout and rinse it clean. A clogged aerator can reduce water flow and cause spraying.
Checking for Leaks
- Regularly check under the sink for any signs of moisture or drips around the supply lines and valves. Address any small leaks immediately before they become bigger problems.
Protecting the Finish
- Be mindful of what comes into contact with your faucet. Hair sprays, certain cosmetics, and some cleaning products can damage finishes over time. If you accidentally spill something on the faucet, wipe it clean immediately.
Frequently Asked Questions (FAQs)
Q1: How long does it typically take to replace a bathroom faucet?
A: For a beginner with basic tools and clear instructions, replacing a bathroom faucet usually takes between 1 to 3 hours. If you need to shut off the main water supply or encounter unexpected issues, it could take a bit longer.
Q2: Do I need a special faucet for a vessel sink?
A: Yes, most vessel sinks require a faucet with a taller spout and often a longer reach to accommodate the sink’s height and position. Some vessel sinks also have a wider spacing for the faucet holes, or they look best with a wall-mount faucet.
