
In-vessel composting methods offer a controlled, fast, and mess-free way to turn kitchen scraps and yard waste into nutrient-rich soil. This guide breaks down the genius of these systems, making them easy for beginners to adopt for a greener home and garden.
Composting at home is a fantastic way to reduce waste and create free, super-powered fertilizer for your plants. But let’s be honest, the thought of a big, open compost pile can sometimes feel intimidating or even a bit messy. You might worry about pests, smells, or just not knowing if you’re doing it right. Well, good news! There’s a smarter, cleaner, and often faster way: in-vessel composting. These clever systems keep everything contained, making the whole process much simpler and more efficient. We’ll walk through exactly how these methods work, what makes them so genius, and how you can easily get started, no matter your space or experience level.
What Exactly Is In-Vessel Composting?

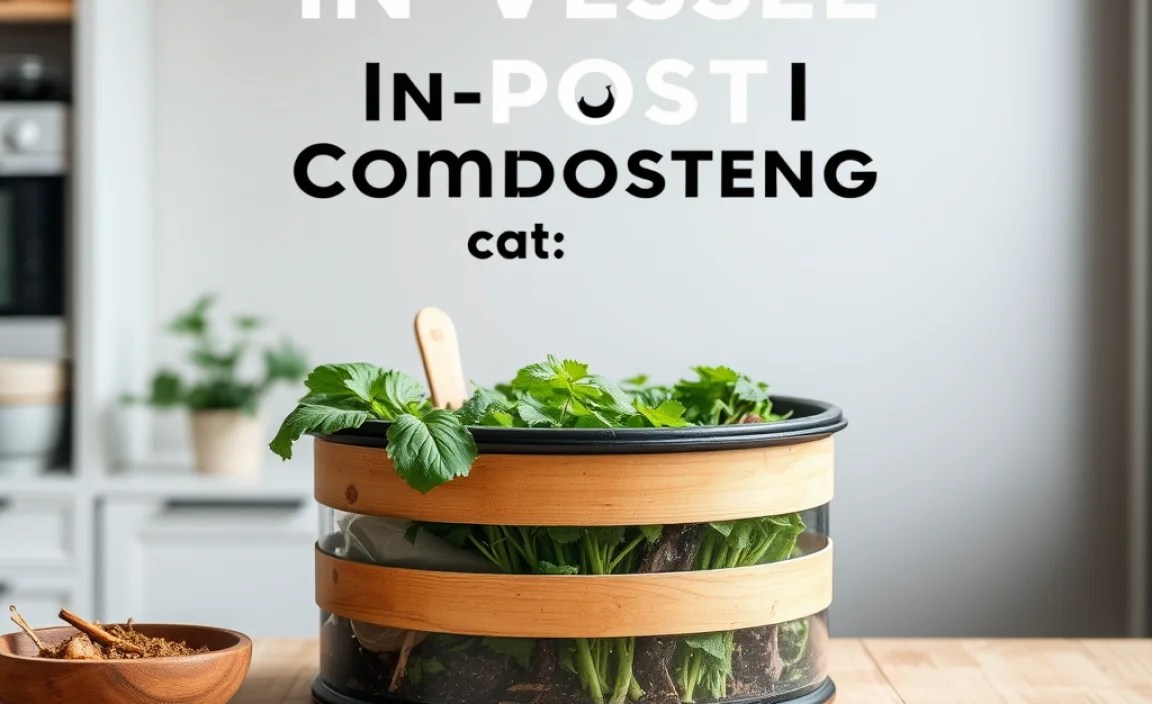
Simply put, in-vessel composting means you’re doing your composting inside a container or “vessel.” Instead of an open pile in the corner of your yard, you’re using a bin, tumbler, or specialized enclosed system. This contained approach is what makes it so appealing for many home composters. It’s tidy, it helps manage moisture and temperature more effectively, and it can significantly speed up the decomposition process.
The “vessel” can be anything from a DIY recycled bin to a state-of-the-art electric composter. The key is that it keeps your organic materials enclosed, protected from the elements and local critters. This control is the real genius behind these methods, allowing you to compost even in smaller spaces like apartments, balconies, or urban backyards.
Why Is In-Vessel Composting Genius & Essential?
In-vessel composting isn’t just a trend; it’s a genuinely smarter approach to home composting for several reasons. It addresses many of the common hurdles beginners face and offers benefits that contribute to a more sustainable lifestyle.
Key Benefits of In-Vessel Composting:
- Odor Control: One of the biggest concerns for many is the potential for bad smells. In-vessel systems, when managed correctly, significantly reduce or eliminate odors because they keep materials contained and balanced.
- Pest Deterrence: An enclosed bin is a much better barrier against unwanted visitors like rodents, raccoons, or flies compared to an open pile.
- Faster Decomposition: Many in-vessel systems are designed to optimize conditions like aeration, moisture, and temperature, which can speed up the composting process, sometimes turning waste into compost in a matter of weeks rather than months.
- Space Efficiency: Whether you have a small city backyard, a balcony, or an indoor space, there’s an in-vessel composter that can fit. They are often more compact and aesthetically pleasing than traditional compost piles.
- Weather Protection: The contents are protected from excessive rain (which can make things too wet and smelly) or drying out from sun and wind, offering a more consistent environment for decomposition.
- Tidiness: These systems keep everything neat and contained, preventing materials from spilling out or looking messy in your yard or home.
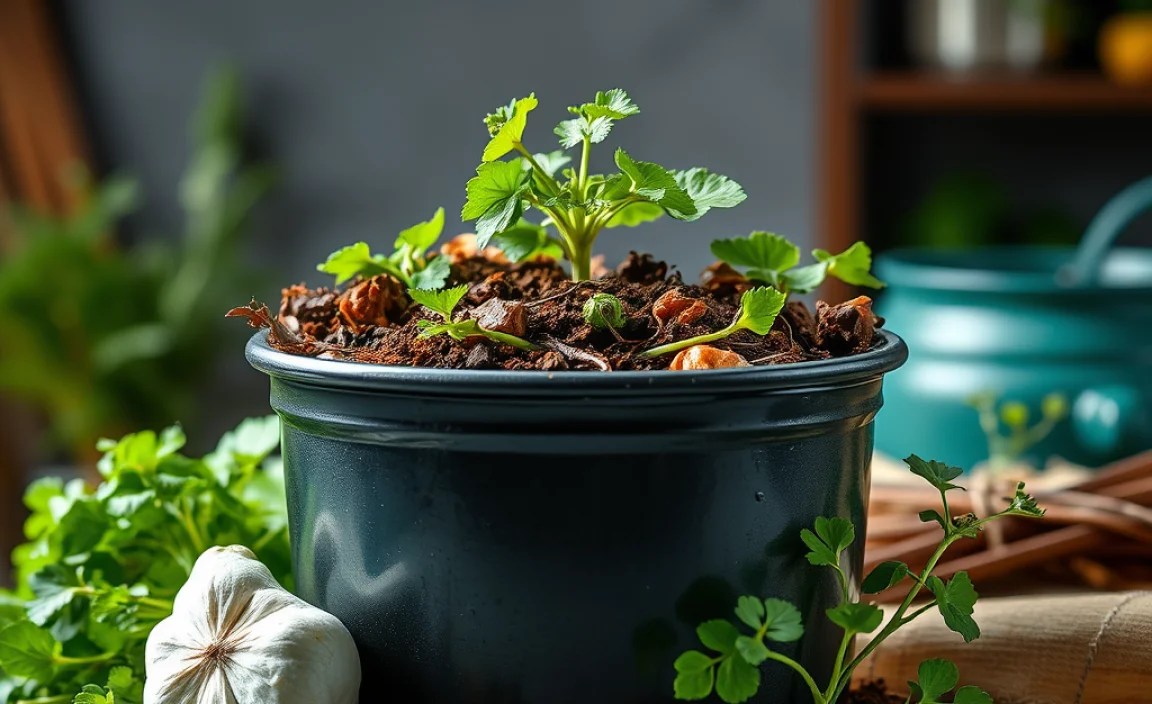
- Nutrient Rich Compost: Properly managed in-vessel composting yields high-quality compost, packed with essential nutrients that will enrich your soil and boost plant growth.
For homeowners and DIY enthusiasts looking to make a tangible impact on their waste footprint while improving their garden soil, in-vessel composting is becoming an increasingly essential and accessible solution. It’s a high-return, low-hassle approach to sustainability right in your own home.
Exploring Common In-Vessel Composting Methods
When we talk about in-vessel composting, there are a few popular types of systems available. Each has its own unique way of working, benefits, and ideal user. Understanding these will help you pick the best method for your needs.
Types of In-Vessel Composters:
- Stationary Bins: These are typically upright bins with a lid and often a door at the bottom for harvesting finished compost. They are static, meaning you don’t move the bin itself.
- Tumblers (Rotating Bins): These are enclosed drums or chambers that can be rotated or tumbled. Tumbling helps mix the compost and aerate it effectively.
- Worm Composting (Vermicomposting): While technically a form of composting using a vessel, this method specifically uses earthworms to break down organic matter.
- Electric/Accelerated Composters: These are modern, often countertop appliances that use heat, aeration, and sometimes grinding to rapidly break down food scraps into compostable material in a matter of hours.
Stationary Bins: The Workhorse
Stationary bins are perhaps the most common and often the most budget-friendly type of in-vessel composter. They are usually made of plastic, wood, or recycled materials.
How They Work:
You add your green (nitrogen-rich) and brown (carbon-rich) materials to the top. Over time, microorganisms break down the waste. To ensure proper aeration and prevent compaction, homeowners often need to turn the material periodically using a compost aerator tool or pitchfork. Many stationary bins have vents to allow airflow and a hinged lid to control moisture and prevent pests. A removable door at the bottom allows you to access the finished compost, which is usually at the base of the bin.
Who it’s for:
Ideal for larger households, those with a decent amount of yard waste in addition to kitchen scraps, and people who don’t mind a little manual turning. They are a good starting point for many.
Tumblers: The Quick and Easy Mixer
Compost tumblers are designed to make turning and aeration much easier. They consist of a drum or chamber mounted on a base, allowing you to spin it.
How They Work:
Similar to stationary bins, you add green and brown materials. The magic happens when you simply turn the handle or push the tumbling chamber. A few turns a day or every few days mixes the contents thoroughly, introducing oxygen and distributing moisture. This constant aeration and mixing create an ideal environment for microbes, leading to faster compost production. Many tumblers are double-chambered, allowing you to continue filling one side while the other matures.
Who it’s for:
Great for people who want faster results, find manual turning of a pile difficult, or live in areas where open piles might be an issue. They are excellent for speeding up the composting of kitchen scraps.
Worm Composting (Vermicomposting): The Tiny Recyclers
Vermicomposting uses specific types of worms (like red wigglers) in a bin to eat your food scraps and produce nutrient-rich worm castings.
How They Work:
You set up a specialized worm bin (often made of plastic or wood) with bedding material (like shredded newspaper or coconut coir). You then add your food scraps (avoiding meat, dairy, and oily foods) and the worms. The worms consume the scraps and their “digested” waste becomes beautiful, potent worm castings. The bin typically has drainage to handle excess moisture and sometimes a tray system to collect liquid “worm tea,” a valuable liquid fertilizer. You actively feed the worms and harvest the castings periodically.
Who it’s for:
Perfect for apartment dwellers, people with very limited space, or those who want incredibly nutrient-dense compost for houseplants, seedlings, or small gardens. It’s a hands-on, fascinating process.</p
Electric/Accelerated Composters: The Modern Solution
These are the high-tech members of the composting family. They are typically compact appliances, often resembling a modern kitchen bin or small appliance.
How They Work:
You add food scraps (and sometimes other organic materials, depending on the model). The appliance then uses a combination of heat, aeration, and sometimes grinding/mixing to break down the waste rapidly. Some models can turn food scraps into a dry, compost-like material in as little as 4-8 hours. They are essentially accelerated biodegradation units.
Who it’s for:
Ideal for those who want the quickest possible results, have limited space, are concerned about odors or pests, or prefer a largely automated solution. They are great for managing kitchen food waste specifically.
How to Choose the Right In-Vessel Composter for You
Selecting the best in-vessel composting method depends on your specific situation and goals. Considering these factors will help you make an informed choice:
Key Considerations for Your Choice:
- Space Available: Do you have a large yard, a small patio, or just a kitchen counter? This is the primary limiting factor.
- Amount of Waste: How much kitchen and yard waste do you generate? A larger family will need a bigger capacity than a single person.
- Time Commitment: How much time are you willing to spend managing your composter? Tumblers and electric models require less manual labor than some stationary bins.
- Budget: Prices can range from very inexpensive DIY options to several hundred dollars for advanced electric models.
- Speed of Composting Desired: Do you need compost quickly for an upcoming planting season, or are you happy to wait a few months?
- Aesthetics and Odor Concerns: If your composter will be visible or near living areas, appearance and odor control are paramount.
Comparing Popular Methods at a Glance
Let’s look at a quick comparison to help visualize the differences:
| Method | Ideal For | Pros | Cons | Typical Cost Range | Speed |
|---|---|---|---|---|---|
| Stationary Bin | Yard waste producers, larger households, budget-conscious | Durable, large capacity, good for yard waste, can be inexpensive | Requires manual turning, slower than tumblers, can take up more space | $50 – $300+ | Months |
| Tumbler | Faster composting, less manual labor, urban/suburban yards | Faster composting, easy to turn/aerate, good odor/pest control, often double-chambered | Can be more expensive, smaller capacity than some stationary bins, needs balance of wet/dry materials | $100 – $400+ | Weeks to Months |
| Worm Composter (Vermicomposting) | Apartments, small spaces, houseplant enthusiasts, quick nutrient boost | Produces highly nutrient-rich castings, efficient for food scraps only, compact, low odor if managed well | Limited to food scraps (no meat/dairy), requires specific worms, can be sensitive to temperature, smaller batches | $50 – $200+ (includes worms) | Months |
| Electric Composter | Speed, convenience, odor/pest control, small spaces, high volume food waste | Extremely fast, odor-free, compact, very easy to use, high food waste reduction | Highest cost, requires electricity, not “traditional” composting (produces compost starter, not mature compost) | $300 – $700+ | Hours |
Getting Started: A Step-by-Step Approach
Once you’ve chosen your in-vessel composter, the next step is to set it up and learn how to use it effectively. Here’s a general guide, adaptable to most systems.
Step 1: Setup and Placement
For Stationary Bins & Tumblers:
- Location: Choose a spot that gets partial sun to aid heating but isn’t blasted by direct sun all day, which can dry it out. Ensure it’s accessible for adding materials and harvesting compost. A level surface is important.
- Assembly: Follow the manufacturer’s instructions for assembly. This is usually straightforward, often involving clicking pieces together or screwing in a few components. If you’re building your own, ensure it’s sturdy and has proper ventilation.
For Worm Bins:
- Location: Worms are sensitive to extreme temperatures. Choose a spot that stays between 55-77°F (13-25°C) for most of the year. This could be a shaded corner outdoors in milder climates, a basement, a garage, or under a sink.
- Setup: Add your bedding material (e.g., shredded newspaper, coconut coir, peat moss) and moisten it until it’s like a wrung-out sponge. Add your worms according to the supplier’s instructions.
For Electric Composters:
- Location: Most are designed for kitchen counters, so consider proximity to an electrical outlet and ventilation.
- Setup: Plug it in. Some may require an initial setup or a quick clean.
Step 2: The Ingredients – Greens and Browns
Successful composting, whether in-vessel or not, relies on a balanced mix of “green” and “brown” materials. This balance is crucial for decomposition and odor control.
What are Greens (Nitrogen-Rich)?
Greens are moist materials that provide nitrogen, essential for microbial activity. They tend to break down quickly.
- Fruit and vegetable scraps
- Coffee grounds and tea bags
- Grass clippings
- Plant trimmings
- Eggshells (crushed)
What are Browns (Carbon-Rich)?
Browns are dry materials that provide carbon, which fuels the microbes and adds bulk, helping with aeration and preventing a soggy mess.
- Dry leaves
- Shredded newspaper or cardboard (uncoated and uncolored)
- Straw or hay
- Wood chips or sawdust (use sparingly)
- Paper towels (unsoiled by grease or chemicals)
Step 3: Adding Materials and Maintaining Balance
For Stationary Bins & Tumblers:
Aim for a ratio of about 2-3 parts Browns to 1 part Greens by volume. This is crucial! Too many greens can lead to a slimy, smelly mess. Too many browns will slow down decomposition.
- Start with Browns: It’s often recommended to start your bin with a layer of brown material to establish airflow.
- Add Greens: Bury your kitchen scraps (greens) into the existing material to help reduce odors and deter pests.
- Add Browns: Always cover your greens with a layer of browns. This is the golden rule for odor control.
- Moisture: The compost should feel like a damp sponge – not dripping wet, not bone dry. If it’s too dry, add a little water. If it’s too wet, add more browns.
- Turning/Tumbling:
- Stationary Bins: Turn the contents with a pitchfork or aeration tool every 1-2 weeks to introduce oxygen.
- Tumblers: Rotate the tumbler a few times every 2-3 days.
For Worm Bins:
- Feeding: Start by adding small amounts of food scraps, buried under the bedding. As the worm population grows, you can increase the amount.
- What to Avoid: Do NOT feed worms meat, dairy, oily foods, citrus in large quantities, or processed foods.
- Moisture: Keep the bedding moist at all times.
- Harvesting: After 2-4 months, you’ll start to see worm castings. You can harvest by migrating the worms to one side or emptying the bin and sorting.
