
Have you ever looked at your caulking tools and thought they could use a good cleaning? It’s easy to overlook them, but clean caulking tools are essential for any project. You might not realize it, but the condition of your tools can affect the quality of your work. Think about it: would you paint a wall with a dirty brush? Of course not!
Many people forget to care for their tools, but keeping them clean can make a big difference. A surprising fact is that many professionals attribute their success to well-maintained tools. When was the last time you cleaned yours? You might be shocked at how quickly debris builds up on caulking guns and smoothing tools.
Join us as we explore the best ways to clean caulking tools. Discover simple steps to keep your tools in great shape. This not only helps your projects look better but also saves you time in the long run. Let’s dive in and unlock the secrets to maintaining those essential tools!
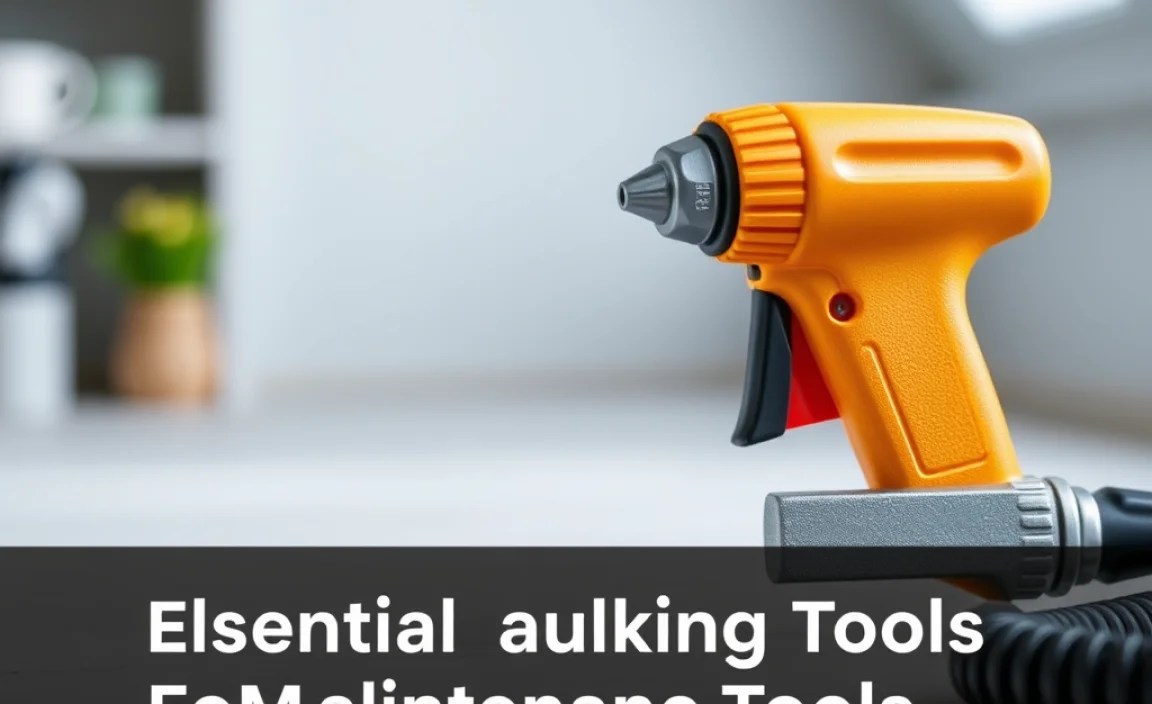
Essential Tips For Clean Caulking Tools Maintenance
Importance of Clean Caulking Tools

Keeping your caulking tools clean is crucial for effective home repairs. Dirty tools can lead to messy applications and poor adhesion. Imagine sealing windows or bathrooms with a tool covered in old residue—yikes! Regular cleaning ensures your tools stay in top shape. Did you know that clean tools can save you time and frustration? By investing just a bit of effort to maintain them, you can achieve professional-looking results every time. Don’t let messy tools ruin your projects!
Understanding the Importance of Clean Caulking Tools

Discuss the impact of clean tools on project quality.. Explain how cleanliness affects the longevity of caulking applications..
Using clean caulking tools is vital for any project. Clean tools lead to better work quality. They help caulk stick properly, creating strong seals. Dirty tools can trap dust and debris, weakening the caulking. This may cause it to crack or peel. Keeping tools clean helps projects last longer. In fact, clean tools can double the lifespan of caulking applications.
Why are clean tools important?
Clean tools ensure effective sealing and boost the durability of caulking.
Benefits of Clean Caulking Tools:
- Improved adhesion
- Stronger seals
- Longer-lasting results
Essential Types of Caulking Tools

List various tools, including caulk guns, scrapers, and finishing tools.. Describe the roles of each tool in the caulking process..
Many tools help with caulking. Each one plays a special role in making your work neat and tidy. Here are some essential types:
- Caulk Guns: These help you squeeze out the caulk smoothly.
- Scrapers: They remove old caulk, making the surface clean.
- Finishing Tools: These help shape and smooth the caulk for a neat finish.
Using the right tool makes caulking easier and keeps everything looking great!
What are clean caulking tools?
Clean caulking tools help create a neat finish and ensure that your projects are done perfectly.
Step-by-Step Guide to Clean Caulking Tools

Provide detailed methods for cleaning different types of caulking tools.. Include the necessary materials and products for effective cleaning..
Cleaning your caulking tools helps them last longer and work better. Here’s how to do it!
For squeeze tubes, use warm soapy water. Rinse them well, and let them dry. For caulking guns, remove excess caulk with a putty knife. Clean inside with a damp cloth. If it’s sticky, use mineral spirits. Finally, for nozzles, soak them in warm, soapy water, then scrub with a brush.
Materials you’ll need include:
- Warm soapy water
- Putty knife
- Damp cloth
- Mineral spirits
- Brush
How can I prevent my caulking tools from getting dirty?
Store them properly and clean them right after use to keep them in good shape.
Maintenance Tips for Prolonging Tool Lifespan
Offer best practices for maintaining tools after each use.. Discuss the importance of proper storage and handling..
Taking care of your tools can make them last longer. Here are some best practices:
- Clean your tools after every use. Dirt can speed up wear and tear.
- Store tools in a dry place. Humidity can cause rust.
- Handle tools carefully. Dropping them can lead to damage.
Proper storage is also very important. A designated spot keeps tools organized. This saves time and keeps everyone safe. Remember, taking these steps helps your tools serve you better.
How can I prolong the lifespan of my tools?
To extend your tools’ lifespan, clean them regularly, store them properly, and handle them with care. Simple habits make a big difference!
Common Mistakes to Avoid with Caulking Tools
Highlight frequent errors users make during tool usage and maintenance.. Provide solutions and alternatives to common mistakes..
Many people make simple errors while using caulking tools. One common mistake is not cleaning them after use. This can lead to dried caulk, turning your trusty tools into stubborn paperweights. Remember, a little elbow grease goes a long way!
Another blunder is using the wrong tip size. If your caulking bead looks like a squashed worm, you need a smaller opening! Choosing the right tip is key for a neat finish.
Take a look at this table for quick solutions to avoid these mistakes:
| Common Mistake | Solution |
|---|---|
| Not cleaning tools | Clean right after use! |
| Wrong tip size | Use a smaller tip for precision. |
By avoiding these simple slip-ups, you’ll keep your caulking tools clean and happy, and your projects will shine like a superstar!
Recommended Products for Caulking Tools Cleaning
Review specific cleaning solutions and tools that work best.. Include user reviews or ratings for recommended products..
Cleaning your caulking tools is easy with the right products. Here are some top choices that users love:
- Caulk Remover Spray: Great for softening old caulk, making it easy to remove. It has a 4.5-star rating for effectiveness.
- Cleaning Grout Brush: This brush helps scrub away residue. Users say it’s durable and comfortable to hold.
- Acetone Solution: A strong cleaner for tough stains. Many users appreciate its quick action.
These products can make cleaning your caulking tools smooth and quick.
What products can help clean caulking tools?
Cleaning sprays, brushes, and acetone solution work best for this task.
When to Replace Your Caulking Tools
Explain signs that indicate a tool needs replacement.. Discuss the costeffectiveness of investing in new tools versus repairs..
Knowing when to toss those old caulking tools can save you time and hassle. Look for signs like gaps in the caulk line or a handle that just won’t budge. If your tool is more stubborn than a raccoon at a picnic, it’s time for a change! New tools might seem pricey, but they’re a wise investment. You’ll cut down on mistakes, which saves cash in the long run. Remember, a happy tool makes for a happy DIY-er!
| Sign of Replacement | Why It’s Time |
|---|---|
| Gaps in caulk | Indicates wear on the tool |
| Dull blade | Can’t apply properly |
| Stuck handle | Tough to use; might break |
DIY vs. Professional Caulking Services
Compare the benefits and drawbacks of DIY caulking versus hiring professionals.. Discuss how clean tools can impact both approaches..
Deciding between DIY caulking and hiring a pro can feel like choosing between pizza and burgers—both tasty, but each has its perks! Those brave enough for DIY can save cash and feel like a superhero, but mistakes with messy cracks might make their walls scream for help. Professionals have experience and clean tools, ensuring a smooth finish every time. Clean tools are essential, too, because who wants leftover goo ruining their project? Here’s a handy table that lays it all out:
| Aspect | DIY | Professional |
|---|---|---|
| Cost | Lower | Higher |
| Skill Level | Beginner | Expert |
| Time | More | Less |
| Finish Quality | Varies | Consistent |
It’s clear; think about your needs before picking a side. If you love the thrill of DIY, grab some clean caulking tools and get started! Just remember, a little practice goes a long way.
Conclusion
In conclusion, clean caulking tools help you work better and achieve smoother results. Keeping your tools tidy means less mess and easier repairs. Check your tools regularly and clean them after each use. This way, you’ll be ready for the next project. For more tips on maintaining your tools, keep exploring and learning!
FAQs
What Are The Best Methods For Cleaning Caulking Tools After Use To Prevent Hardened Residue?
To clean caulking tools, you should act fast before the caulk dries. First, wipe off any extra caulk with a paper towel. Then, wash the tools with warm, soapy water. If the caulk is hard, try using rubbing alcohol or acetone. Always dry the tools well to keep them in good shape.
How Often Should Caulking Tools Be Cleaned To Maintain Their Effectiveness And Longevity?
You should clean your caulking tools after every use. This helps them work better next time. Use warm soapy water and a cloth. Keeping them clean will make them last longer. Always check for stuck caulk before you use them again!
What Types Of Solvents Or Solutions Are Most Effective For Cleaning Different Types Of Caulking Materials, Such As Silicone Or Acrylic?
To clean silicone caulk, you can use rubbing alcohol or a special silicone remover. For acrylic caulk, warm soapy water works well. You can also try vinegar for both types. Remember to read labels to make sure the cleaner is safe for the surface. Always wear gloves to keep your hands safe!
Are There Any Specific Tools Or Accessories Designed To Simplify The Cleaning Process For Caulking Tools?
Yes, there are special tools to help clean caulking tools. One tool is a caulk remover, which helps scrape off old caulk easily. You can also use a scraper that has a sharp edge. Some people like to have brushes or sponges to clean the tools after use. These accessories make cleaning quick and simple!
What Precautions Should Be Taken When Cleaning Caulking Tools To Ensure Safety And Avoid Damaging The Tools?
When you clean caulking tools, always Wear gloves to protect your hands. Use warm soapy water to avoid using strong chemicals. Rinse and dry the tools carefully to stop rust. Finally, store them in a dry place to keep them safe.
