
Don’t let a leaky, clogged, or broken shower drain your wallet. Our guide offers simple, budget-friendly DIY fixes for common shower problems, from dripping faucets to gunked-up drains, empowering you to handle repairs with confidence and save money. Get ready to master basic shower maintenance!
Is your shower delivering more drips and dribbles than a steady stream? A malfunctioning shower can be a real pain, not to mention a waste of water and money. But before you call a costly plumber, know this: many common shower issues are surprisingly easy and cheap to fix yourself! You don’t need to be a master craftsman or have a toolbox full of fancy gadgets. With a little know-how and a few basic supplies, you can tackle those annoying leaks, stubborn clogs, and funky showerhead problems. Let’s transform your frustrating shower into a source of pure, affordable relaxation. Ready to dive in?
Common Shower Problems and Their Cheap Fixes

Let’s break down the most frequent shower woes and how to tackle them without breaking the bank. My goal here is to give you the confidence and clear steps to get your shower back in tip-top shape.
1. The Annoying Drip, Drip, Drip: Fixing a Leaky Shower Faucet
A dripping faucet isn’t just irritating; it’s like throwing money down the drain with every drop. The most common culprits are worn-out washers or O-rings inside the faucet handle.
What You’ll Need:
-
- Adjustable wrench
- Phillips head screwdriver
- Flathead screwdriver (for prying)
- Replacement O-rings and washers (take the old ones to the hardware store to match!)
- Plumber’s grease (optional, but helpful)
- Rag or towel
Step-by-Step Fix:
-
-
- Turn Off The Water: This is crucial! Find the water shut-off valve for your bathroom or house and turn it off. If you can’t find it, you might need to turn off the main water supply to your home. This Old House has a great guide on locating these valves.
- Remove The Handle: Look for a small decorative cap on the faucet handle. Gently pry this off with a flathead screwdriver. You’ll find a screw underneath. Remove the screw with your Phillips head screwdriver.
- Access The Innards: Once the handle is off, you’ll see a decorative escutcheon (the plate around the faucet stem). This might screw off or be held by clips. Beneath that, you’ll find the valve stem or cartridge. Use your adjustable wrench to carefully unscrew and remove the packing nut or retaining clip holding the stem in place.
- Replace Worn Parts: Carefully pull out the valve stem. Inspect the O-rings and washers on the stem. If they look cracked, flattened, or brittle, they are your problem! Remove the old ones and replace them with new ones. Apply a small amount of plumber’s grease to the new O-rings to help them seal and last longer.
- Reassemble: Put everything back together in reverse order. Screw the packing nut back on, reattach the escutcheon, and then the handle. Don’t overtighten anything!
- Test It Out: Turn the water supply back on slowly. Check for any leaks around the handle. Then, turn the faucet on and off to ensure the drip has stopped.
-
2. Slow Drains and Stinky Showers: Clearing Clogged Drains
Hair, soap scum, and other debris love to build up in shower drains, leading to slow drainage and unpleasant odors. Before resorting to harsh chemical drain cleaners, try these gentler, cheaper methods.
What You’ll Need:
-
-
- Gloves
- Old toothbrush or scrub brush
- Coat hanger (bent into a hook) or a drain snake/auger
- Baking soda
- White vinegar
- Hot water
- Drain cover or plunger
-
Step-by-Step Fix:
-
-
-
- Remove Visible Gunk: Put on your gloves. Remove the drain cover (if possible by unscrewing it or lifting it out). Use your toothbrush or a bent coat hanger to carefully pull out any visible hair and gunk. This is often the primary offender!
- The Baking Soda & Vinegar Method: Pour about 1/2 cup of baking soda down the drain. Follow it with 1/2 cup of white vinegar. It will fizz and bubble – this is good! Cover the drain immediately with a plug or rag to direct the foaming action downward into the pipe. Let it sit for at least 30 minutes, or even overnight for tough clogs.
- Flush It Out: After the soaking time, pour a kettle of hot (not boiling) water down the drain to flush away the loosened debris. Repeat steps 1 and 2 if the drain is still sluggish.
- Use a Drain Snake (if needed): If the baking soda and vinegar didn’t do the trick, it’s time for a drain snake. Feed the end of the snake into the drain opening and push it down until you feel resistance. Crank the handle to snag or break up the clog. Slowly retrieve the snake, cleaning off any debris as you go. Repeat until clear.
- Prevention is Key: Consider getting a mesh drain cover to catch hair before it goes down the drain. Clean it out after every few showers. A quick rinse with hot water after each use can also help.
-
-
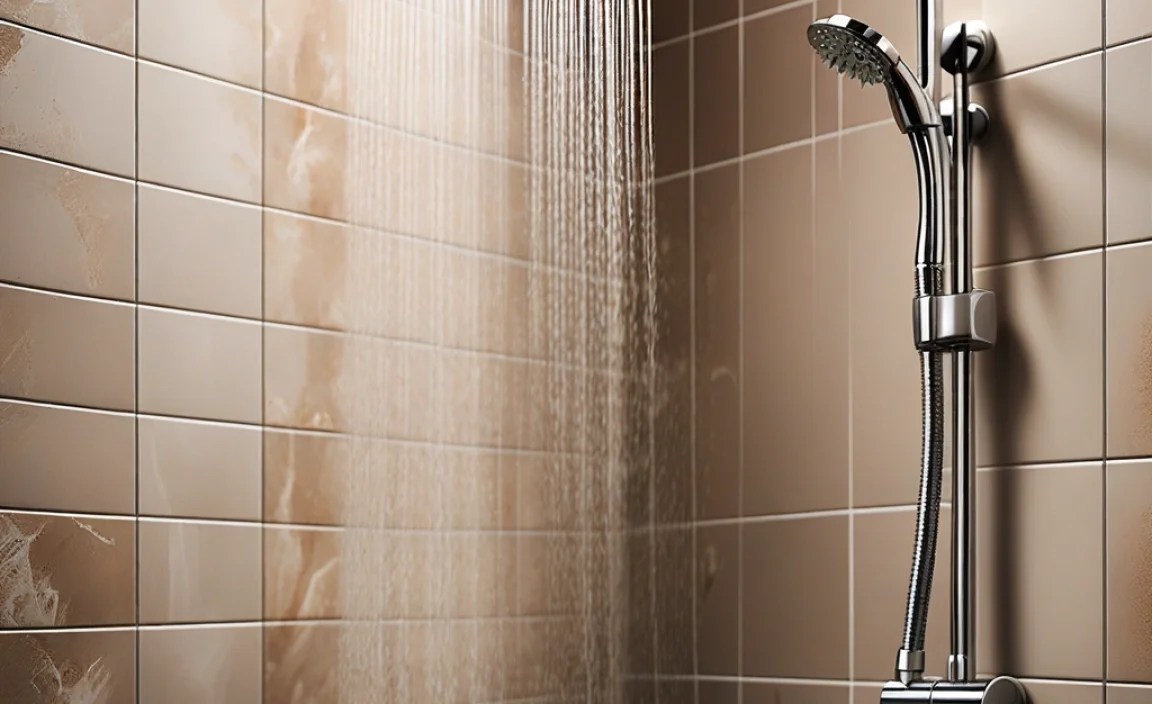
3. Weak Water Pressure or Spray: Revitalizing Your Showerhead
Mineral deposits, like limescale, can clog the tiny holes in your showerhead, leading to a weak spray and uneven water distribution. This is a common problem, especially in areas with hard water.
What You’ll Need:
-
-
-
- Adjustable wrench
- Plastic bag (large enough to fit over the showerhead)
- Rubber band or string
- White vinegar
- Old toothbrush or toothpick
- Rag
-
-
Step-by-Step Fix:
-
-
-
- Soak The Showerhead: Fill a plastic bag with enough white vinegar to submerge the showerhead. Secure the bag around the showerhead using a rubber band or string, ensuring the entire head is immersed in the vinegar. Let it soak for at least 4-6 hours, or overnight for stubborn deposits.
- Remove and Rinse: Carefully remove the bag of vinegar. Use your adjustable wrench to gently loosen the showerhead from the arm if it needs a thorough cleaning inside or if you want to soak it off the fixture entirely. Rinse the showerhead thoroughly with warm water.
- Scrub Away Deposits: Use an old toothbrush or a toothpick to gently dislodge any remaining mineral deposits from the spray nozzles. Pay attention to any stubborn spots.
- Reattach and Test: If you removed the showerhead, reattach it to the shower arm, hand-tightening it first, then a slight turn with the wrench if needed. Turn on the water to check the spray pattern and pressure. Run it for a minute to flush out any loose debris.
- Consider a New Head (If Needed): If your showerhead is very old or heavily corroded, sometimes a new, inexpensive replacement can be found for under $20 at your local hardware store. This is still a far cheaper option than calling a professional.
-
-
4. Water Splashing Out of the Tub/Shower Area
This common annoyance can make your bathroom floor a slip hazard. Often, it’s a sign that your shower curtain or door isn’t quite doing its job anymore.
What You’ll Need:
-
-
-
- New shower curtain or liner (waterproof/water-resistant)
- Shower curtain hooks
- Optional: Weighted shower curtain liner
- Optional: Shower caddy that extends over the tub edge
- Optional: Caulk Remover and new caulk
-
-
Step-by-Step Fix:
-
-
-
- Check Your Curtain: Is your shower curtain old, torn, or too short? A simple, good-quality vinyl shower curtain or liner is incredibly inexpensive. Make sure it hangs at least a few inches into the tub. A clean, fresh liner can make a world of difference.
- Ensure Proper Placement: When showering, make sure the curtain is fully inside the tub, all the way around. Tuck it in at the corners to prevent water from escaping.
- Consider a Weighted Liner: If your curtain billows inward or doesn’t hang straight, a liner with built-in weights or magnets at the bottom can keep it in place and prevent splashes.
- Seal Gaps: Examine the seal where the shower or tub meets the tile. If there are gaps in the caulk, water can seep out. You can carefully remove old caulk with a caulk remover tool and reapply a fresh bead of bathroom-specific caulk. This is a very affordable fix that significantly improves water containment.
- Shower Door Adjustment: If you have a sliding glass shower door that’s leaking, check the bottom sweep (the rubber strip at the bottom). If it’s cracked or worn, it needs replacement. You can often find universal sweeps at hardware stores and install them yourself.
-
-
5. Squeaky Shower Handles
A simple squeak might seem minor, but it can be incredibly annoying. This is usually caused by friction between metal parts or a lack of lubrication.
What You’ll Need:
-
-
-
- Screwdriver (to remove handle, if needed)
- Plumber’s grease
- Rag
-
-
Step-by-Step Fix:
-
-
-
- Identify the Source: Try to determine which part of the handle is squeaking when you turn it.
- Lubricate: If accessible without complete disassembly, try to apply a small amount of plumber’s grease to the moving parts of the handle. This might involve a small dab around the stem where it enters the faucet body. If you’ve recently fixed a leak, you’ll already have plumber’s grease from that repair.
- Disassemble and Lubricate: If you can’t access the squeaky part directly, you may need to remove the handle (following steps similar to the dripping faucet repair). Once the handle is off, apply plumber’s grease to the valve stem and any metal-on-metal contact points before reassembling.
- Test: Reassemble and test. The squeaking should be gone.
-
-
Essential Tools for Cheap Shower Fixes


You don’t need a professional plumbing toolkit to handle most shower repairs. Here are a few essential, affordable tools that will serve you well for many home maintenance tasks. Investing in these basic tools will save you money and headaches in the long run.
| Tool | Why You Need It For Shower Fixes | Approximate Cost |
|---|---|---|
| Adjustable Wrench | Securing and loosening nuts, pipes, and fittings on faucets and shower arms. | $10 – $25 |
| Phillips & Flathead Screwdrivers (Set) | Removing faucet handles, shower trim, and other components secured by screws. | $10 – $20 |
| Plumber’s Tape (PTFE Tape) | Ensuring watertight seals on threaded pipe connections, like the shower arm. |
