
Installing a shower has never been easier! Follow these proven, straightforward steps for an effortless setup. We break down each phase of “install shower easy,” from preparation to the final touches, ensuring a leak-free, beautiful shower with confidence and minimal stress. Get ready to enjoy your new shower soon!
Ever looked at a shower installation and thought, “That looks complicated”? You’re not alone. Many homeowners feel a bit intimidated by plumbing and tiling projects. But what if we told you that installing a shower can be a genuinely positive DIY experience? It’s true! With clear instructions and the right approach, you can confidently tackle this project. This guide is designed to demystify the process, breaking it down into simple, manageable steps. We’ll walk you through everything you need to know to achieve an “install shower easy” outcome, so you can enjoy your refreshed bathroom without the usual hassle.
Preparing for Your Easy Shower Installation

Before we dive into the actual installation, a little preparation goes a long way in making the entire process smooth and “easy.” Think of this as setting the stage for success. Getting your tools and materials ready and understanding the layout will prevent those frustrating mid-project roadblocks. A well-prepared DIYer is a happy DIYer, and that’s exactly what we’re aiming for here!
Gathering Your Essential Tools and Materials
Having the right tools at hand is crucial for any DIY project, especially when aiming for an “install shower easy” experience. This list covers the essentials. Don’t worry if you don’t have everything; many tools can be rented or borrowed from friends or local hardware stores. Safety first, so make sure you have safety glasses and gloves!
Tools You’ll Need:
- Tape measure
- Pencil
- Level
- Drill and drill bits
- Screwdriver set (Phillips and flathead)
- Utility knife
- Caulking gun
- Adjustable wrench
- Pipe wrench (if connecting to existing plumbing)
- Stud finder
- Safety glasses
- Work gloves
- Bucket
- Sponge
Materials You’ll Need:
- Your new shower unit/kit (enclosure, base, doors)
- Shower valve and trim kit
- Shower head and arm
- Plumbing supplies (pipe dope or Teflon tape, couplings, P-trap if needed)
- Fasteners (screws, lag bolts – check your shower kit instructions)
- Caulk (silicone, suitable for bathrooms)
- Mortar or thin-set (if your shower base requires it)
- Water-resistant backer board (if you’re tiling walls)
- Waterproofing membrane
- Tiles and grout (if tiling)
Understanding Your Shower Unit Type
There are a few common types of shower installations, and knowing which one you have will tailor the “install shower easy” steps. While individual components might differ, the core principles remain the same. Let’s look at the most common setups:
- One-Piece Shower Units: These are the simplest to install as the base and walls are a single molded unit. They are easier to maneuver and require fewer seal points.
- Multi-Piece Shower Units: These come in several sections (base, back panel, side panels) that connect. They offer more flexibility and are often easier to get through doorways.
- Tub-Shower Combos: Similar to one-piece units, but designed to fit around a standard bathtub.
- Custom Shower Enclosures: These can be tiled or use glass panels and often involve a separate shower base. This type requires more advanced skills but offers the most design freedom.
For this guide, we’ll focus on the most common DIY-friendly options: multi-piece shower units and pre-fabricated shower bases with wall panels. Our goal is to make the “install shower easy” process achievable for most homeowners.
Checking Your Existing Plumbing and Framing
This is a critical step for an “install shower easy” outcome. Before you even unbox your new shower, take a peek behind the existing walls where the shower will go. You’ll want to ensure the plumbing is up to code and that the wall framing is sturdy enough to support the new unit. This might involve removing a section of drywall. If you find outdated plumbing or weak framing, it’s best to address these issues before proceeding. Consulting a plumber or a general contractor for this phase can save you significant headaches down the line.
You also need to confirm that your existing drain line is accessible and in good condition. The connection to the shower base will be a key point for preventing leaks. A properly installed P-trap is essential for preventing sewer gases from entering your bathroom. You can learn more about plumbing basics and code requirements from resources like the U.S. Department of Housing and Urban Development (HUD) information on plumbing. This due diligence is a cornerstone of an “install shower easy” approach.
Step-by-Step Guide: The “Install Shower Easy” Process

Now that we’ve set the stage, let’s get to the heart of it all – the actual installation. We’ve broken down the process into clear, actionable steps to ensure your “install shower easy” experience is a success. Remember to read the manufacturer’s instructions for your specific shower unit thoroughly, as details can vary.
Step 1: Turn Off the Water Supply
This is the most important safety step for any plumbing project. If you don’t turn off the water, you’ll have a much bigger, wetter problem on your hands. Locate the main water shut-off valve for your house – it’s usually in the basement, garage, or near your water meter. Turn it off completely. Then, open the lowest faucet in your house (like a basement utility sink faucet) to drain any remaining water from the pipes. This ensures no water will come out when you start disconnecting old fixtures.
Step 2: Remove the Old Shower or Tub
If you’re replacing an old shower, you’ll need to remove it carefully. This usually involves:
- Removing the shower door or curtain rod.
- Unscrewing and removing the shower valve trim and handle.
- Disconnecting the shower arm and head.
- If it’s a one-piece unit or multi-piece walls, you’ll need to cut carefully around the edges and pry the unit away from the wall. Be prepared for some effort here.
- If there’s a shower base or tub, you might need to cut through the caulk around its edge and then carefully lift or pry it out. You may need to disconnect the drain assembly from the underside.
Dispose of the old unit responsibly. This step can be messy, so wear old clothes and have trash bags ready.
Step 3: Prepare the Subfloor and Walls
This is crucial for the longevity and stability of your new shower. For an “install shower easy” result, the base needs a solid, level foundation.
- For Shower Bases: Ensure the subfloor is clean, dry, and free of debris. Check if it’s perfectly level using your level. If it’s not, you may need to use shims or a self-leveling compound to create a flat surface. Some shower bases require a bed of mortar underneath for support; check your unit’s instructions.
- For Tiled Showers or Wall Panels: If you’re tiling, you’ll need to install a water-resistant backer board (like cement board or a specialized tile backer board – check manufacturer recommendations like those from Nicholl Waterproofing) over the studs. Ensure it’s securely fastened. Then, apply a waterproofing membrane over the backer board according to the product’s instructions. This is a vital step to prevent water damage.
Step 4: Install the Shower Base
With the subfloor prepped, it’s time to set the base. This is where having a level surface is paramount for an “install shower easy” fit and function.
- Follow the manufacturer’s instructions precisely.
- Apply a bead of recommended adhesive or mortar if required.
- Carefully lower the shower base into position.
- Ensure it sits flush and is perfectly level. Use your level in multiple directions.
- If your base requires it, fasten it to the subfloor or wall studs using the provided screws or bolts.
- Connect the drain assembly to the base and the rough plumbing. Ensure a watertight seal.
Testing the drain connection for leaks before proceeding can save a lot of trouble later. Just pour some water down the drain and check underneath.
Step 5: Install the Shower Walls
This step varies greatly depending on the type of shower unit you’re installing.
For Multi-Piece Shower Kits:
- Identify the back panel and side panels.
- Often, these units slide or snap together and are sealed with adhesive or caulk.
- Apply the recommended sealant along the edges where panels meet.
- Carefully position and press the panels into place against the studs or against the base.
- Secure them to the wall studs using the provided fasteners. Ensure they are plumb and level.
- Pay close attention to any overlap or interlocking features designed for waterproofing.
For Tiled Shower Walls:
This is a more involved process and less “easy,” but can be managed with care.
- First, install the plumbing for your shower valve. Ensure it’s at the correct height and position according to your valve trim kit.
- If using a pre-built shower curb, install it if needed.
- Begin tiling from the bottom up, using a level to ensure straight rows.
- Cut tiles to fit around fixtures and edges.
- Allow grout to cure fully before sealing it.
For our simplest “install shower easy” approach, we focus on pre-fabricated panels.
Step 6: Install the Shower Valve and Trim
This is where the shower starts to look like a shower! The proper installation of the valve is critical for function and preventing leaks.
- Install the shower valve body into the wall opening. It typically screws into the pipe connections. Use pipe dope or Teflon tape on all threaded connections to ensure a watertight seal.
- Make sure the valve is oriented correctly (hot on the left, cold on the right, when facing it).
- Secure the valve to the wall framing if required by the manufacturer.
- Install the shower arm by screwing it into the valve outlet.
- Install the shower trim kit, which includes the handle and escutcheon plate. Follow the kit’s specific instructions, as these vary by brand.
If you’re unsure about plumbing connections, this is a good point to consult a professional. A correctly installed valve is fundamental for the long-term reliability of your shower.
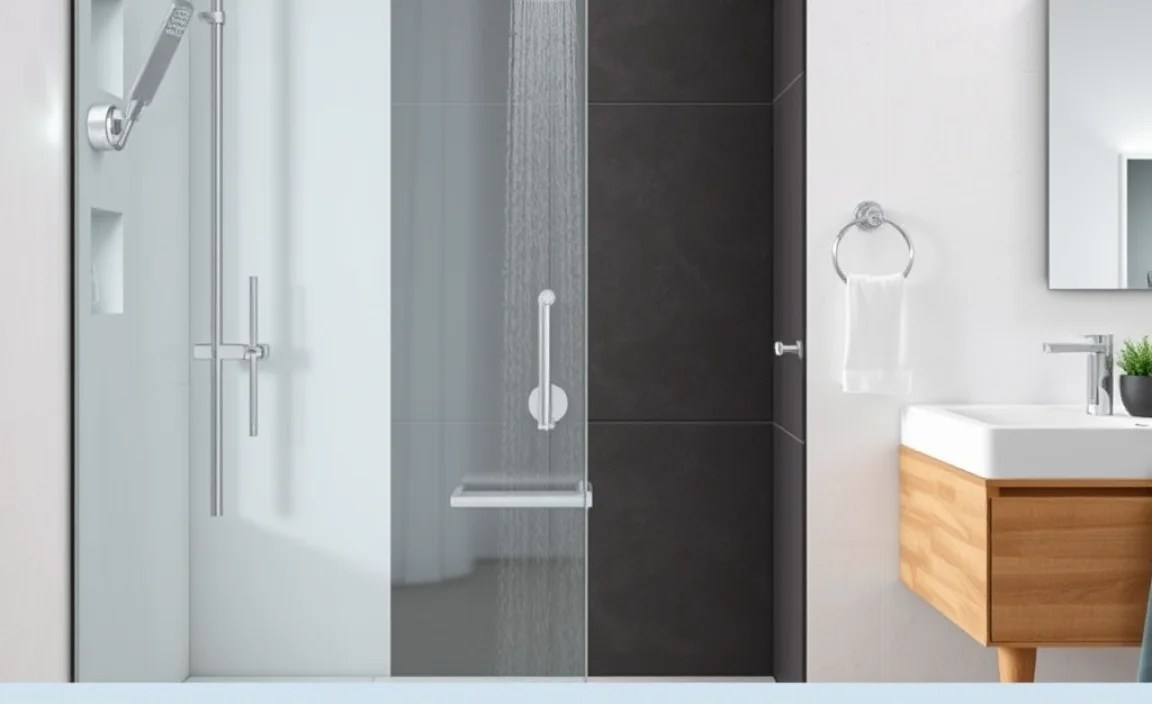
Step 7: Install Shower Doors or Curtain Rod
The final touch that encloses your shower space!
For Shower Doors:
- Read the door kit’s instructions carefully. They often have specific requirements for mounting.
- Typically, you’ll mount vertical tracks to the shower walls and then attach the door panels.
- Use a level to ensure the tracks are perfectly plumb.
- Secure the tracks to the wall using appropriate fasteners, ensuring they go into studs or solid backing.
- Install the door panels, rollers, and any seals.
- Adjust the doors so they swing smoothly and close properly.
For Curtain Rods:
- Measure and mark the desired height for your curtain rod.
- Use a level to mark the positions for the mounting brackets.
- Drill pilot holes and install the brackets, ensuring they are securely fastened into studs.
- Attach the curtain rod.
This is the final step before sealing, and it’s rewarding to see the project coming together for your “install shower easy” transformation.
Step 8: Seal and Caulk
This is arguably the most critical step for preventing water damage and ensuring your “install shower easy” project stands the test of time. A good seal keeps water where it belongs – inside the shower!
- Clean all edges and seams thoroughly. Any dust or grease will prevent the caulk from adhering properly.
- Apply a continuous bead of high-quality, bathroom-grade silicone caulk along all edges where the shower unit meets the walls, floor, and any fixtures.
- Pay special attention to the seams between wall panels and the shower base, and around the shower valve trim.
- Smooth the caulk line with a wet finger or a caulk tool for a clean, professional finish.
- Allow the caulk to cure completely according to the manufacturer’s instructions before using the shower. This can take 24-48 hours.
Step 9: Turn Water Back On and Test
The moment of truth! It’s time to see if all your hard work has paid off.
- Ensure all faucets are turned off and the shower drain is clear.
- Slowly turn the main water supply back on.
- Check all visible plumbing connections for leaks.
- Turn on the shower valve and let water run for a few minutes.
- Check the shower head, shower arm, valve, and all connections for any drips or leaks.
- Inspect the caulked seams and the shower base for any signs of water escaping.
- If you find any leaks, turn off the water supply immediately and re-tighten or re-seal the offending connection.
Congratulations! If there are no leaks, you’ve successfully completed your “install shower easy” project!
Troubleshooting Common Installation Hiccups
Even with the best intentions for an “install shower easy” project, sometimes things don’t go perfectly. Here are a few common issues and how to tackle them:
Leaking Connections
Problem: Drips from pipe joints or valve connections.
Solution: Turn off water supply. Ensure pipe dope or Teflon tape was used correctly on threaded connections. If a connection is persistently leaking, you might need to replace the fitting or a section of pipe.
Shower Base Not Level
Problem: Water pools on the base or does not drain properly.
Solution: If possible, lift the base and add more shims or self-leveling compound underneath. If the base is already fully secured, this can be a complex fix, potentially requiring partial removal. Prevention is key here!
Wall Panels Don’t Fit Squarely
Problem: Gaps appear between panels or the unit looks crooked.
Solution: Double-check that the shower base is perfectly level and square. Ensure you’re following the exact interlocking instructions for the panels. Minor adjustments can sometimes be made by loosening and re-tightening fasteners, but significant issues might point to framing problems.
Caulk Not Adhering
Problem: Caulk is peeling or not sticking to surfaces.
Solution: The surfaces were likely not clean and dry before caulk application. Remove the old caulk, clean the area thoroughly with rubbing alcohol, let it dry completely, and then re-apply fresh caulk.
Maintenance for Your New Shower
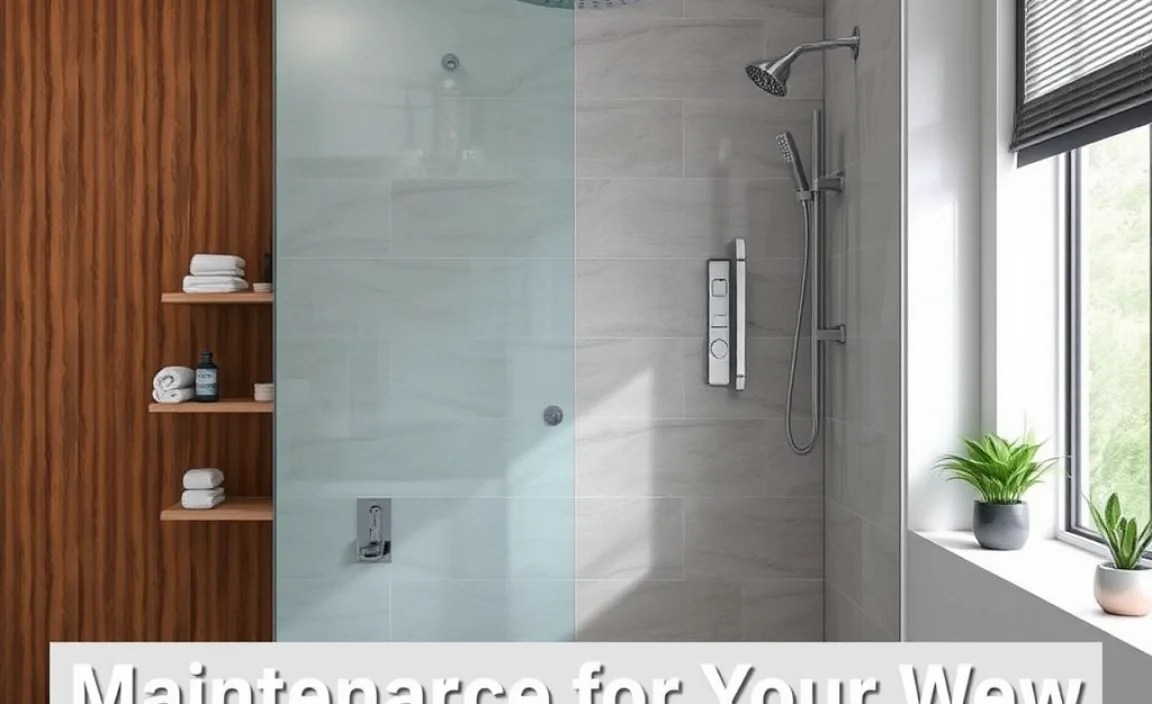
To keep your newly installed shower looking and functioning great, a little regular maintenance goes a long way. This ensures your “install shower easy” success continues for years.
- Clean regularly: Wipe down surfaces after each use to prevent soap scum and mildew build-up. Use non-abrasive cleaners specifically designed for bathroom surfaces.
- Check caulk: Inspect the caulking around your shower every 6-12 months. Re-caulk any areas that are cracked, peeling, or showing signs of mold.
- Inspect drains: Occasionally check the shower drain for blockages and clean out any hair or debris to ensure proper drainage.
- Test fixtures: Periodically check the shower head and valve for consistent water pressure and temperature control.
FAQ: Your “Install Shower Easy” Questions Answered
Q1: How long does a typical shower installation take?
A1: For a straightforward, pre-fabricated shower unit, an “install shower easy” project can often be completed in one to two days by a DIYer with some basic skills. If you’re tiling or dealing with extensive plumbing modifications, it could take longer.
Q2: Do I need to be a professional plumber to install a shower?
A2: While professional plumbing experience helps, many modern shower units are designed for DIY installation. You’ll need basic carpentry and plumbing skills, plenty of patience, and a willingness.
