
Do you ever notice cracks in your shower wall panel? It’s a common problem that many homeowners face. A fix may seem tough, but it’s easier than you think. Just imagine stepping into a shower that looks brand new.
Repairing a shower wall panel can save you money and time. Hiring someone can be costly. Plus, doing it yourself can be a fun project. Did you know that a small crack can turn into a big problem if you leave it alone? Water can sneak behind the panel and cause even more damage.
This article will help you understand how to repair your shower wall panel. We’ll cover the steps you need and some tips to make the job easier. So, grab your tools and let’s get started on making your shower sparkle again!
How To Repair Shower Wall Panel: Tips And Techniques

Repair Shower Wall Panel

Repairing a shower wall panel can seem daunting, but it doesn’t have to be. Imagine stepping into your shower without worrying about cracks or mold. First, identify the damage. You might need to clean, patch, or replace sections. Did you know that using the right adhesive can make a big difference? With simple tools and materials, you can restore your shower’s look and functionality. Dive into the project and enjoy a fresher, cleaner shower.
Understanding Shower Wall Panels
Types of shower wall panels available. Common materials used in shower panels.
Shower wall panels come in different types, which makes them fun and useful. Here are some common ones:
- Plastic Panels: Lightweight and easy to clean.
- Glass Panels: Modern look and let in light.
- Tile Panels: Custom designs and classic appeal.
They also use various materials:
- Acrylic: Strong and smooth.
- Fiberglass: Flexible and affordable.
- Ceramic Tile: Durable and stylish.
So, whatever you choose, make sure it fits your style!
What are the benefits of choosing shower wall panels?
Shower wall panels are easy to clean, water-resistant, and can fit any bathroom style. They simplify maintenance and can even save money on repairs.
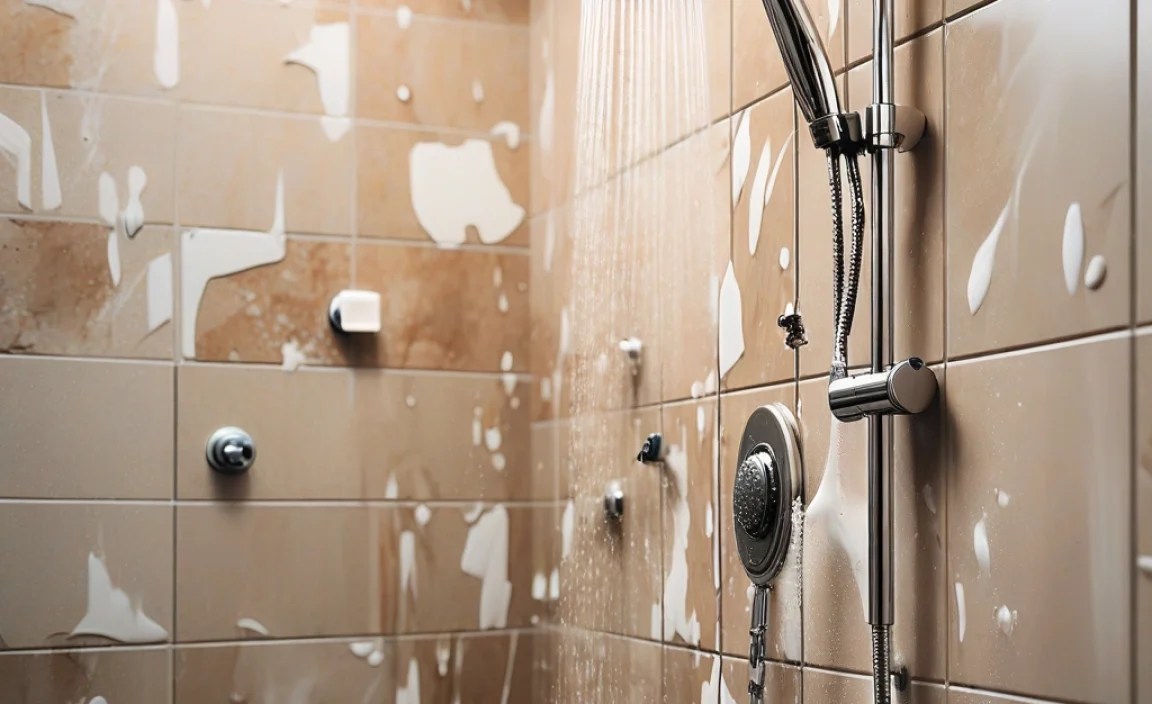
Signs Your Shower Wall Panel Needs Repair

Indicators of damage or wear. How to assess the extent of the damage.
To know if your shower wall panel needs repair, look for signs of wear. Check for cracks, holes, or discoloration. These can mean damage. You can also feel the surface; if it’s soft or sagging, that’s a bad sign. Water leaks or mold growth are serious issues too. Assess the panel by covering these points:
- Visible cracks or holes
- Soft or sagging areas
- Stains or discoloration
- Mold or mildew spots
Noticing these problems early can save you time and money! Let’s keep your shower safe.
How do I know if my shower wall panel is damaged?
Look for cracks, softness, or stains on the surface. Any leaks or mold should be immediate signs to repair. These clues help assess the need for repair.
Tools and Materials Required for Repair

Essential tools for shower panel repair. Recommended materials for effective repair.
To fix a shower wall panel, you need some basic tools and materials. Here are the essentials:
- Tools: A hammer, screwdriver, caulking gun, and utility knife.
- Materials: Waterproof adhesive, replacement panel, and caulk.
- Safety gear: Gloves and goggles for protection.
These items will help you tackle the repair easily. Having the right tools makes fixing things quicker and more fun!
What tools should I use for shower panel repair?
Good question! Use a hammer, screwdriver, and utility knife for the job. You’ll also need a caulking gun to hold everything in place.
What materials do I need?
- Waterproof adhesive for sticking.
- Replacement panel for damaged parts.
- Caulk to seal joints.
Step-by-Step Guide to Repairing Shower Wall Panels
Detailed instructions for minor repairs. Instructions for more extensive damage.
Fixing a shower wall panel can feel a bit like magic, but it’s easier than you think! For small repairs, you only need to clean the area and apply some epoxy to fill holes. Let it dry and voilà, you’re done! If the damage is bigger, you might need to replace the entire panel. No need to panic! Just measure your space, cut a new panel to size, and secure it in place. Easy-peasy!
| Repair Type | Steps |
|---|---|
| Minor Repairs |
|
| Major Repairs |
|
Preventative Maintenance for Shower Wall Panels
Tips to extend the life of your shower panels. Regular inspection and care guidelines.
To keep your shower wall panels in great shape, regular care is key. Start by checking for cracks or loose edges every few weeks. A quick cleaning with mild soap helps prevent mold and grime. Here are some tips to extend their life:
- Use soft sponges for cleaning.
- Install a shower mat to reduce water splash.
- Avoid harsh chemicals that can damage surfaces.
- Fix any small damages quickly to stop them from growing.
Following these simple steps can make your panels last longer and look better!
How can I care for my shower wall panels?
You should inspect them regularly, clean with gentle products, and fix any damage quickly. Taking these small steps pays off in the long run!
Common Mistakes to Avoid During Repairs
Frequent pitfalls and how to prevent them. Best practices for ensuring a successful repair.
During repairs, common blunders can pop up like uninvited guests at a birthday party. One big mistake is skipping steps. That’s like trying to bake a cake without eggs—messy! Always read instructions carefully. Also, don’t rely on old tools that are about as reliable as a cat on a leash!
Another pitfall is choosing the wrong materials. Using cheap stuff may save cash but could lead to future leaks. Oops! Always check compatibility. Double-check your measurements too—if you think twice, you might save your wall panel from looking like it went through a blender.
| Mistake | Tip |
|---|---|
| Skipping steps | Follow instructions closely |
| Wrong materials | Choose quality materials |
| Incorrect measurements | Measure twice, cut once |
By avoiding these frequent pitfalls, your repair will turn out more like a masterpiece and less like a toddler’s finger painting. With some patience and care, you can make your shower wall panel shine!
When to Call a Professional
Scenarios where DIY may not be sufficient. How to choose the right professional for repairs.
Sometimes, fixing things is harder than it looks, like trying to dance in a rainstorm! If your shower wall panel has major cracks or leaks, DIY might not do the trick. It’s time to call in the experts. Experts know exactly what to do and can save you from turning your bathroom into a swimming pool! To find the right helper, look for someone with good reviews and proper licenses. Ask questions like, “How many showers have you saved?”
| Scenario | Professional Needed? |
|---|---|
| Large water damage | Yes |
| Simple cracks | No |
| Tile replacement | Yes |
| Minor scratches | No |
Conclusion
In summary, repairing a shower wall panel is important for a safe and clean bathroom. You can fix small damages easily with DIY methods. For bigger problems, consider hiring a professional. Always use waterproof materials to prevent future issues. If you’re unsure, feel free to research more or ask for help. Let’s keep your shower looking great!
FAQs
What Are The Common Causes Of Damage To Shower Wall Panels, And How Can They Be Repaired Effectively?
Shower wall panels can get damaged by water leaks, hard hitting, or scratches. Water leaks can make the panels weak over time. We can fix small cracks with special glue or waterproof tape. If the damage is bigger, we might need to replace the whole panel. Always check for leaks to keep them in good shape!
What Materials And Tools Do I Need For Repairing A Shower Wall Panel?
To repair a shower wall panel, you need a few simple things. First, get some adhesive or glue for panels. You will also need a paint scraper or a utility knife to remove damaged parts. A measuring tape will help you cut new pieces the right size. Finally, grab a cloth to clean up any mess after you’re done.
How Can I Identify Whether My Shower Wall Panel Needs Repair Or Complete Replacement?
To see if your shower wall panel needs repair or a complete replacement, look for cracks or big holes. Check if water is leaking behind the panel. If you see mold or a lot of damage, it might be time to replace it. You can also tap on the panel; if it sounds hollow, it may need replacing. If you’re not sure, ask an adult for help.
What Step-By-Step Process Should I Follow To Successfully Repair A Crack Or Hole In A Shower Wall Panel?
To fix a crack or hole in a shower wall panel, follow these steps. First, clean the area around the damage with soap and water. Next, let it dry completely. Then, use a special repair kit made for shower panels. Apply the patch or filler smoothly over the crack or hole. Finally, allow it to dry according to the package instructions, and then enjoy your fixed shower!
Are There Specific Maintenance Tips To Prevent Future Damage To Shower Wall Panels After Repair?
Yes, we can take care of our shower wall panels. First, wipe them down with a soft cloth after every use. This helps remove soap scum and water spots. Second, check for small cracks or chips often. It’s easier to fix them before they get bigger. Lastly, avoid using harsh cleaners that can hurt the surface.
